Gut Health for Women: Food, Habits, and What Actually Helps
Gut health for women comes down to a few simple things: feeding the good bacteria in your gut, eating enough fibre, drinking enough water, moving your body, and giving yourself time

Gut health for women comes down to a few simple things: feeding the good bacteria in your gut, eating enough fibre, drinking enough water, moving your body, and giving yourself time
Life gets in the way sometimes — a busy season, an illness, an injury, a holiday, or just a few months where training slipped down the list. Coming back does not mean starting from zero, and it does not mean picking up where you left off either. This guide shows you how to ease back into lifting after a break: how much to do in your first week, what weights to start with, what to expect, and how to rebuild without overdoing it. The short version: start lighter than you think, keep your first sessions short, and give your body a week or two to remember the moves. Strength comes back faster than you think — but only if you do not rush it. How long was your break? How you come back depends on how long you were away — and on why you stopped. A week or two off. You have lost very little. Ease back in with one or two lighter sessions in your first week, then return to your normal routine. A month or two off. Expect to feel rusty. Start with lighter weights than you used before, shorter sessions, and two sessions in your first week. Several months or more off. Treat yourself like a beginner again — in the kindest sense. Start with the beginner routines on this site, two sessions a week, and build back up over a few weeks. A break because of injury, illness, or pregnancy. Talk to your doctor before starting again, and follow their guidance on what is safe for you. That note appears in our kettlebell and walking guides too, and it matters most here. There is no shame in any of these. A break is not a failure — it is just a pause. What should my first week back look like? Keep it simple and short. Two full-body sessions in your first week, on non-consecutive days, with a walk on the days between. Each session: a 5–7 minute warm-up, one round of a beginner full-body routine, and a 5-minute cool-down and stretch. That is about 20–30 minutes, and it is enough. From our full-body guide, the warm-up is arm circles (30 seconds each direction), high knees (1 minute), bodyweight squats (15 reps), shoulder rolls (30 seconds), and hip openers (10 each side). The cool-down is a standing quad stretch, seated hamstring stretch, child’s pose, spinal twist, and deep belly breathing. For the routine itself, start with the beginner version of our full-body guide — or, if you want something shorter, the 20-minute kettlebell workout or the 12-minute booty and hips workout are good first steps back. Do one round in week one. Add a second round in week two if the first week felt good. What weights should I start with? Lighter than the weights you used before your break — even if that feels too easy on day one. If you used to lift with dumbbells, start with a pair of 5–10 lb dumbbells for upper-body work, based on your comfort — the same starting point as a beginner in our own guides. If you used a kettlebell, start with an 8–12 lb bell if you are brand new to it again, as our kettlebell guide suggests for beginners. If a move feels easy with good form, that is fine for week one. Your body is relearning the movement, not testing your maximum. A simple test from our guides: pick a weight you can lift with good form for the full set, where the last two reps feel challenging but your form does not slip. If your form slips, rest or switch to a lighter weight. What should I expect in the first two weeks? A few things that are normal — and a few that are signs to slow down. Normal: feeling a bit sore the day after your first session back, especially in your legs and glutes. Feeling rusty on moves you used to do easily. Getting tired faster than you remember. Needing more rest between sets. All of this fades over the first two weeks as your body remembers the movements. Slow down if: a joint hurts (not just a muscle feeling worked), pain is sharp or one-sided, you feel dizzy or unwell, or soreness is still strong after two or three days. Rest, use a lighter weight or an easier version of the move, and if pain does not settle, talk to your doctor. If something hurts, stop and modify the move — that is the rule in every guide on this site. Sleep, food, and water matter more than ever when you are coming back. Our guides repeat this: fuel your body with protein, complex carbs, and healthy fats, and hydrate. The arm plan suggests at least 2–3 litres of water daily, as the post states. How do I rebuild without overdoing it? The same pattern our guides describe for progressing from beginner to intermediate — just applied to a comeback: Master form first. Move slowly and with control. If your form slips, rest or switch to a lighter weight. Prioritise form over speed or weight. Add a little at a time. Add reps first, then weight, then a round — one change at a time, not all three at once. In the arm plan, progress each week by increasing reps or weight. Add a day, not an hour. Start with two sessions a week and build to three once the routine feels easy. Longer sessions are not the goal — more consistent weeks are. Leave at least one rest day between sessions for the same muscle group, and at least 48 hours between leg sessions. Your muscles rebuild while you recover, not during the workout itself. Track it. Take notes or photos weekly to see changes in strength and form — and celebrate small wins. Every rep counts. A realistic timeline, from our own guides: you will start noticing new strength in 3–4 weeks with consistent training, according
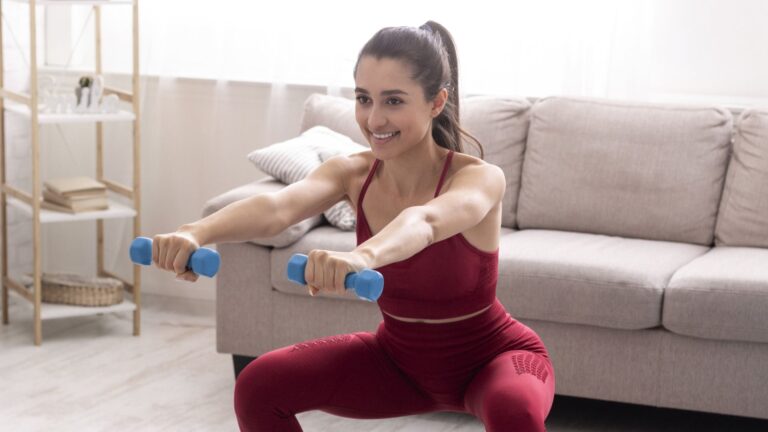
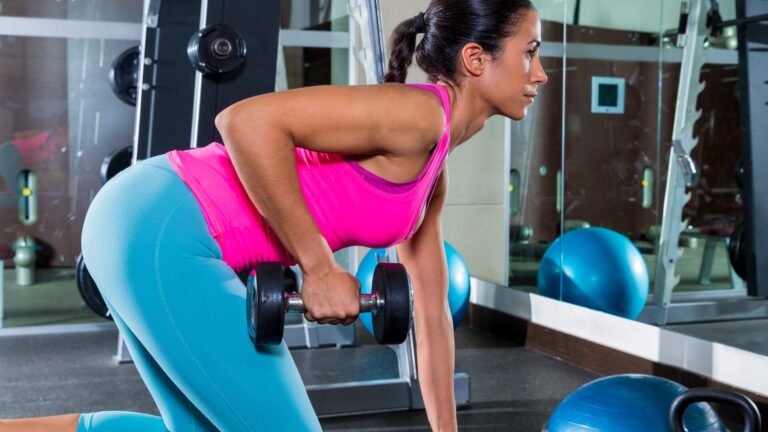
Dumbbells are the most flexible place to start strength training. One pair covers your arms, shoulders, legs, and core, they fit in a corner at home, and you can go heavier one pair at a time as you get stronger. This guide shows you what weights to start with, how to hold your form, and a simple full-body dumbbell routine for beginners. If you are completely new, start lighter than you think, keep your sessions short, and focus on form before weight. Two or three sessions a week is enough to begin. What weights should a beginner start with? Start with a pair of 5–10 lb dumbbells for upper-body work, based on your comfort — that is the starting point across our own guides. Our arm plan uses light to moderate dumbbells (5–15 lbs), and our kettlebell guide’s ‘only buying one’ logic applies here too: if you are only buying one pair, a middle weight you can lift with good form for 10–12 reps is the right call. A simple test from our guides: pick a weight you can lift with good form for the full set, where the last two reps feel challenging but your form does not slip. If your form slips, rest or switch to a lighter weight. You can always go heavier once your form feels solid — that is the whole point of starting light. You do not need a full rack. One pair to start, and a second, heavier pair later when the first pair starts to feel easy, is enough for months of progress. What equipment do I need besides dumbbells? A pair of dumbbells, a mat or a rug if your floor is hard, water, and a towel. A sturdy chair is useful for triceps dips and step-ups. That is the whole list — everything in this guide can be done at home or in the gym, with minimal equipment. If you are pregnant, recovering from an injury, or have a health condition, talk to your doctor before starting a new routine. How does the dumbbell routine work? Plan for about 30–40 minutes: a 5–7 minute warm-up, the routine itself, and a 5-minute cool-down and stretch. Do the routine 2–3 times a week on non-consecutive days, with at least one rest day between sessions. Aim for 2–3 sets of 10–12 reps for each movement, as in our upper-body guide, resting 30–60 seconds between exercises. Warm up first (5–7 minutes) From our full-body guide: arm circles (30 seconds each direction), high knees (1 minute), bodyweight squats (15 reps), shoulder rolls (30 seconds), and hip openers (10 each side). Do the warm-up without weights, so your shoulders, hips, and legs are ready before you pick up a dumbbell. The routine — 6 dumbbell moves Goblet squat — legs and glutes. Hold one dumbbell vertically against your chest, feet shoulder-width apart, sit back as if into a chair, and stand back up. This is the beginner-friendly way to learn squat mechanics from our compound-lifts post. Start with 2–3 sets of 10–12 reps. Overhead dumbbell press — shoulders and arms. Hold a dumbbell in each hand at shoulder height, press them up until your arms are straight, and lower slowly. This is one of the upper-body guide’s five moves. Start with 2–3 sets of 10–12 reps. Keep your core tight and do not arch your lower back. Bent-over row — back and arms. Hinge forward from your hips with a soft bend in your knees, hold a dumbbell in each hand, and pull them toward your ribs, squeezing your shoulder blades together. This is one of the upper-body guide’s five moves. Start with 2–3 sets of 10–12 reps. Bicep curls — front of the arms. Hold a dumbbell in each hand, arms by your sides, and curl the weights up toward your shoulders, then lower slowly. From our toned-arms plan, which uses 3 sets of 10–15 reps per exercise with light to moderate dumbbells (5–15 lbs). Keep your elbows close to your body and do not swing. Romanian deadlift — hamstrings and glutes. Hold a dumbbell in each hand in front of your thighs, hinge at your hips and slide the weights down your legs until you feel a stretch in your hamstrings, then stand back up by squeezing your glutes. This is one of the leg guide’s six moves. Start with 2–3 sets of 10–12 reps. Keep your back flat and the weights close to your legs. Triceps dips (chair) — back of the arms. Sit on the edge of a sturdy chair, hands beside your hips, and slide your hips off the seat, bending your elbows to lower yourself a little, then press back up. This is one of the upper-body guide’s five moves, and it needs no dumbbell at all. Start with 2–3 sets of 10–12 reps. Keep the chair against a wall so it cannot slide. Cool down for 5 minutes afterwards with stretching — standing quad stretch, seated hamstring stretch, child’s pose, spinal twist, and deep belly breathing, as in our full-body guide. Form tips that matter most Move slowly and with control. Momentum takes the work away from your muscles. Use your full range of motion and squeeze at the top of each rep. Keep your core tight. Brace your stomach gently, as if someone were about to tap you there, before every lift. Do not arch your lower back on presses. If you feel your back arching, the weight is too heavy or you are tired — rest or go lighter. Breathe. Breathe out on the hard part (pressing up, standing up), breathe in on the way down. Prioritise form over speed or weight. If your form slips, rest or switch to a lighter weight — that note appears across our guides for a reason. How do I progress with dumbbells? Progress the same way our other guides describe it: master form first, then do a little more. Add reps, then weight. In the arm plan, progress each
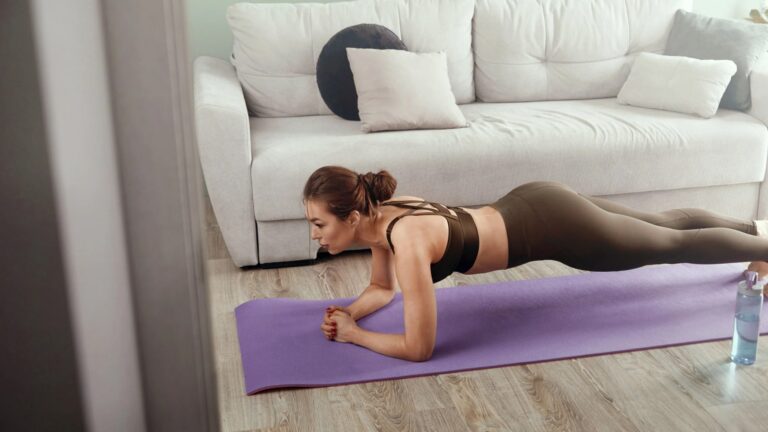
You do not need a gym, dumbbells, or any equipment to start strength training. Your own body weight is resistance — enough to build strength, tone your arms and legs, and support your posture, all from your living room. This guide gives you a simple beginner routine you can do at home with no equipment at all, plus how to make each move easier or harder, and how often to do it. If you are completely new, start with two sessions a week, keep them short, and focus on form before anything else. You can add a third session once the routine starts to feel easy. Can you build strength with no equipment? Yes. Bodyweight moves work the same muscles as weighted moves — squats work your legs and glutes, push-ups work your chest, shoulders, and arms, glute bridges work your glutes and hamstrings, and planks work your core. Our own guides already use them: the core guide is entirely floor-based with no equipment, the booty and hips workout is all standing with no equipment and no floor work, and wall push-ups and bodyweight squats are in our full-body warm-up and routines. The trick is not the equipment — it is doing the moves with control, resting between sessions, and doing a little more over time. What do you need to start? Nothing you have to buy. A clear bit of floor space, a sturdy chair or countertop for support, a mat or a rug if your floor is hard, and water. That is the whole list. Wear comfortable clothes and shoes that grip, or go barefoot on a mat if that feels steadier for you. How does the no-equipment routine work? Plan for about 20–30 minutes: a 5–7 minute warm-up, the routine itself, and a 5-minute cool-down and stretch. Do the routine 2–3 times a week on non-consecutive days, with at least one rest day between sessions. Do 2–3 rounds, resting 30–60 seconds between exercises, as in our full-body guide. Warm up first (5–7 minutes) From our full-body guide: arm circles (30 seconds each direction), high knees (1 minute), bodyweight squats (15 reps), shoulder rolls (30 seconds), and hip openers (10 each side). You should feel warm and a little out of breath, not tired, before you start. The routine — 6 bodyweight moves Bodyweight squats — legs and glutes. Stand with feet shoulder-width apart, sit back as if into a chair, and stand back up. Keep your chest up and your knees tracking over your toes. Start with 10–15 reps. Wall push-ups — chest, shoulders, and arms. Stand facing a wall, hands on the wall at shoulder height, and bend your elbows to bring your chest toward the wall, then press back. This is the beginner push-up from our upper-body guide. Start with 10–12 reps. When wall push-ups feel easy, move your hands to a countertop, then to a sturdy chair seat, then to the floor on your knees. Glute bridges — glutes and hamstrings. Lie on your back, knees bent, feet flat, and lift your hips until your body makes a straight line from shoulders to knees, squeeze at the top, and lower slowly. This is one of the leg guide‘s six moves. Start with 10–15 reps. Standing glute kickbacks — glutes and hips. Stand tall, hold a chair or countertop for balance, and lift one leg straight back without leaning forward, then lower it slowly. From our booty and hips workout, which does each move for 45 seconds with 15 seconds of rest. Start with 10–12 reps per leg. Triceps dips (chair) — back of the arms. Sit on the edge of a sturdy chair, hands beside your hips, and slide your hips off the seat, bending your elbows to lower yourself a little, then press back up. This is one of the upper-body guide‘s five moves. Start with 10–12 reps. Keep the chair against a wall so it cannot slide. Plank — core. Hold a straight line from head to heels, on your forearms or hands, for 30 seconds to start. From our core guide: start on your knees if a full plank is too much, and hold for 15–20 seconds at first. Rest, then try again. Cool down for 5 minutes afterwards with stretching — standing quad stretch, seated hamstring stretch, child’s pose, spinal twist, and deep belly breathing, as in our full-body guide. How do I make it harder as I get stronger? Progress the same way our other guides describe it: master form first, then do a little more. Add reps, then rounds. When 10–15 reps feels easy, add a few more reps, then add a third round. Slow down. Take 3 seconds to lower into a squat or a push-up, and squeeze at the top. Slower reps make the same move harder. Change the angle. Move from wall push-ups to countertop push-ups, from knees-down planks to full planks, from regular squats to pulse squats. Add a day. Start with two sessions a week and build to three once the routine feels easy. What if I have never exercised before? Start with the easiest version of every move, and rest whenever you need to. Do one round instead of two or three on your first week. Hold a wall or chair for balance in standing moves, use a shorter range of motion, and stop if anything hurts. If you are pregnant, recovering from an injury, or have a health condition, talk to your doctor before starting a new routine — that note appears in our kettlebell and walking guides too. Good form comes before longer holds or more reps. Frequently Asked Questions Is bodyweight training enough to build muscle? Bodyweight moves can build strength and tone, especially when you are starting out — our own guides use them as the foundation of the full-body, core, and booty and hips routines. As moves get easy, progress by adding reps, slowing down, or moving to a harder version. When bodyweight stops challenging you,
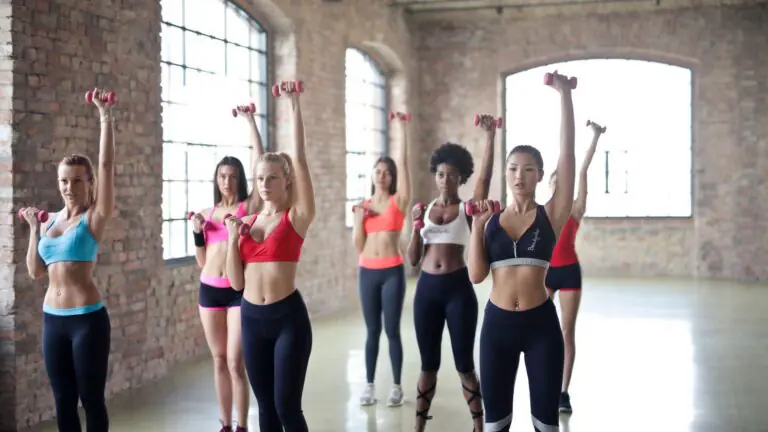
Strength training for women is simply training your muscles against resistance — dumbbells, a kettlebell, resistance bands, or your own body weight — so you get stronger, steadier, and more confident in everyday life. You do not need a gym membership, heavy weights, or any experience to start: two or three short sessions a week, at home or in the gym, is enough to begin. This guide brings together everything we cover on Custom Curves, so you can start where you are and progress, step by step, from beginner to intermediate — for every body type. If you are completely new, start with a full-body routine two or three times a week, add one focused day for the area you care about most, and walk on your rest days. The rest of this guide shows you how. Why should women strength train? Strength training is about far more than how your body looks. Here is what our own guides say it does for you: Everyday strength. Strong arms, legs, and core make carrying groceries, lifting kids, climbing stairs, and opening jars easier. Our upper-body guide puts it plainly: everyday tasks feel easier when your shoulders, back, and arms are strong. Better posture and balance. Strong shoulders and back muscles support better alignment, and strong legs stabilise your whole body. Our core guide adds that a strong core supports your lower back, improves posture and balance, and helps reduce back pain. A faster-feeling metabolism. Muscle burns more calories at rest than fat does, so building lean muscle supports fat loss over time. Our full-body guide lists this as one of the main benefits of training your whole body in one session. Stronger bones and joints. Resistance training puts stress on your bones, which helps make them stronger and denser — the NIH’s National Institute of Arthritis and Musculoskeletal and Skin Diseases (NIAMS) explains that resistance exercises “put stress on bones, so they can make bones stronger as well.” (NIH NIAMS — Exercise for Your Bone Health) If you have low bone density or osteoporosis, talk to your health care provider before starting an exercise program, as NIAMS advises. Confidence that carries over. Every post in this cluster says the same thing in its own way: progress is progress, no matter how small, and getting stronger changes how you move through your day. And the worry we hear most: no, this will not make you bulky. Our upper-body guide says building visible bulk takes heavy lifting, a calorie surplus, and years of dedicated training. Our toned-arms guide says the same — women naturally have less testosterone, so strength training tones your arms rather than bulking them up. How do I start strength training as a beginner? Start lighter than you think, keep your sessions short, and focus on form before weight. What equipment do I need? You do not need fancy equipment to start. A simple starter kit is all it takes: a pair of dumbbells (5–10 lbs for upper-body work, based on your comfort), resistance bands (optional), a yoga or workout mat, water and a towel, a sturdy chair or countertop (for triceps dips and step-ups), and one kettlebell — 8–12 lbs (4–5 kg) if you are brand new, or 12 or 15 lbs as the sweet spot if you are only buying one. Everything in this guide can be done at home or in the gym, with minimal equipment. If you are pregnant, recovering from an injury, or have a health condition, talk to your doctor before starting. How long is a session, and how much time do I need? Plan for about 30–40 minutes for a full-body session: a 5–7 minute warm-up, the routine itself, and a 5-minute cool-down and stretch. Shorter sessions count too — the kettlebell workout is 20 minutes and the booty and hips workout is 12 minutes. Two or three sessions a week is the place to start. What does a good warm-up look like? Warm up for 5–7 minutes before you lift: arm circles (30 seconds each direction), high knees (1 minute), bodyweight squats (15 reps), shoulder rolls (30 seconds), and hip openers (10 each side). When you finish, cool down for 5 minutes: standing quad stretch, seated hamstring stretch, child’s pose, spinal twist, and deep belly breathing. How often should I strength train? Two to three times a week is the sweet spot for strength training. Our full-body guide suggests 2–4 sessions a week, with at least one rest day between sessions — start with 2–3 and build to 3–4 as the beginner routine feels easy. The upper-body plan runs three upper-body days with rest or light cardio in between, the leg guide asks you to allow at least 48 hours between leg sessions, and the core guide suggests core work 3–4 times a week. A sample week could look like this: Monday: Full-body Tuesday: Rest, or a walk Wednesday: Upper body (or arms) Thursday: Rest, or a walk Friday: Legs (or kettlebell) Saturday: Core, or a walk Sunday: Rest On rest days, keep moving gently — a walk or a light stretch is enough. The walking plan pairs well here: five walking days a week, starting at 15–20 minutes and building to a 45-minute long walk by week 4. Full-body workouts: the best place to start If you only do one thing, do a full-body workout. A full-body workout trains your upper body, lower body, and core in a single session, so you get more out of two or three workouts a week than you would from a split routine you can only fit in once. Full-Body Workout Routines for Women: Sculpt and Strengthen Our full-body guide gives you two ready-to-follow routines: a beginner-friendly version and an intermediate-to-advanced circuit, both built to build lean muscle, burn fat, and help you feel stronger in every session. Do 2–3 rounds, resting 30–60 seconds between exercises, two to three times a week, with a 5–7 minute warm-up and a 5-minute cool-down. The beginner routine

Ever hit that mid-afternoon crash and head straight for the pantry? We’re sharing 8 simple, everyday habits to help keep your blood sugar, energy and cravings steadier, just in time for the holidays.
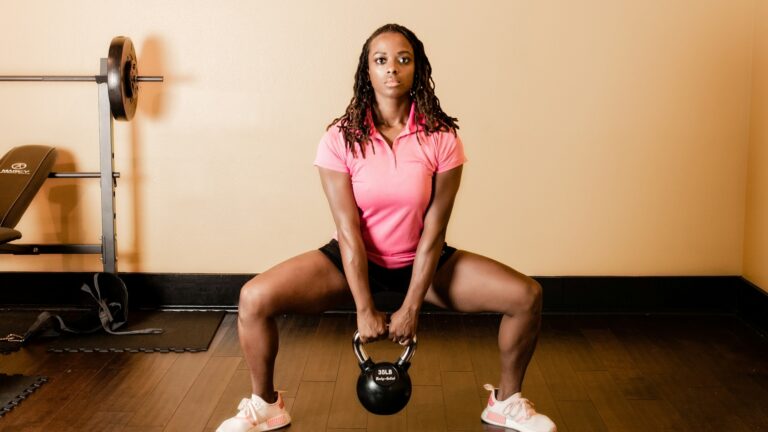
Ladies, if we could hand you one piece of equipment before the holidays, it would be a kettlebell! Our 20-minute full-body routine walks you through 5 simple beginner moves, with form tips and a 4-week plan.


We provide workouts for those who enjoy the gym as well as for those who would rather work out at home--no need to commit to one or the other you have options!

Whether you are vegan, pescatarian, vegetarian we have custom recipes made just for you!

Health is not just eating healthier and exercising, health can be mental health too--stay in touch and subscribe for our newsletter to stay current on our lifestyle topics too!