



High-Protein Turkey & Butternut Squash Skillet Pin Print High-Protein Turkey & Butternut Squash Skillet Serving 4 servingsPrep time 10 minutesCooking time 25 minutesCalories 370 kcal Ladies, let’s be real: when the weather turns chilly, all we want is something warm, cozy and filling for dinner. This High-Protein Turkey & Butternut Squash Skillet is exactly that. Lean ground turkey, tender, naturally sweet butternut squash, black beans and a smoky spice blend all come together in one pan in about 35 minutes. Each serving packs around 31 grams of protein and plenty of fiber, so it actually keeps you full. It’s perfect for a busy weeknight, and it makes the best meal-prep lunches, too. 🛒 Ingredients 1 tablespoon olive oil 1 lb 93% lean ground turkey 1 small yellow onion, diced 1 red bell pepper, diced 3 cups peeled butternut squash, cut into 1/2-inch cubes (about 1 lb, or one bag of pre-cut squash) 2 cloves garlic, minced 2 teaspoons chili powder 1 teaspoon ground cumin 1 teaspoon smoked paprika 1/4 teaspoon ground cinnamon (optional, but trust us) 1/2 teaspoon salt, plus more to taste, and black pepper 1/2 cup low-sodium chicken broth 1 (15 oz) can black beans, drained and rinsed 2 cups baby spinach Juice of 1/2 lime 1/2 cup plain nonfat Greek yogurt and fresh cilantro, for serving 👩🏻🍳 Instructions Brown the Turkey: Heat the olive oil in a large (12-inch) skillet over medium-high heat. Add the ground turkey and cook for 5 to 6 minutes, breaking it up with a spoon, until browned and no longer pink. Transfer it to a plate. Sauté the Veggies: In the same pan, add the onion, bell pepper and butternut squash. Cook for 3 to 4 minutes, stirring often. Add the garlic, chili powder, cumin, smoked paprika, cinnamon, salt and pepper and stir for 1 minute until fragrant. Steam the Squash: Pour in the chicken broth, cover the pan and reduce the heat to medium. Cook for 10 to 12 minutes, stirring halfway through, until the squash is fork-tender. Bring It Together: Return the turkey to the pan along with the black beans and spinach. Stir and cook for 2 to 3 minutes, until the spinach wilts and everything is heated through (ground turkey should reach 165°F). Squeeze in the lime juice and season with more salt to taste. Serve: Divide into four bowls and top each with 2 tablespoons of Greek yogurt and a sprinkle of cilantro. Nutritional Information A Quick Note: The following nutritional information is an estimate for 1 serving (1/4 of the skillet) including 2 tablespoons of Greek yogurt, without rice or tortillas. Actual values can vary based on the brands you use and how you portion it. Calories: ~370 kcal Protein: ~31 g Fat: ~13 g Carbohydrates: ~33 g Fiber: ~9 g Sugar: ~6 g Tips & Swaps Save time: Grab a bag of pre-cut butternut squash. It’s the biggest time-saver in this recipe. Swap the squash: Sweet potato works perfectly here. Cut it into the same size cubes. Make it spicy: Add a pinch of cayenne or a diced chipotle pepper in adobo. Stretch it: Serve over brown rice or quinoa, or spoon it into warm corn tortillas for skillet tacos. Meal prep: Store portions in airtight containers in the fridge for up to 4 days. Reheat with a splash of water. Cozy, colorful and loaded with protein. This one’s going straight into your fall dinner rotation. Enjoy, ladies! Check out these items! SHOP NOW! SHOP NOW! SHOP NOW! SHOP NOW! SHOP NOW! SHOP NOW! Share: Facebook Pinterest Email SHOP NOW! SHOP NOW! Social Media Facebook-f Youtube Pinterest Instagram Tiktok Most Popular Get The Latest Updates Subscribe To Our Weekly Newsletter No spam, notifications only about new post, updates. Categories Related Posts
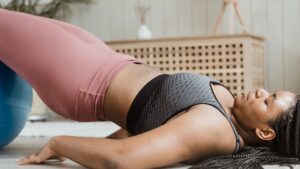
Booty & Hips Workout + 5 Tips to Grow Your Glutes Let’s talk booty! Whether you want to build a little more curve, lift and shape your glutes, or just strengthen your hips so everyday life feels easier, a strong lower body is worth the work. Your glutes power everything from walking and climbing stairs to standing up from a chair, and strong glutes and hips help support your knees and lower back. The good news? You don’t need a gym (or even a mat) to get started. This 12-minute booty & hips workout is all standing, with no equipment and no floor work. Grab a timer, follow the six moves below, then keep reading for 5 tips to help you grow your glutes. How the Workout Works You’ll do each of the six moves for 45 seconds, then rest for 15 seconds before moving on to the next one. Complete all six moves for one round, then repeat for a second round. That’s 12 minutes total. A free interval timer app set to 45 seconds on and 15 seconds off makes it easy to keep track. Equipment: None. A wall or sturdy chair for balance is optional. Rounds: 2 Timing: 45 seconds of work, 15 seconds of rest One-sided moves: Work your right side for the first half, then switch to your left side halfway through. Warm up first with a minute or two of marching in place, hip circles and a few easy bodyweight squats. Your workout at a glance (screenshot this for mid-workout!): Good Mornings Standing Glute Kickbacks (switch legs halfway) Curtsy Lunges (alternate sides) Standing Fire Hydrants (switch legs halfway) Lateral Squat Walks Pulse Squats Your 12-Minute Booty & Hips Plan 1. Good Mornings Why it works: This is a hip hinge, the same movement pattern behind deadlifts. It works your glutes and hamstrings and teaches you to move from your hips, which is key for building your backside. How to do it: Stand with your feet hip-width apart, a soft bend in your knees and your hands lightly behind your head. Keeping your back flat and your chest proud, push your hips straight back and let your upper body lean forward. Lower until you feel a stretch in the backs of your thighs, only as far as you can keep your back flat. Squeeze your glutes and drive your hips forward to stand tall. Make it easier: Rest your hands on your thighs and use a shorter range of motion. 2. Standing Glute Kickbacks Why it works: Kickbacks zero in on your glutes, especially the big muscle that gives your booty its round shape. How to do it: Stand tall with your hands on your hips or resting lightly on a wall or chair in front of you. Shift your weight onto your left leg with a slight bend in the knee. Squeeze your right glute and kick your right leg straight back behind you. Think “back,” not “up.” Pause and squeeze at the top, then bring your leg back to the start. Switch legs halfway through. Make it easier: Hold onto a wall or chair and keep the movement small and controlled. 3. Curtsy Lunges Why it works: Stepping back and across hits your glutes from a different angle, including the sides of your hips, while also working your quads and inner thighs and challenging your balance. How to do it: Stand with your feet hip-width apart and your hands clasped at your chest. Step your right foot back and behind your left, as if you’re doing a curtsy. Bend both knees to lower down, keeping your chest up and your front knee in line with your toes. Push through your front heel to return to the start. Alternate sides with each rep. Make it easier: Take a smaller step back, don’t sink as deep and hold a chair for balance. 4. Standing Fire Hydrants Why it works: Fire hydrants target the sides of your glutes and hips, the muscles that help create that rounded hip curve. How to do it: Stand tall with your hands on your hips or on a wall or chair, weight on your left leg. Bend your right knee to about 90 degrees and lift it in front of you to hip height (or as high as is comfortable). Keeping your knee bent, open it out to the side as far as you comfortably can without twisting your upper body, then bring it back to center with control. Switch legs halfway through. Make it easier: Use a wall or chair for balance and keep the range of motion small. 5. Lateral Squat Walks Why it works: Staying low keeps your glutes and quads working the whole time, and stepping side to side targets the outer glutes. It gets your heart rate up, too! How to do it: Lower into a half squat with your feet hip-width apart, chest up and hands at your chest. Staying low, step your right foot out to the side, then bring your left foot in to meet it, keeping your feet about hip-width apart. Take three or four steps to the right, then three or four steps to the left. Keep your hips level and your squat low the whole time. Make it easier: Stand a little taller and take smaller steps. 6. Pulse Squats Why it works: Pulses keep your muscles under tension for the whole set. This finisher is where you’ll really feel the burn! How to do it: Stand with your feet about shoulder-width apart and lower into a squat, as deep as feels comfortable. Stay low and pulse up and down a few inches, keeping your weight in your heels and your chest tall. Every few pulses, stand all the way up and squeeze your glutes, then sink back down. Make it easier: Don’t sink as deep, or swap the pulses for regular squats. Round 1, done! Grab some water and go through all six moves one more time.
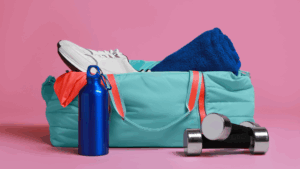
Tired of your old gym bag? Discover the best cute, stylish, and functional gym bags for women. From chic totes to versatile backpacks with shoe compartments, find the perfect bag to take you from workout to weekend in style.

Feeling bloated or hormonally imbalanced? Your gut may hold the key. Discover the best fermented foods for women’s health, how they improve digestion, mood, and hormonal balance, and how to easily add them to your diet.
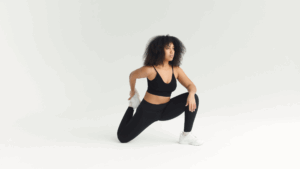
Want to build strong, sculpted legs quickly? Discover the most effective compound exercises for women that target multiple leg muscles simultaneously for faster growth and a powerful lower body. Say hello to leg day gains!
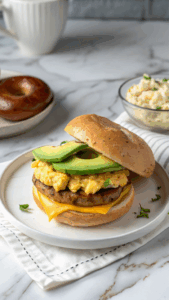
Upgrade your morning with the ultimate high-protein breakfast bagel! This recipe stacks a toasted bagel with a cheesy cottage cheese egg scramble, savory sausage, and creamy avocado for over 40g of protein.