



Ladies, let’s make a deal: no guilt this Thanksgiving! We’re sharing 9 simple ways to enjoy every bite and still wake up feeling good on Friday.
A 7-day gut-friendly meal plan does not have to mean a diet overhaul — it means one week of ordinary meals built around fibre, fermented foods, and water, using recipes we already cook on Custom Curves. Every meal below links to a real recipe on this site, so you can cook along day by day, or pick the days you like and repeat them. There is no calorie counting here, no foods banned, and no cleanse — just a week of eating in a way that tends to help digestion, plus one small habit a day. How this plan works: each day has a breakfast, a lunch, a dinner, and a snack, plus one small gut habit. Prep the soups and overnight oats in advance if you can — the Tuscan white bean soup, lentil soup, and overnight oats all keep well for a few days in the fridge. If a meal does not suit you, swap it for another day’s meal; the plan is a starting point, not a prescription. If you have a digestive condition like IBS, are pregnant, or take medication that affects your digestion, check in with your doctor or a registered dietitian before making big changes to how you eat. This plan is general information, not medical advice. The ideas behind this plan Three simple ideas, borrowed from our gut-health posts: Fibre, added slowly. The Dietary Guidelines for Americans recommend roughly 22 to 28 grams of fibre a day for adult women, depending on age. This plan gets there with oats, beans, lentils, fruit with the skin on, and seeds — added a little at a time, not all at once. One fermented food a day. Yogurt, kefir, kimchi, sauerkraut, or kombucha — a small serving, not a large one. Our fermented-foods guide recommends one or two small servings a day and building up slowly. Water with every meal. Fibre works best with fluid, and water helps digestion and nutrient movement. Keep a water bottle close all week. For the full background — probiotics vs. prebiotics, fibre, fermented foods, and the signs your gut may need support — read our pillar guide first. Day 1 — Start with oats and a soup Breakfast: High-Protein Pumpkin Spice Overnight Oats (31g Protein) — about 8 grams of fibre per serving, according to our fibre guide. Make it the night before, and top it with raspberries in the morning. Lunch: Avocado Toast with Poached Egg on whole-grain bread — avocado is about 10 grams of fibre per cup, per our high-fibre foods post. Dinner: Creamy Tuscan White Bean Soup with Kale — about 17g protein, about 10g fibre, about 280 kcal per serving, ready in about 40 minutes, no heavy cream. Make a double batch: it keeps well, and you will want it again on Day 4. Snack: A pear with a handful of almonds — the pear with its skin is about 5–6 grams of fibre. Today’s habit: Drink a glass of water with each meal. Day 2 — Beans and a fermented food Breakfast: Vegan Overnight Oats with Nuts & Seeds — oats, nuts, and seeds, ready when you wake up. Stir in a spoonful of chia seeds for a little more fibre. Lunch: Mediterranean Lemon Chickpea Patties with Yogurt Sauce — chickpeas for fibre, yogurt sauce for live cultures, in one meal. Dinner: Black Bean and Sweet Potato Chili Soup — beans and sweet potato, two fibre-rich foods in one bowl. Snack: Strawberry Yogurt Bites — a yogurt-based snack that adds live cultures between meals. Today’s habit: Add one fermented food — a spoonful of sauerkraut or kimchi with dinner, or a small glass of kefir. Start small. Day 3 — Lentils and a walk Breakfast: Greek Yogurt Protein Muffins with a sliced apple (skin on) — yogurt for live cultures, apple for fibre. Lunch: Black Bean Crunch Wraps — beans (about 7–8 grams of fibre per half cup cooked) in a lunch you will actually look forward to, with crunchy vegetables and a whole-grain wrap. Dinner: 10-Minute Lentil Soup — lentils are one of the highest-fibre foods we cover (about 15 grams per cup), and this soup is on the table faster than takeout. Snack: Healthy Chewy High-Fiber Flaxseed Cookies — flaxseed in a snack you will actually want to eat. Today’s habit: Take a 15–20 minute walk after dinner. Movement stimulates bowel function, and a walk counts. Day 4 — Leftovers and a light bowl Breakfast: High-Protein Pumpkin Spice Overnight Oats (31g Protein) again — make a second batch the night before, or use the vegan overnight oats if you prefer. Lunch: Leftover Creamy Tuscan White Bean Soup with Kale from Day 1 — this is why you made a double batch. Dinner: Chili-Lime Shrimp Bowl — a fresh, light dinner. Pair it with brown rice or quinoa instead of white rice for a little more fibre. Snack: Chocolate Chia Seed Pudding — chia seeds are about 10 grams of fibre per ounce, and pudding makes them feel like dessert. Today’s habit: Swap one fizzy drink for still water or a low-sugar kombucha. Our probiotic-drinks guide has six fizzy options that taste like soda. Day 5 — A skillet and a salad Breakfast: Vegan Overnight Oats with Nuts & Seeds with raspberries — raspberries are about 8 grams of fibre per cup. Lunch: Cranberry Apple Salad with one of our homemade sugar-free dressings — fruit with the skin on, nuts, and greens in one bowl. Dinner: High-Protein Turkey & Butternut Squash Skillet (31g) — about 9 grams of fibre per serving thanks to black beans and squash, according to our fibre guide. A one-pan dinner that covers protein and fibre at once. Snack: A pear with a handful of almonds, or veggies with hummus. Today’s habit: Eat slowly and chew well. Eating fast means swallowing air, which adds to bloating. Day 6 — A slow day, a warm soup Breakfast: Avocado Toast with Poached Egg on whole-grain bread, with a side of

Foods that bloat and foods that help are often the same kinds of foods, eaten differently — beans can bloat you when you eat a lot of them suddenly, and the same beans can help your digestion once your gut is used to them. That is the honest truth about bloating: it is rarely one “bad” food, and it is almost never fixed by cutting out whole food groups. This post gives you a side-by-side look at which foods commonly cause bloating, which ones tend to calm digestion, and the simple swaps that make the biggest difference — all based on our own bloating and gut-health posts, and all easy to live with. If bloating is your main concern, read this alongside our two bloating posts — one on the foods that cause it, one on ten natural ways to reduce it. And remember: if bloating is severe, persistent, or comes with pain, weight loss, or big changes in your digestion, talk to your doctor. This post is general information, not medical advice. What is bloating, really? Bloating is that uncomfortably full, gassy, swollen feeling after eating — and it is one of the most common gut complaints we hear about. It happens when gas builds up in your digestive system, or when your gut is working harder than usual to break food down. It is not the same as body fat: bloating comes and goes, often within hours, while body fat changes slowly over weeks and months. Our bloating-vs-fat post explains the difference in detail, and it is worth reading if you have ever confused the two — because they call for very different fixes. Bloating can also be a sign of something worth paying attention to. Our signs-of-poor-gut-health post lists bloating and gas after eating as the first sign to watch for, alongside fatigue, skin breakouts, irregular bowel movements, and hormonal changes. One sign on its own usually means nothing; several together are a nudge to look at your gut habits — and to talk to your doctor if they persist. Foods that commonly cause bloating From our foods-that-cause-bloating post, these are the usual suspects. Notice that most of them are healthy foods — the problem is usually how much, how fast, or how they are cooked, not the food itself. Legumes and beans Beans and lentils are high in fibre and in complex carbohydrates that reach the large intestine undigested, where gut bacteria ferment them and produce gas. That is why a big bowl of beans can leave you bloated — especially if you do not eat them often. The fix is not to quit beans: it is to eat them regularly in smaller amounts, cook them well, and drink water with them. Your gut adjusts over a week or two, and the bloating usually settles. Cruciferous vegetables Broccoli, cauliflower, cabbage, Brussels sprouts, and kale are packed with nutrients — and they contain raffinose sugars that are not easily digested by the human body. Like beans, these reach the large intestine undigested and are fermented by gut bacteria, producing gas. Cooking cruciferous vegetables helps break down some of these complex carbohydrates and makes them easier to digest, according to our bloating post. So steamed broccoli is usually easier on your gut than a big raw kale salad. Carbonated drinks Soda, sparkling water, and other fizzy drinks are notorious for causing bloating. The carbonation is carbon dioxide gas, and when you drink it, those bubbles can accumulate in your digestive system. Many carbonated drinks also contain high amounts of added sugars or artificial sweeteners, which can be difficult to digest and may lead to more gas. If fizzy drinks are a daily habit, try swapping one a day for still water or a probiotic drink — our probiotic-drinks guide has six fizzy options that taste like soda. Other foods that may cause bloating in some people Dairy products — lactose intolerance can lead to bloating and digestive discomfort when you eat dairy. Fatty foods — high-fat meals slow digestion, leading to a feeling of fullness and bloating. Wheat and gluten-containing foods — if you have gluten sensitivity or celiac disease, wheat-based foods may cause bloating. Certain artificial sweeteners — sorbitol and xylitol can have a laxative effect and cause bloating. Individual reactions vary a lot. Keeping a food diary and paying attention to your own triggers helps more than cutting out whole food groups at random — and a healthcare professional or registered dietitian can give you personalised advice. Foods that tend to help digestion These are the foods our gut-health posts come back to again and again — not because any one of them is magic, but because they support the gut in different ways: probiotics, prebiotics, fibre, water, and easy digestion. Fermented foods (probiotics) Kefir, yogurt with live and active cultures, kimchi, sauerkraut, and kombucha add live beneficial bacteria to your gut. Our fermented-foods guide recommends one or two small servings a day — a spoonful of sauerkraut, a small glass of kefir, a few bites of yogurt — and building up slowly. Start small: a big serving on day one is more likely to cause gas than to help. Prebiotic foods (food for the good bacteria) Garlic, onions, leeks, asparagus, bananas (especially slightly green ones), apples, chicory root, oats and barley, and flaxseeds feed the good bacteria in your gut. You are probably already eating several of these — the trick is eating them regularly. Add garlic and onions to dinner, a banana as a snack, oats for breakfast, and you are covering the bases without thinking about it. High-fibre foods, added slowly Oats, lentils, beans, raspberries, pears and apples with the skin on, chia seeds, and flaxseeds are the fibre foods our posts recommend most. The key word is slowly: add fibre gradually over a week or two and drink plenty of water, and the bloating that sometimes comes with extra fibre usually settles as your gut adjusts. Our fibre guide has the
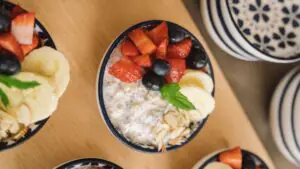
High-fibre meal ideas for women do not have to mean a diet overhaul — they mean adding one fibre-rich food to meals you already eat. Oats for breakfast, beans in a soup, a pear with a handful of almonds as a snack: small additions like these are how most women close the fibre gap. The Dietary Guidelines for Americans recommend roughly 22 to 28 grams of fibre a day for adult women, depending on age, and note that fibre is one of the nutrients most Americans do not get enough of. (Dietary Guidelines for Americans, 2020–2025) This post gives you easy breakfasts, lunches, dinners, and snacks built on foods we already cook on Custom Curves — plus the tips that keep extra fibre from causing bloating. If you are new to fibre, the one rule to remember is: go slow, and drink water with it. Add fibre gradually over a week or two, and keep a water bottle close — fibre works best with fluid. What is fibre, and why does it matter? Fibre is the part of plant foods your body does not digest — and that is exactly why it helps. Soluble fibre dissolves in water and slows digestion, which helps you feel full longer and supports steadier energy. You will find it in oats, barley, beans, lentils, apples, pears, chia seeds, and flaxseeds. Insoluble fibre does not dissolve; it adds bulk and helps food move through your system, which keeps you regular. You will find it in whole grains, nuts, seeds, and the skins of fruits and vegetables. Most plant foods have a mix of both, so a varied plate covers your bases. Our fibre guide puts the benefits for women plainly: fibre keeps you regular, keeps you full, supports steadier energy, feeds your gut (some types of fibre act as prebiotics, feeding the good bacteria), and supports heart health as part of an overall balanced diet. Our older high-fibre foods post adds that fibre supports weight management and satiation, improves digestion, and plays a role in hormonal balance by helping regulate estrogen levels. You do not need to count every gram — if most of your meals include a fruit or vegetable plus a whole grain, bean, or seed, you are probably in a great spot. How much fibre is in the foods we already cook? Approximate amounts, from our own fibre posts — amounts vary by brand and serving, so treat these as a guide, not a lab result: Lentils, 1 cup cooked — about 15 g Avocado, 1 cup — about 10 g Chia seeds, 1 ounce — about 10 g Raspberries, 1 cup — about 8 g Black beans or lentils, 1/2 cup cooked — about 7–8 g Butternut squash, 1 cup cooked — about 6 g Pear with the skin, 1 medium — about 5–6 g Apple with the skin, 1 medium — about 4 g Chia seeds, 1 tablespoon — about 4 g Rolled oats, 1/2 cup dry — about 4 g Canned pumpkin, 1/2 cup — about 3–4 g The pattern is clear: beans, lentils, oats, fruit with the skin on, and seeds do most of the work. You do not need exotic ingredients — you need a few of these, most days. Breakfast: high-fibre ideas to start the day Breakfast is the easiest fibre win of the day, because oats do the heavy lifting for you. Overnight oats (make it the night before) Overnight oats are our favourite fibre breakfast: oats, nuts, and seeds, ready when you wake up. Our vegan overnight oats with nuts and seeds is the simplest version, and our high-protein pumpkin spice overnight oats adds about 8 grams of fibre per serving (and 31g of protein), according to our fibre guide. Top either one with raspberries or a sliced pear with the skin on for a few more grams, and a spoonful of chia seeds stirred in adds fibre with almost no effort. Avocado toast with a poached egg Avocado is one of the highest-fibre foods we cover — about 10 grams per cup — and avocado toast is a five-minute breakfast. Use whole-grain bread for a little more fibre, keep the avocado generous, and add a poached egg for protein. It is filling without feeling heavy, and it works just as well as a light lunch. Greek yogurt with berries, nuts, and seeds Plain Greek yogurt with raspberries (about 8 grams of fibre per cup), a spoonful of chia seeds, and a small handful of nuts is a high-fibre, high-protein breakfast that takes two minutes. The yogurt also adds live cultures, so it is a probiotic and a fibre win in one bowl. Choose unsweetened yogurt and check the label for “live and active cultures.” Lunch: high-fibre ideas that keep you full Lunch is where beans and whole grains earn their keep — they are cheap, filling, and easy to batch-cook. Chickpea patties with yogurt sauce Our Mediterranean lemon chickpea patties with yogurt sauce are a perfect fibre lunch: chickpeas for fibre, yogurt sauce for live cultures, and lemon and herbs for flavour. Make a batch on Sunday and reheat them through the week — they hold up well in a lunchbox with a simple salad. Black bean crunch wraps Beans are the fibre shortcut: about 7–8 grams per half cup cooked. Our black bean crunch wraps turn them into a lunch you will actually look forward to — beans, crunchy vegetables, and a whole-grain wrap. Add avocado if you have it, and a side of fruit with the skin on. A big salad with a fibre base A salad only keeps you full if it has a fibre base under the greens. Build it on quinoa, chickpeas, or black beans, add avocado and seeds, and finish with one of our homemade sugar-free dressings instead of a bottled one. Our cranberry apple salad is a good starting point — fruit with the skin on, nuts, and greens in one bowl. Dinner: high-fibre ideas
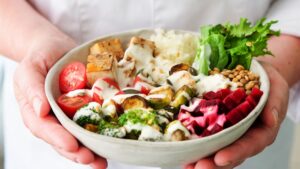
Gut health for women comes down to a few simple things: feeding the good bacteria in your gut, eating enough fibre, drinking enough water, moving your body, and giving yourself time to rest. You do not need an expensive supplement routine, a restrictive diet, or a complicated cleanse to start — one or two small servings of fermented food a day, a fibre-rich meal, and a short walk will do more than most quick fixes. This guide brings together everything we cover on Custom Curves, so you can see what actually helps, what to eat more of, what to ease off, and how to build a week of gut-friendly eating around food you already like — for every body type. If you are completely new, start here: add one fermented food a day, add one high-fibre food to a meal you already eat, and drink a glass of water with each meal. The rest of this guide shows you how. What is gut health, and why does it matter for women? Your gut is home to trillions of tiny organisms — the gut microbiome — that help you digest food, absorb nutrients, and keep your digestive system running smoothly. When that community is balanced, digestion tends to feel easier: less bloating, more regular bowel movements, and fewer uncomfortable surprises after meals. Our gut-health guide puts it plainly: the gut microbiome influences estrogen metabolism and plays a role in menstrual health, menopause, and fertility. It also notes that much of the immune system is linked to the gut, that the gut produces a large share of the body’s serotonin (the “feel-good” neurotransmitter), and that a balanced gut can mean calmer skin, since inflammation in the gut often shows up on the skin. These are the reasons gut health shows up in so many conversations about women’s health — it touches digestion, hormones, mood, skin, and immunity at once. That does not mean your gut causes every symptom you have, and it does not mean fixing your gut fixes everything. It means it is a good place to start, because the habits that support it — fibre, fermented foods, water, movement, sleep — support the rest of your health too. If you have ongoing digestive symptoms, pain, or big changes in your digestion, talk to your doctor or a registered dietitian. This guide is general information, not medical advice, and it is not a substitute for care. Probiotics vs. prebiotics: what is the difference? This is the pair everything else in this cluster builds on, so it is worth getting straight. Probiotics: the live bacteria Probiotics are live beneficial bacteria that support a healthy gut microbiome. They are found in fermented foods and in supplements, and they help maintain balance in your digestive tract. Our gut-health guide lists their benefits for women as: supporting digestion and nutrient absorption, reducing bloating and constipation, promoting vaginal health by balancing yeast and bacteria, boosting immunity, and reducing inflammation. The richest food sources, from our own guide, are Greek yogurt (unsweetened), kefir, sauerkraut, kimchi, miso, tempeh, pickles fermented in brine, and kombucha (low sugar). If you want the full picture, including which foods are richest and how to combine them every day, start with our guide. Prebiotics: the food for the good bacteria Prebiotics are the non-digestible fibres that feed the good bacteria in your gut — think of them as fertilizer for your microbiome. Our guide lists their benefits as: enhancing the growth and function of probiotics, supporting bowel regularity, improving calcium absorption for bone health, and possibly helping reduce appetite and balance blood sugar. The richest sources, from our guide, are garlic, onions, leeks, asparagus, bananas (especially slightly green ones), apples, chicory root, oats and barley, and flaxseeds. You are probably already eating several of these — the trick is eating them regularly, not occasionally. Do you need a probiotic supplement? Food first is a great start — and that is what our guide recommends. A supplement may help if you struggle with digestion, have recently taken antibiotics, or have imbalanced vaginal flora, according to the post. If you do consider one, the post’s tips are: look for multiple strains (like Lactobacillus and Bifidobacterium), choose one with 5–10 billion CFUs, consider targeted formulas for gut, vaginal, or immune support, and note that refrigerated options often retain potency better. If you are not sure whether you need one, a doctor can help you choose. Our site also has a review of one popular supplement brand — read it as a product review, not as a general recommendation for everyone. Fermented foods: the easiest way to add probiotics Fermented foods are packed with live, beneficial bacteria — and adding one or two small servings a day can calm an unhappy gut without a major diet overhaul. That is the promise of our fermented-foods guide, and it is the simplest place to begin. The five best fermented foods for women From our fermented-foods guide, the five to know are: Kefir (dairy or water). A fermented drink, thinner than yogurt, with a wider variety of beneficial bacteria and yeast strains. Dairy kefir is also a good source of calcium and vitamin D. Use it as a smoothie base, pour it over granola, or drink a small glass on its own. Yogurt. The most familiar starting point. Choose plain, unsweetened yogurt (Greek style is great for extra protein) and check the label for “live and active cultures.” Top with berries and nuts, mix with herbs for a veggie dip, or add a dollop to soups. Kimchi. A traditional Korean side dish of fermented vegetables, usually napa cabbage and Korean radish, seasoned with chili powder, garlic, and ginger. It is a probiotic and a prebiotic two-for-one, since the fibre-rich cabbage feeds the good bacteria. A spoonful is all you need to start — add it to scrambled eggs, a rice bowl, or a quesadilla. Sauerkraut. Finely shredded cabbage fermented by lactic acid bacteria. Like kimchi, it is a good

Life gets in the way sometimes — a busy season, an illness, an injury, a holiday, or just a few months where training slipped down the list. Coming back does not mean starting from zero, and it does not mean picking up where you left off either. This guide shows you how to ease back into lifting after a break: how much to do in your first week, what weights to start with, what to expect, and how to rebuild without overdoing it. The short version: start lighter than you think, keep your first sessions short, and give your body a week or two to remember the moves. Strength comes back faster than you think — but only if you do not rush it. How long was your break? How you come back depends on how long you were away — and on why you stopped. A week or two off. You have lost very little. Ease back in with one or two lighter sessions in your first week, then return to your normal routine. A month or two off. Expect to feel rusty. Start with lighter weights than you used before, shorter sessions, and two sessions in your first week. Several months or more off. Treat yourself like a beginner again — in the kindest sense. Start with the beginner routines on this site, two sessions a week, and build back up over a few weeks. A break because of injury, illness, or pregnancy. Talk to your doctor before starting again, and follow their guidance on what is safe for you. That note appears in our kettlebell and walking guides too, and it matters most here. There is no shame in any of these. A break is not a failure — it is just a pause. What should my first week back look like? Keep it simple and short. Two full-body sessions in your first week, on non-consecutive days, with a walk on the days between. Each session: a 5–7 minute warm-up, one round of a beginner full-body routine, and a 5-minute cool-down and stretch. That is about 20–30 minutes, and it is enough. From our full-body guide, the warm-up is arm circles (30 seconds each direction), high knees (1 minute), bodyweight squats (15 reps), shoulder rolls (30 seconds), and hip openers (10 each side). The cool-down is a standing quad stretch, seated hamstring stretch, child’s pose, spinal twist, and deep belly breathing. For the routine itself, start with the beginner version of our full-body guide — or, if you want something shorter, the 20-minute kettlebell workout or the 12-minute booty and hips workout are good first steps back. Do one round in week one. Add a second round in week two if the first week felt good. What weights should I start with? Lighter than the weights you used before your break — even if that feels too easy on day one. If you used to lift with dumbbells, start with a pair of 5–10 lb dumbbells for upper-body work, based on your comfort — the same starting point as a beginner in our own guides. If you used a kettlebell, start with an 8–12 lb bell if you are brand new to it again, as our kettlebell guide suggests for beginners. If a move feels easy with good form, that is fine for week one. Your body is relearning the movement, not testing your maximum. A simple test from our guides: pick a weight you can lift with good form for the full set, where the last two reps feel challenging but your form does not slip. If your form slips, rest or switch to a lighter weight. What should I expect in the first two weeks? A few things that are normal — and a few that are signs to slow down. Normal: feeling a bit sore the day after your first session back, especially in your legs and glutes. Feeling rusty on moves you used to do easily. Getting tired faster than you remember. Needing more rest between sets. All of this fades over the first two weeks as your body remembers the movements. Slow down if: a joint hurts (not just a muscle feeling worked), pain is sharp or one-sided, you feel dizzy or unwell, or soreness is still strong after two or three days. Rest, use a lighter weight or an easier version of the move, and if pain does not settle, talk to your doctor. If something hurts, stop and modify the move — that is the rule in every guide on this site. Sleep, food, and water matter more than ever when you are coming back. Our guides repeat this: fuel your body with protein, complex carbs, and healthy fats, and hydrate. The arm plan suggests at least 2–3 litres of water daily, as the post states. How do I rebuild without overdoing it? The same pattern our guides describe for progressing from beginner to intermediate — just applied to a comeback: Master form first. Move slowly and with control. If your form slips, rest or switch to a lighter weight. Prioritise form over speed or weight. Add a little at a time. Add reps first, then weight, then a round — one change at a time, not all three at once. In the arm plan, progress each week by increasing reps or weight. Add a day, not an hour. Start with two sessions a week and build to three once the routine feels easy. Longer sessions are not the goal — more consistent weeks are. Leave at least one rest day between sessions for the same muscle group, and at least 48 hours between leg sessions. Your muscles rebuild while you recover, not during the workout itself. Track it. Take notes or photos weekly to see changes in strength and form — and celebrate small wins. Every rep counts. A realistic timeline, from our own guides: you will start noticing new strength in 3–4 weeks with consistent training, according