
Between your business meetings, errands, and wellness goals, finding time to hit the gym can feel impossible. But that doesn’t mean your booty goals have to take a backseat.
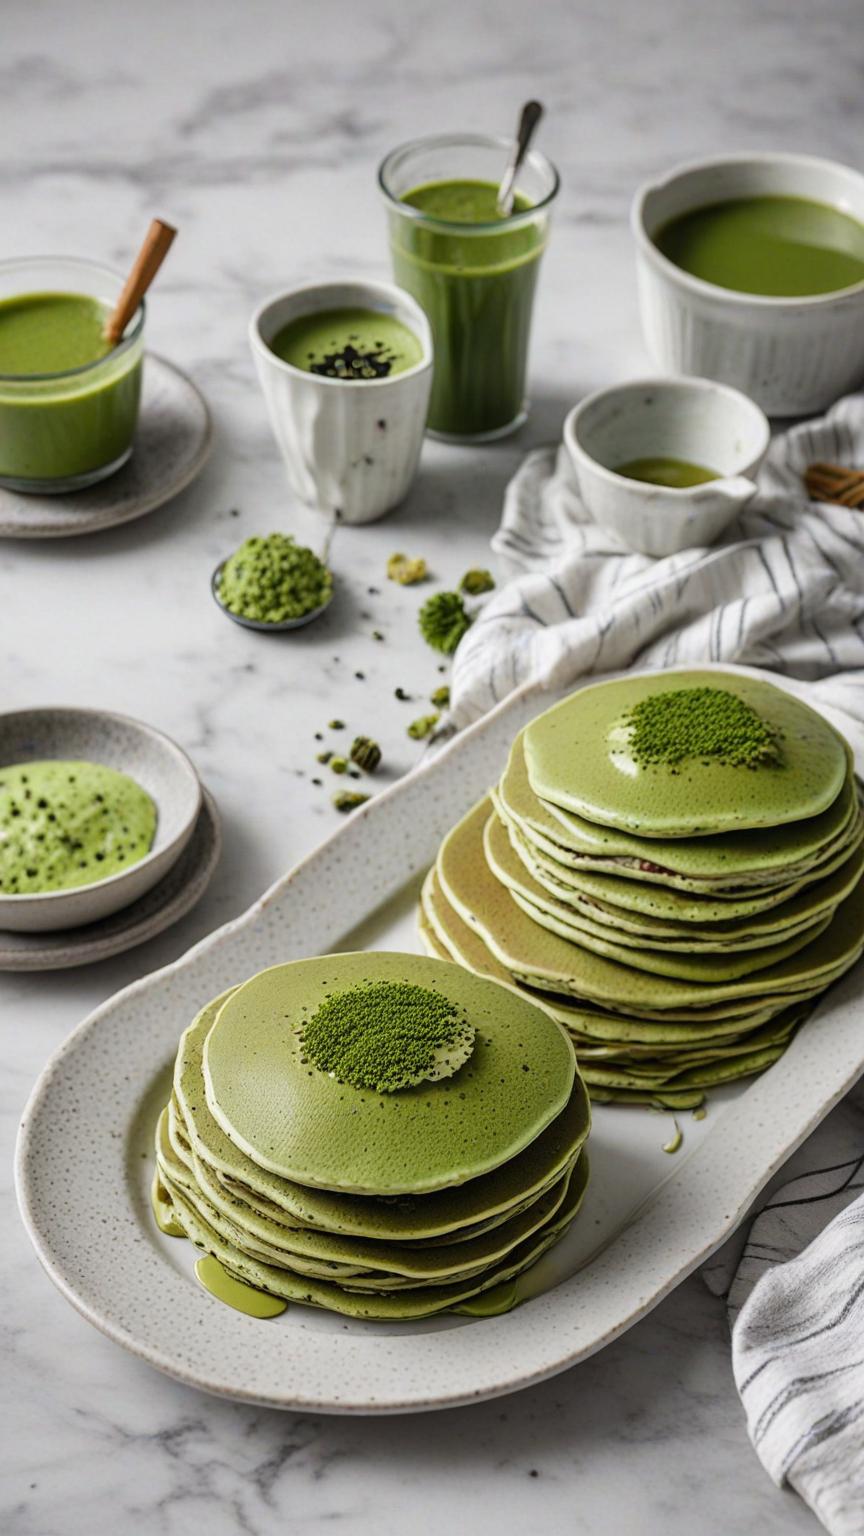
Protein Matcha Pancakes
Protein Matcha pancakes Elevate your breakfast game with these Protein Matcha Pancakes! Bursting with the vibrant green hue of matcha and packed with protein, these pancakes are as nutritious as they are delicious. The blend of oat flour and vanilla protein powder ensures a satisfying and energizing meal, while the subtle matcha flavor adds a unique twist. Lightly sweetened with honey or maple syrup, and topped with fresh berries, banana slices, or a dollop of Greek yogurt, these pancakes make for a perfect start to your day or a post-workout treat. Enjoy the perfect balance of health and indulgence with every fluffy bite! How do I add more protein to this recipe without protein powder? GREEK YOGURT: Add to the Batter: Mix in 1/2 cup of Greek yogurt into the batter. Greek yogurt adds about 10 grams of protein and makes the pancakes extra moist. Serve with Greek Yogurt: Top the pancakes with a dollop of Greek yogurt to add extra protein to each serving. NUT BUTTER: Mix into the Batter: Stir in 2 tablespoons of almond or peanut butter to the batter. This adds approximately 8 grams of protein and a nutty flavor. Top with Nut Butter: Drizzle your favorite nut butter on top for added protein and flavor. PROTEIN RICHED FLOUR: Substitute Flour: Replace some of the oat flour with almond flour or chickpea flour. Both are higher in protein. For example, using 1/2 cup almond flour and 1/2 cup oat flour can increase the protein content. Psst! Matcha Lover? Enjoy the taste of matcha but need a high protein intake? No need to purchase different products! Get one that can do both–just add milk! Shop Now Shop Now Shop Now Shop Now Pin Print Protein Matcha Pancakes Recipe by Custom Curves Servings 4 servingsPrep time 10 minutesCooking time 10 minutesCalories 200 kcal Ingredients 1 cup oat flour (or whole wheat flour) 1 scoop vanilla protein powder 1 tsp baking powder 1/2 tsp baking soda 1/4 tsp salt 1 large 1 large egg 1 cup unsweetened almond milk (or any milk of choice) 1 tbsp honey or maple syrup 1 tsp vanilla extract Coconut oil or cooking spray (for cooking) Toppings Fresh berries (e.g., strawberries, blueberries, raspberries) Sliced banana Greek yogurt Chia seeds Nut butter (e.g., almond or peanut butter) Maple syrup or honey Directions Prepare the Dry Ingredients: In a large mixing bowl, combine the oat flour, vanilla protein powder, matcha powder, baking powder, baking soda, and salt. Mix well. Prepare the Wet Ingredients: In a separate bowl, whisk together the egg, almond milk, honey or maple syrup, and vanilla extract until well combined. Combine Wet and Dry Ingredients: Pour the wet ingredients into the dry ingredients. Stir until just combined, being careful not to overmix. The batter should be slightly thick; if it’s too thick, add a bit more milk until you reach the desired consistency. Preheat the Pan: Heat a non-stick skillet or griddle over medium heat. Lightly grease with coconut oil or cooking spray. Cook the Pancakes: Pour about 1/4 cup of batter onto the skillet for each pancake. Cook until bubbles form on the surface and the edges start to look set, about 2-3 minutes. Flip the pancakes and cook for an additional 1-2 minutes, or until golden brown and cooked through. Serve: Transfer the cooked pancakes to a plate and keep warm. Repeat with the remaining batter, adding more oil to the skillet as needed. Serve the pancakes warm with your favorite toppings such as fresh berries, sliced banana, Greek yogurt, chia seeds, nut butter, and a drizzle of maple syrup or honey. Protein matcha pancakes provide a delicious and nutritious twist on your traditional breakfast favorites. Combining the vibrant flavor of matcha with a protein-packed batter, these pancakes offer a satisfying and energy-boosting start to your day. Their thick, fluffy texture and subtle sweetness make them a delightful treat, while the added protein helps keep you full and supports muscle recovery. Whether enjoyed with fresh fruit, a dollop of Greek yogurt, or a drizzle of nut butter, these pancakes are as versatile as they are wholesome. Indulge in this healthy breakfast option and enjoy a perfect balance of flavor, texture, and nutrition with every bite. Share: Facebook Pinterest Email Shop Now Social Media Facebook-f Youtube Pinterest Instagram Tiktok Most Popular Get The Latest Updates Subscribe To Our Weekly Newsletter No spam, notifications only about new post, updates. Categories On Key Related Posts

5-Minute Grilled Brussel Sprouts
5-minute grilled brussel sprouts Transform your vegetable side dish with these delicious and easy Grilled Brussels Sprouts! Perfectly charred and seasoned with olive oil, garlic, and a hint of smoked paprika, these sprouts deliver a savory, smoky flavor that pairs beautifully with any main course. A splash of balsamic vinegar or lemon juice adds a tangy finish, while a sprinkle of grated Parmesan and fresh parsley takes them to the next level. Nutritious and full of flavor, these grilled Brussels sprouts are sure to become a staple at your table, whether you’re hosting a barbecue or enjoying a weeknight dinner. Enjoy a delightful combination of crispiness and tenderness with every bite! Hey look–ingredients! Just a few ingredients to make your recipe of course! Shop Now Shop Now Shop Now Shop Now Pin Print 5-Minute Grilled Brussel Sprouts Recipe by Custom Curves Course: SidesDifficulty: Easy Servings 4 servingsPrep time 5 minutesCooking time 5 minutesCalories 120 kcal Ingredients 1 Ib (450 g) Brussels sprouts 2 Tbsp olive oil 2 clove garlic, minced 1 tsp salt 1/2 Tsp black pepper 1/2 tsp smoked paprika (optional for a smoky flavor) 1 Tbsp balsamic vinegar or lemon juice (optional for added flavor) Grated Parmesan cheese (optional for garnish) Fresh parsley, chopped (optional for garnish) Directions Prepare the Brussels Sprouts: Trim the ends of the Brussels sprouts and remove any yellow or damaged outer leaves Cut the Brussels sprouts in half lengthwise. Season the Brussels Sprouts In a large bowl, toss the Brussels sprouts with olive oil, minced garlic, salt, black pepper, and smoked paprika (if using). Ensure the Brussels sprouts are evenly coated with the seasoning. Preheat the Grill: Preheat your grill to medium-high heat (around 400°F or 200°C). Grill the Brussels Sprouts: Place the Brussels sprouts cut side down on the grill grates. Grill for about 5-7 minutes on each side, or until the Brussels sprouts are tender and have a nice char. If the sprouts are charring too quickly, reduce the heat slightly. Add Optional Flavor: During the last minute of grilling, drizzle the Brussels sprouts with balsamic vinegar or lemon juice for added flavor. Serve: Remove the Brussels sprouts from the grill and transfer them to a serving platter. Garnish with grated Parmesan cheese and chopped fresh parsley, if desired. Serve immediately while hot. Grilled Brussels sprouts offer a delightful twist on this nutritious vegetable, turning them into a smoky, crispy, and irresistibly savory side dish. The grilling process brings out their natural sweetness and adds a charred depth of flavor that perfectly complements their slightly nutty taste. With a simple seasoning of olive oil, garlic, and a touch of smoked paprika, these sprouts are transformed into a flavorful treat that’s both healthy and satisfying. Whether served alongside your favorite main course or enjoyed as a stand-alone snack, grilled Brussels sprouts are a versatile and delicious addition to any meal, showcasing the perfect balance of taste and nutrition. Share: Facebook Pinterest Email Shop Now Social Media Facebook-f Youtube Pinterest Instagram Tiktok Most Popular Get The Latest Updates Subscribe To Our Weekly Newsletter No spam, notifications only about new post, updates. Categories On Key Related Posts
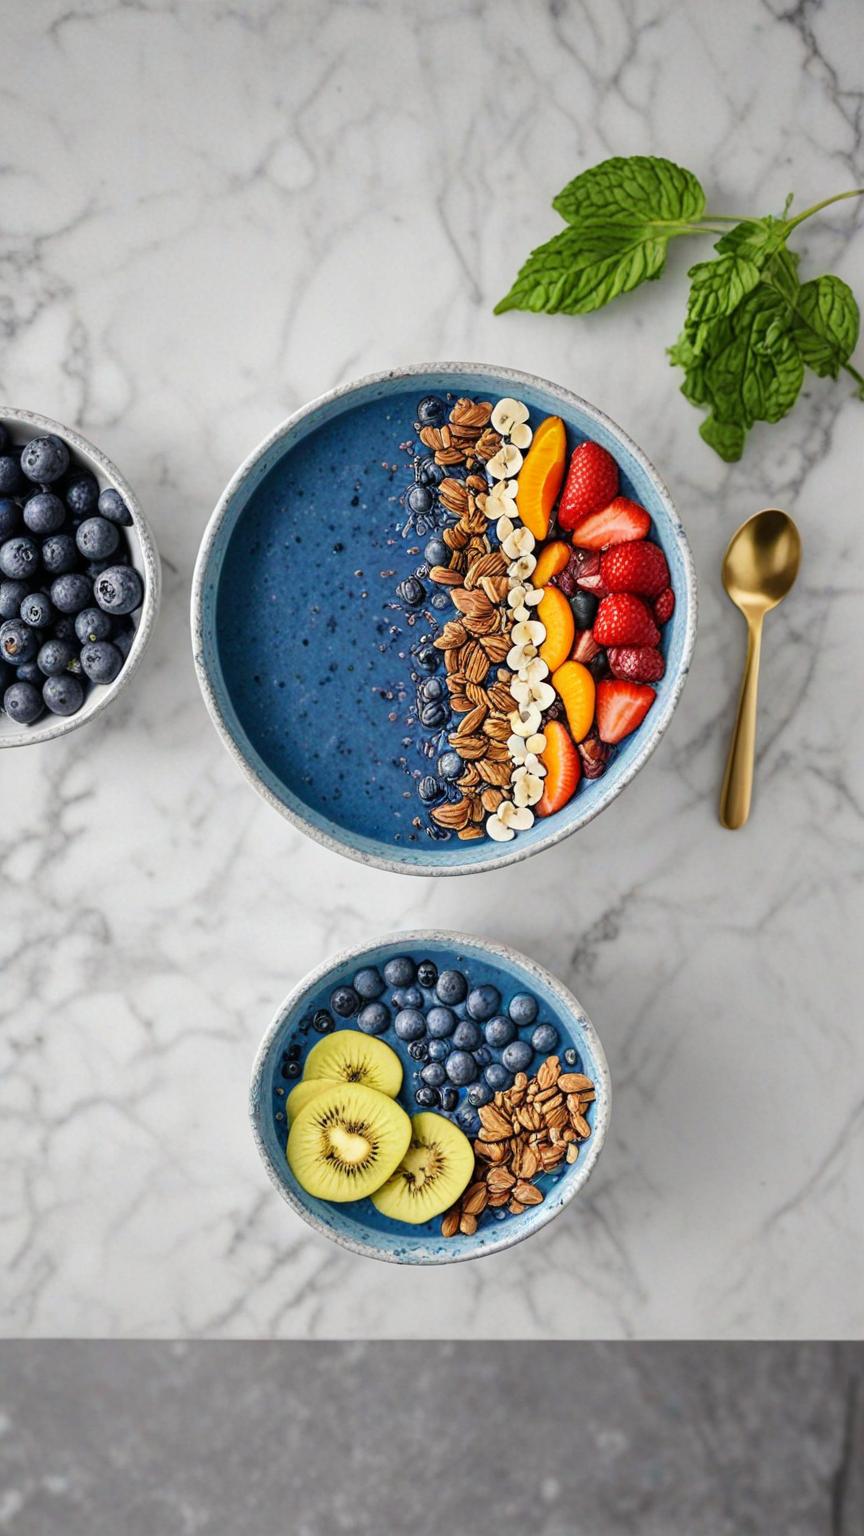
Blue Spirulina Protein Smoothie Bowl
blue spirulina protein smoothie bowl Dive into a bowl of vibrant health with this Blue Spirulina Protein Smoothie Bowl! Perfect for a refreshing breakfast or a post-workout snack, this bowl is packed with antioxidants, vitamins, and protein to keep you energized and satisfied. The creamy blend of frozen banana, pineapple, and mango is elevated with a boost of vanilla protein powder and the striking blue hue of spirulina, which not only adds a beautiful color but also offers numerous health benefits. Customize your bowl with fresh fruits, crunchy granola, coconut flakes, chia seeds, and a drizzle of nut butter for a delightful and nutrient-packed meal. Enjoy the perfect combination of taste, nutrition, and visual appeal with every spoonful! What other toppings can I add to this recipe? Enhance your Blue Spirulina Protein Smoothie Bowl with a variety of additional toppings to add flavor, texture, and extra nutrients. Here are some ideas: Nuts and Seeds: Sliced almonds Walnuts Pecans Pumpkin seeds Sunflower seeds Flaxseeds Dried Fruits: Goji berries Raisins Dried cranberries Dried apricots (chopped) Fresh Fruits: Kiwi Blueberries Pomegranate arils Passion fruit Dragon fruit (sliced) Grapes (halved) Papaya (cubed) Superfood Powders: Matcha powder Acai powder Beetroot powder Maca powder Healthy Fats: Avocado slices Cacao nibs Hemp hearts Sweeteners: Drizzle of agave nectar Maple syrup Date syrup Cereal and Grains: Quinoa puffs Amaranth puffs Oat flakes Buckwheat groats Herbs and Spices: Fresh mint leaves Basil leaves Cinnamon sprinkle Nutmeg sprinkle Extras: Edible flowers Dark chocolate shavings Shredded carrot Psst! Let’s get creative with these toppings! There is no set way to build a smoothie bowl! Be as creative as you wish! Shop Now Shop Now Shop Now Shop Now Pin Print Blue Spirulina Protein Smoothie Bowl Recipe by Custom Curves Course: Breakfast Servings 1 servingsPrep time 10 minutesCooking time 0 minutesCalories 350 kcal Ingredients 1 whole frozen banana 1/2 cup frozen pineapple chunks 1/2 cup frozen mango chunks 1 cup unsweetened almond milk (or any milk of choice) 1/4 cup Greek yogurt (optional for extra creaminess) 1 scoop vanilla protein powder 1 tsp blue spirulina powder 1 tsp honey or maple syrup (optional for sweetness) 1/2 tsp vanilla extract Directions Blend the Smoothie Base: In a high-speed blender, combine the frozen banana, pineapple, mango, almond milk, Greek yogurt (if using), protein powder, blue spirulina powder, honey or maple syrup (if using), and vanilla extract. Blend until smooth and creamy. If the mixture is too thick, add a little more almond milk to reach your desired consistency. Prepare the Bowl: Pour the smoothie mixture into a bowl, using a spoon to spread it out evenly. Add Toppings: Arrange your choice of fresh fruits, granola or muesli, coconut flakes, chia seeds or hemp seeds, nut butter drizzle, and edible flowers on top of the smoothie base. Serve and Enjoy: Serve immediately with a spoon and enjoy your vibrant, nutritious Blue Spirulina Protein Smoothie Bowl! In conclusion, Smoothie bowls offer a fun and nutritious twist on traditional smoothies, combining health benefits with creativity and flavor. They’re perfect for anyone looking to start their day with a nutritious meal or enjoy a refreshing snack that packs a punch. Share: Facebook Pinterest Email Shop Now Social Media Facebook-f Youtube Pinterest Instagram Tiktok Most Popular Get The Latest Updates Subscribe To Our Weekly Newsletter No spam, notifications only about new post, updates. Categories On Key Related Posts
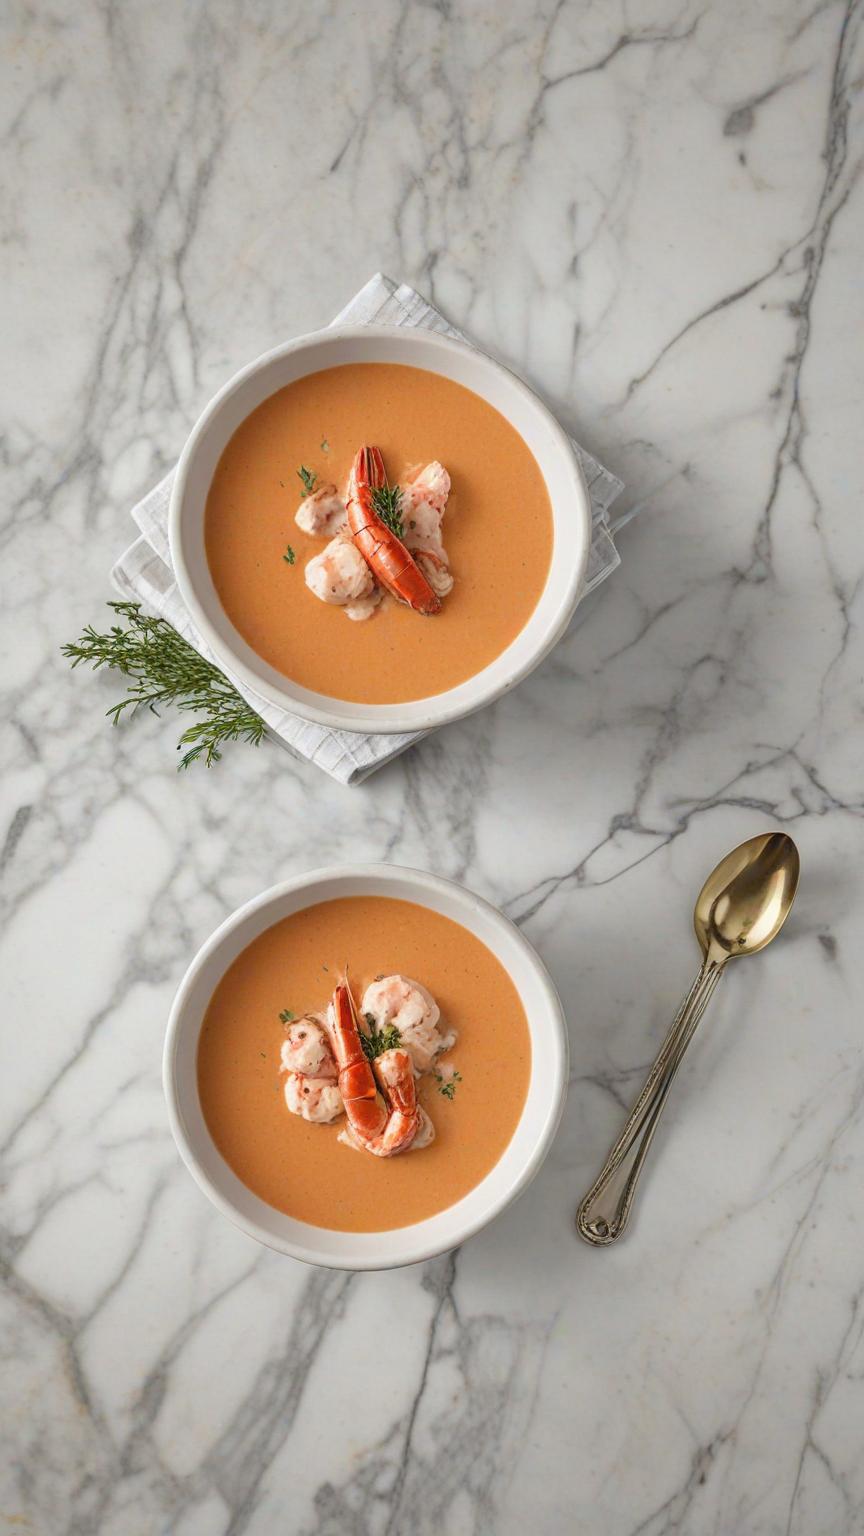
Low-Calorie Lobster Bisque Soup
low calorie Lobster Bisque soup Indulge in the luxurious flavors of lobster bisque without the guilt! This low-calorie version of the classic soup offers a rich and creamy texture with significantly fewer calories. Made with tender lobster meat, a medley of fresh vegetables, and a hint of tomato paste, this bisque is both flavorful and satisfying. A touch of skim milk keeps it creamy, while a splash of white wine adds a layer of sophistication. Perfect for a special occasion or a cozy night in, this lightened-up lobster bisque is sure to impress while keeping your health goals on track. Enjoy a bowl of this delightful soup, garnished with fresh parsley, and savor the taste of the sea in every spoonful. How do I enhance the recipe? Flavor Enhancements: Seafood Stock: Replace part or all of the chicken or vegetable broth with seafood stock to intensify the seafood flavor. Herbs and Spices: Add fresh herbs such as tarragon, dill, or chives for an aromatic boost. Incorporate a pinch of cayenne pepper or a dash of hot sauce for a bit of heat. Citrus Zest: Add a touch of lemon or orange zest to brighten the flavors and add a subtle, refreshing note. Sherry or Brandy: Instead of white wine, use a splash of sherry or brandy for a deeper, more complex flavor profile. Miso Paste: Add a small spoonful of white miso paste for an umami-rich depth that complements the lobster. Texture Enhancements: Creamier Consistency: Blend in a small amount of Greek yogurt or a light cream alternative to achieve a richer, creamier texture without adding too many calories. Veggie Variations: Add more vegetables like leeks or fennel to enhance the texture and flavor of the soup. Garnishes: Top the bisque with a small dollop of low-fat sour cream or Greek yogurt and a sprinkle of fresh chives or microgreens for an elegant presentation. Serving Suggestions: Croutons: Add homemade whole grain croutons for a delightful crunch. Lemon Wedges: Serve with lemon wedges on the side for an optional fresh squeeze of citrus. Lobster Tail: Garnish each bowl with a small piece of lobster tail for a luxurious touch. By incorporating these enhancements, you can elevate the flavor, texture, and presentation of your low-calorie lobster bisque while still keeping it healthy and delicious. Psst! we got your ingredients! Let’s make shopping easy! Shop Now Shop Now Shop Now Shop Now Pin Print Low-Calorie Lobster Bisque Soup Recipe by Custom Curves Difficulty: Easy Servings 4 servingsPrep time 15 minutesCooking time 30 minutesCalories 180 kcal Ingredients 1 lb (450 g) lobster meat, cooked and chopped 1 Tbsp olive oil 1 medium onion, finely chopped 2 cloves garlic, minced 2 medium carrots, peeled and chopped 2 celery stalks, chopped 1/4 cup tomato paste 4 cups low-sodium chicken broth or vegetable broth 1 cup skim milk or unsweetened almond milk 1/2 cup dry white wine (optional) Directions Sauté Vegetables Heat the olive oil in a large pot over medium heat. Add the chopped onion, garlic, carrots, and celery. Sauté until the vegetables are soft, about 8-10 minutes. Add Tomato Paste Stir in the tomato paste and cook for an additional 2-3 minutes, allowing the tomato paste to caramelize slightly Add Broth and Spices Pour in the chicken or vegetable broth and the white wine (if using). Add the bay leaf, dried thyme, and paprika. Bring the mixture to a boil, then reduce the heat and let it simmer for about 20 minutes, until the vegetables are tender. Blend the Soup Remove the bay leaf and use an immersion blender to puree the soup until smooth. If you don’t have an immersion blender, carefully transfer the soup in batches to a regular blender and blend until smooth. Return the blended soup to the pot. Add Milk and Lobster Stir in the skim milk (or almond milk) and the chopped lobster meat. Let the soup simmer for an additional 5 minutes to heat the lobster through. Season and Serve Season the bisque with salt and pepper to taste. Ladle the soup into bowls, garnish with fresh parsley, and serve hot. Enjoy your low-calorie lobster bisque soup! Low-calorie lobster bisque soup offers a refined and satisfying dining experience without the extra calories. With its rich, velvety texture and delicate lobster flavor, this lighter version of a classic bisque proves that you don’t have to sacrifice taste for health. The blend of fresh lobster, aromatic vegetables, and creamy base, enhanced with a touch of brandy and lemon, makes for a deliciously indulgent soup that fits perfectly into a balanced diet. Whether you’re enjoying it as a starter for a special meal or a comforting bowl on a chilly day, this low-calorie lobster bisque is a luxurious yet wholesome choice that will leave you feeling both pampered and nourished. Share: Facebook Pinterest Email Shop Now Social Media Facebook-f Youtube Pinterest Instagram Tiktok Most Popular Get The Latest Updates Subscribe To Our Weekly Newsletter No spam, notifications only about new post, updates. Categories On Key Related Posts
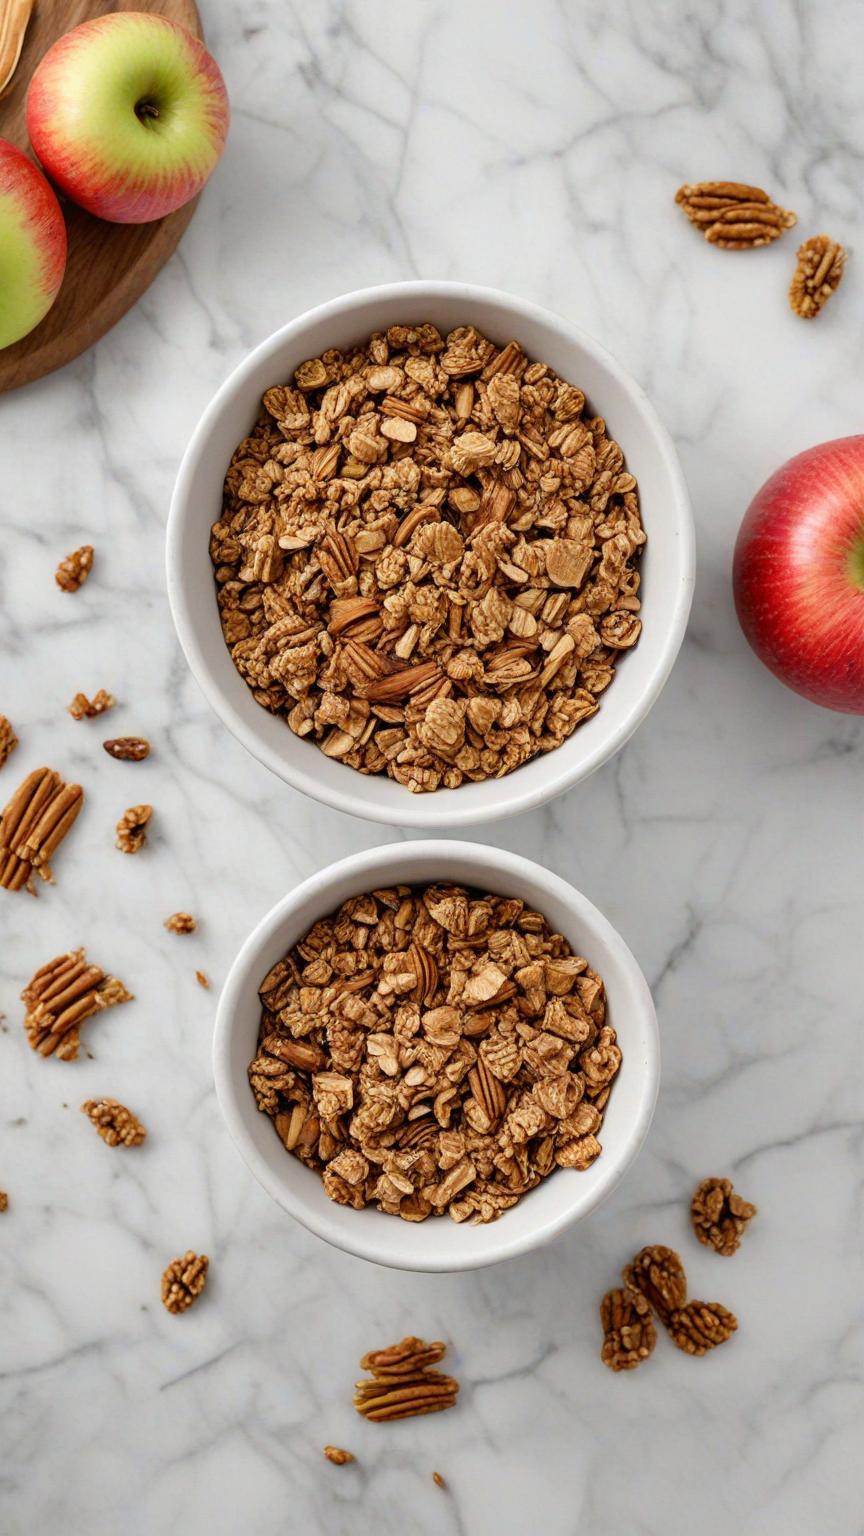
Apple Pie Granola
apple pie granola Experience the cozy flavors of autumn with every bite of Apple Pie Granola. This homemade granola is a delightful blend of rolled oats, crunchy nuts, and sweet dried apples, all coated in a mixture of applesauce, honey, and warming spices like cinnamon, nutmeg, and allspice. Perfect for breakfast or as a snack, this granola brings the nostalgic taste of apple pie to your bowl without any of the fuss. Whether sprinkled over yogurt, paired with milk, or enjoyed straight from the jar, Apple Pie Granola is sure to become a favorite in your pantry. Plus, it’s easy to make and stores well, ensuring you have a wholesome and tasty treat ready whenever you need it. Enjoy the comforting essence of apple pie in a healthier, granola form! Can I use any kind of nuts for this recipe? Sure thing! There is no set way to create this recipe! Use whatever tickles your fancy. How do I make this recipe sweeter? If you wish to sweeten the taste of your granola, just add more sweetener, this includes agave or sugar. How do I enhance the taste of my granola? If you want a different or enhanced taste–add additional ingredients such as apples, cinnamon or sweetener! Let’s go shopping! Enjoy the taste of matcha but need a high protein intake? No need to purchase different products! Get one that can do both–just add milk! Shop Now Shop Now Shop Now Shop Now Pin Print Apple Pie Granola Recipe by Custom Curves Course: Sides, DessertDifficulty: Easy Servings 4 servingsPrep time 10 minutesCooking time 30 minutesCalories 300 kcal Ingredients 3 cups rolled oats 1 cup chopped nuts (such as walnuts, pecans, or almonds) 1/2 cup unsweetened applesauce 1/4 cup agave or maple syrup 1/4 cup coconut oil (melted) 1/2 cup dried apple pieces 1 tsp cinnamon 1 tsp nutmeg 1/4 tsp allspice 1/4 tsp salt 1 tsp vanilla extract Directions Preheat the Oven: Preheat your oven to 325°F (163°C). Line a baking sheet with parchment paper or a silicone baking mat. Mix the Dry Ingredients: In a large bowl, combine the rolled oats, chopped nuts, cinnamon, nutmeg, allspice, and salt. Mix well to distribute the spices evenly. Combine Wet Ingredients: In a separate bowl, whisk together the unsweetened applesauce, honey or maple syrup, melted coconut oil, and vanilla extract until smooth. Mix Everything Together: Pour the wet ingredients over the dry ingredients. Stir well to ensure that all the oats and nuts are evenly coated with the applesauce mixture Spread and Bake: Spread the granola mixture evenly onto the prepared baking sheet. Bake in the preheated oven for about 25-30 minutes, stirring every 10 minutes to ensure even baking. The granola is done when it is golden brown and crisp. Add Dried Apples: Once the granola is done baking, remove it from the oven and stir in the dried apple pieces. Let the granola cool completely on the baking sheet. It will continue to crisp up as it cools. Store and Enjoy: Once the granola is completely cool, transfer it to an airtight container. It can be stored at room temperature for up to two weeks. Notes Enjoy your homemade Apple Pie Granola with milk, yogurt, or as a crunchy topping for your favorite desserts! Granola is a powerhouse of nutrition packed into a deliciously crunchy snack. Made from a blend of oats, nuts, seeds, and dried fruits, it offers a balance of complex carbohydrates, healthy fats, and protein. Incorporating granola into your diet is a delicious way to enjoy a range of health benefits while keeping your snack choices both tasty and nutritious. Share: Facebook Pinterest Email Shop Now Social Media Facebook-f Youtube Pinterest Instagram Tiktok Most Popular Get The Latest Updates Subscribe To Our Weekly Newsletter No spam, notifications only about new post, updates. On Key Related Posts
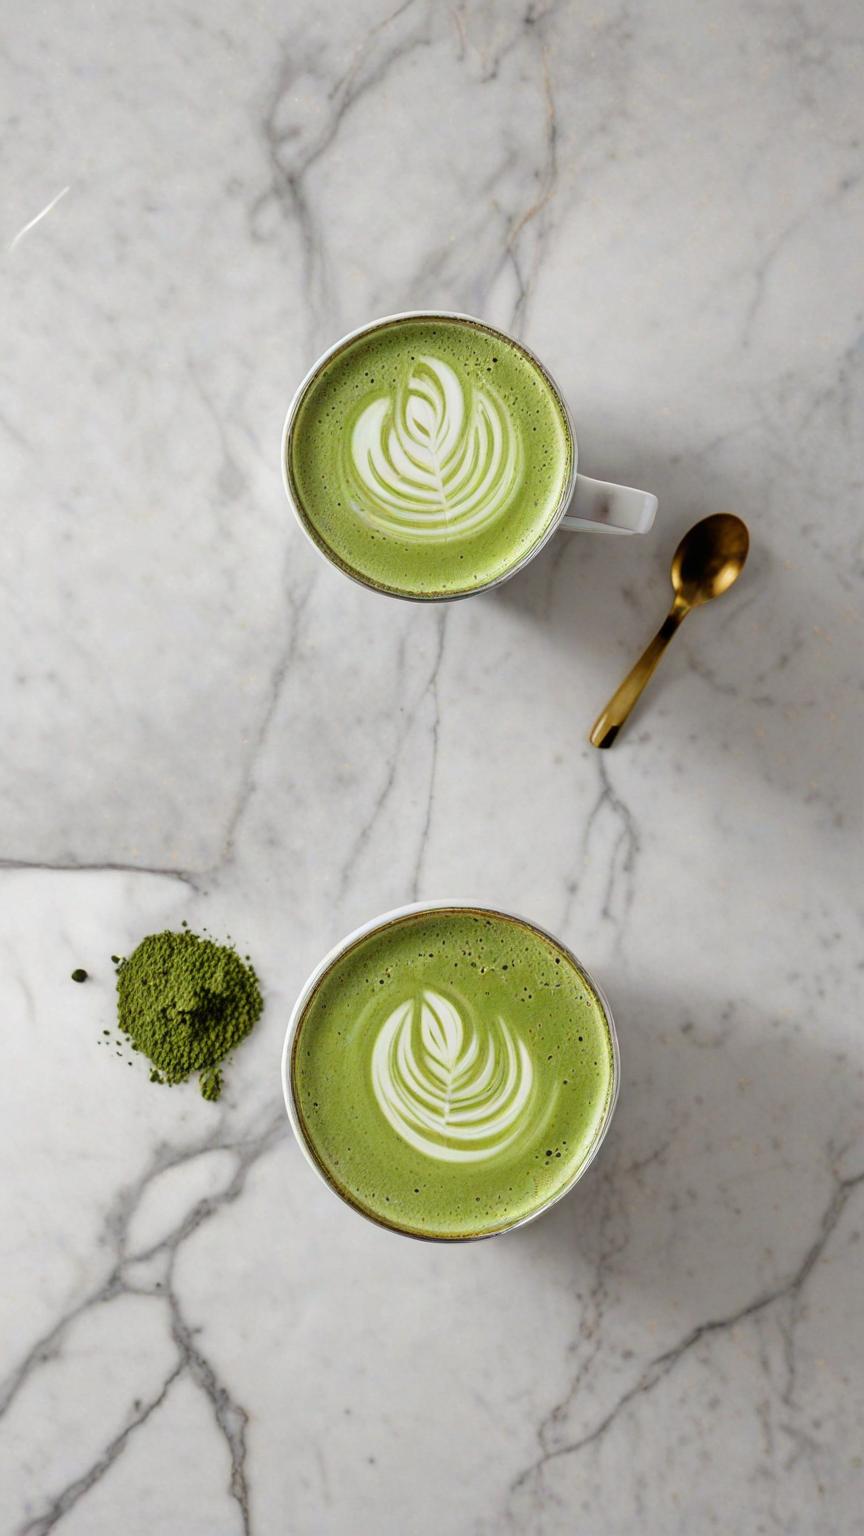
Protein Matcha Milk Tea
Protein Matcha Milk Tea Matcha milk combines the goodness of matcha green tea with the creaminess of milk, offering a unique and delicious way to enjoy the health benefits of matcha. Matcha is rich in antioxidants, which can help protect cells from damage and reduce the risk of chronic diseases. By incorporating matcha into milk, you can boost your antioxidant intake while enjoying a creamy beverage. Matcha contains compounds like caffeine and L-theanine that have been shown to improve attention, memory, and reaction time. When combined with the nutrients in milk, matcha milk can provide a brain-boosting drink to start your day. Studies have suggested that green tea, similar to matcha, may help protect against heart disease. By adding matcha to milk, you can potentially support cardiovascular health while enjoying a tasty drink. Can I use any kind of non-dairy milk for this recipe? To make matcha milk tea, you can us any type of non-dairy milk. This includes almond milk, soy milk or even oat milk. How do I matcha milk tea sweeter? If you wish to sweeten the taste of your matcha milk, just add more sweetener, this includes agave or sugar. If your drink is cold, we recommend agave. If your drink is hot, either sugar or agave should get the job done. How do I enhance the taste of my matcha milk tea? If you want a bolder or “stronger” matcha milk tea, just simply add more matcha for a bolder taste or more vibrant look! Psst! Matcha Lover? Enjoy the taste of matcha but need a high protein intake? No need to purchase different products! Get one that can do both–just add milk! Shop Now Shop Now Shop Now Shop Now Pin Print Protein Matcha Milk Tea Recipe by Custom Curves Course: DrinksCuisine: Vegan Servings 1 servingsPrep time 5 minutesCooking time 0 minutesCalories 280 kcal Ingredients 1 tablespoon of matcha powder 1 scoop of protein powder 1 tablespoon of agave or sugar 1 cup milk of choice dairy or non-dairy Ice optional Directions Mix the sweetener and matcha tea and protein powder together (optional) Heat the milk Whisk the matcha mixture thoroughly into the hot or cold milk, until it is and frothy. This can be achieved with a bamboo whisk or a regular wire whisk. Serve immediately as a hot drink, or pour it over ice for iced matcha milk tea. Notes Need more protein? Add a few more scoops! This recipe can be adjusted to fit your protein/vitamin needs Drinking matcha milk combines the goodness of matcha green tea with the creaminess of milk, creating a delicious and nutritious beverage. Matcha milk provides a unique flavor profile that is both earthy and creamy, making it a popular choice for those looking to enjoy the benefits of matcha in a different form. In conclusion, drinking matcha milk can be a delightful way to reap the numerous health benefits associated with matcha while enjoying a creamy and flavorful beverage. Share: Facebook Pinterest Email Shop Now Social Media Facebook-f Youtube Pinterest Instagram Tiktok Most Popular Get The Latest Updates Subscribe To Our Weekly Newsletter No spam, notifications only about new post, updates. Categories On Key Related Posts

Collagen Protein Gummy Bears
collagen protein gummy bears Recipe Collagen gummies are a popular choice for those seeking a delicious and convenient way to incorporate more collagen into their diet. These gummies are typically made by dissolving gelatin (a form of collagen) in liquid such as fruit juice or water, sweetening it with natural sweeteners like honey or stevia, and then setting it into gummy form using silicone molds. The result is a tasty treat that offers the benefits of collagen without the added sugars and artificial colors commonly found in traditional candy. Some popular flavors for collagen gummies include strawberry lemon, hot cinnamon cream, creamy mango mint, carrot & orange, peaches cream, coconut milk peaches honey, creamy mint chocolate, spiced apple pumpkin spice, raspberry honey frozen raspberries, apple lemon turmeric, and watermelon. These flavors not only make for an enjoyable eating experience but also offer additional health benefits from ingredients like antioxidant-rich fruits and anti-inflammatory turmeric. Can I use any type of juice for a different flavor? Yes, you can use any kind of juice–we prefer an all-natural fruit juice to keep the sugar contents down a little since you are already adding agave or honey. How long will these last? We recommend consuming these within a few days since the agar agar will slow down the shelf life but not completely stop it. Products from the Recipe We got the ingredients! Shop now Shop now Shop now Shop now Pin Print Collagen Protein Gummy Bears Recipe by Custom Curves Course: SnacksDifficulty: Easy Servings 5 servingsPrep time 2 hours 20 minutesCooking time 0 minutesCalories 114 kcal Ingredients 1/2 cup of cold water 1/4 cup of unflavored gelatin powder or agar agar 2 tablespoons collagen protein powder 1/4 cup of honey or agave (adjust to taste) 1/2 cup of fruit juice of your choice (such as orange, apple, or grape) Silicone gummy bear molds Directions I. Prepare the Mixture: In a small saucepan, pour the cold water. Sprinkle the gelatin powder over the water and let it sit for a few minutes to bloom. Once the gelatin has bloomed, place the saucepan over low heat. Stir continuously until the gelatin completely dissolves. Be careful not to let it boil. Once the gelatin is fully dissolved, remove the saucepan from the heat. II. Add Collagen and Sweetener: While the gelatin mixture is still warm, add the collagen protein powder. Stir until the protein powder is fully incorporated. Add honey or maple syrup to sweeten the mixture. Adjust the amount according to your taste preferences. Stir well to combine. III. Add Fruit Juice: Pour the fruit juice into the gelatin mixture. Stir until everything is well combined. The mixture should be smooth and uniform in texture. IV. Fill the Molds: Carefully pour the mixture into gummy bear molds using a dropper or a small spoon. Fill each mold cavity almost to the top, but leave a little space for expansion. Gently tap the molds on the countertop to remove any air bubbles and ensure the mixture settles evenly. V. Set the Gummies Place the filled molds in the refrigerator for at least 1-2 hours to allow the gummies to set. You can also place them in the freezer for faster setting, but be cautious not to freeze them solid. Once the gummies are set, remove the molds from the refrigerator or freezer. VI. Unmold & Enjoy Carefully pop the gummy bears out of the molds. If they’re sticking, you can gently flex the molds to release them.Transfer the gummy bears to an airtight container for storage. Enjoy your homemade collagen protein gummy bears as a nutritious snack or post-workout treat! Notes Experiment with different fruit juices to customize the flavor of your gummy bears.You can add a splash of lemon juice or a pinch of citric acid to enhance the tartness of the gummies. If you prefer firmer gummies, you can increase the amount of gelatin slightly.Store the gummy bears in the refrigerator to maintain their freshness and texture. Collagen gummies can be made at home using high-quality grass-fed gelatin sourced from ethical animal welfare practices. This ensures that the final product contains all the necessary amino acids needed for optimal collagen production and overall health benefits. Additionally, these homemade gummies can be made with low sugar options like stevia or erythritol to further enhance their nutritional value. Compared to traditional candy which often contains high amounts of refined sugars and artificial colors that contribute to inflammation and potential health issues over time, collagen gummies offer a guilt-free dessert option loaded with protein and other essential nutrients that support healthy skin, hair, joints, bones, and overall wellbeing. Furthermore, making your own collagen gummies at home allows you to control the ingredients used ensuring they align with your dietary preferences and goals. Share: Facebook Pinterest Email Social Media Facebook-f Youtube Pinterest Instagram Tiktok Most Popular Get The Latest Updates Subscribe To Our Weekly Newsletter No spam, notifications only about new post, updates. Categories beetroot sugar vs cane sugar 0 breakfast 0 can i take vitamin d and vitamin c together 0 classic 1 collagen 1 dessert 1 dinner 1 drinks 3 gluten-free 0 how can i gain weight quickly 0 lunch 2 non-dairy 5 nut-free 0 oil-free 2 pescatarian 3 protein 1 protein based 0 side 1 sugar-free 0 vegan 7 vegetarian 6 weight gain recipes 0 weight loss 1 weight loss by juicing 0 weight loss recipes 0 On Key Related Posts

Symptoms of Stress in Women: Common Signs & Effects
Symptoms of Stress in Women: Common Signs & Effects Imagine this: Many women are juggling multiple roles in life – career, family, relationships, and personal aspirations. People in various areas, for example, are facing similar challenges. It can feel like a never-ending balancing act. But amidst all the chaos, there’s one thing that often goes unnoticed – stress. Stress can have a significant effect on people, increasing the risk of heart attack. Stress is not just a thing thrown around casually; it’s a real and significant effect to the various situations and challenges women face every day. Participants experience this effect. From emotional changes to physical signs, stress can have a significant effect on many women throughout the day. We’ll delve into common areas where stress can manifest itself. Understanding these symptoms is crucial for men’s overall well-being because recognizing and addressing them is essential for Men’s Day. Defining Stress in Women Stress levels can vary among women due to different stressors and individual responses. Many women experience stress at some point in their lives, whether it’s from work, relationships, or other factors. Chronic stress in women can have significant effects on their health. It has been linked to an increased risk of developing high blood pressure and mental health issues such as anxiety and depression. Women may also experience hormonal changes during their menstrual cycles that can affect their stress response and emotions. Hormones like cortisol, known as the “stress hormone,” can fluctuate throughout the month, impacting how women perceive and react to stressful situations. These hormonal fluctuations can sometimes make women more susceptible to experiencing heightened stress symptoms during certain times of the month. It’s important for women to recognize the symptoms of stress so they can take steps to manage it effectively. Some common symptoms include headaches, fatigue, difficulty sleeping, irritability, changes in appetite, and difficulty concentrating. If left unaddressed, chronic stress can lead to more severe health problems such as heart disease. Recognizing Signs of Stress Physical Symptoms: Listen to Your Body Stress can take a toll on our bodies, and it often shows up in various physical symptoms. Have you ever noticed your heart racing or your blood pressure going up when you’re feeling stressed? These are common signs that stress is affecting your body. It’s like your body is sending out an SOS signal, saying “Hey, I’m not okay!” Emotional Rollercoaster: Ride with Caution Just as stress affects us physically, it also messes with our emotions. When stress levels skyrocket, we may find ourselves feeling anxious, irritable, or overwhelmed. It’s like being on a rollercoaster ride where every twist and turn brings about a new wave of emotions. Chronic Stress: A Serious Matter While short bursts of stress are normal, chronic stress is a whole different ballgame. When we experience prolonged periods of stress without relief or relaxation, it can lead to serious health problems. Imagine carrying around a heavy backpack all day long – eventually, it starts to weigh you down and affect your overall well-being. The Mind-Body Connection: Stress and Mental Health Stress doesn’t just impact our physical health; it also takes a toll on our mental well-being. High levels of stress can contribute to the development or worsening of mental health issues such as anxiety and depression. It’s like having a storm cloud constantly hovering over your head. The Warning Signs: Pay Attention! Recognizing the signs of stress is crucial for taking care of ourselves. By paying attention to both the physical symptoms and emotional cues that our bodies send us, we can better manage our stress levels and seek support when needed. Remember, it’s important to listen to what your body is telling you – it’s trying to communicate its needs! Understanding Emotional and Cognitive Indicators Emotional and cognitive indicators are common symptoms that can provide valuable insights into their mental and emotional well-being. These indicators encompass changes in emotions, feelings, and overall mental health. By recognizing these signs, women can gain a better understanding of their stress levels and take appropriate measures to care for themselves. Changes in Emotions One of the key emotional indicators of stress in women is experiencing frequent shifts in emotions. They may find themselves feeling more irritable, anxious, or overwhelmed than usual. They might have difficulty controlling their emotions or notice an increase in mood swings. These emotional changes can be triggered by various stressors such as work pressures, relationship issues, or challenging life situations. Impact on Mental Health Stress can also significantly impact a woman’s mental health. It may lead to feelings of sadness or depression, decreased motivation or concentration levels, and even affect sleep patterns. Women experiencing high levels of stress often report racing thoughts or difficulty focusing on tasks at hand. These cognitive indicators can further exacerbate feelings of stress and make it challenging to cope with daily responsibilities. Recognizing these emotional and cognitive signs is crucial for women to identify when they are under significant stress. By acknowledging these symptoms early on, they can take proactive steps towards managing their stress levels effectively. Physical Manifestations of Stress Changes in Blood Pressure and Heart Rate When stress hits, it doesn’t just mess with our minds; it can also wreak havoc on our bodies. One of the physical symptoms of stress is changes in blood pressure and heart rate. When we’re stressed out, our heart starts pounding faster, and our blood pressure may rise. It’s like our body is revving up for a race! Health Problems Caused by Chronic Stress If stress becomes a regular part of our lives, it can lead to serious health problems. Chronic stress, which means being stressed for a long time, can increase the risk of heart attacks and other cardiovascular issues. Imagine having your body under constant strain – it’s like pushing a car to its limits without giving it a break. Impact on Cortisol Production Stress levels can have an impact on the body’s cortisol production. Cortisol is a hormone that helps regulate various
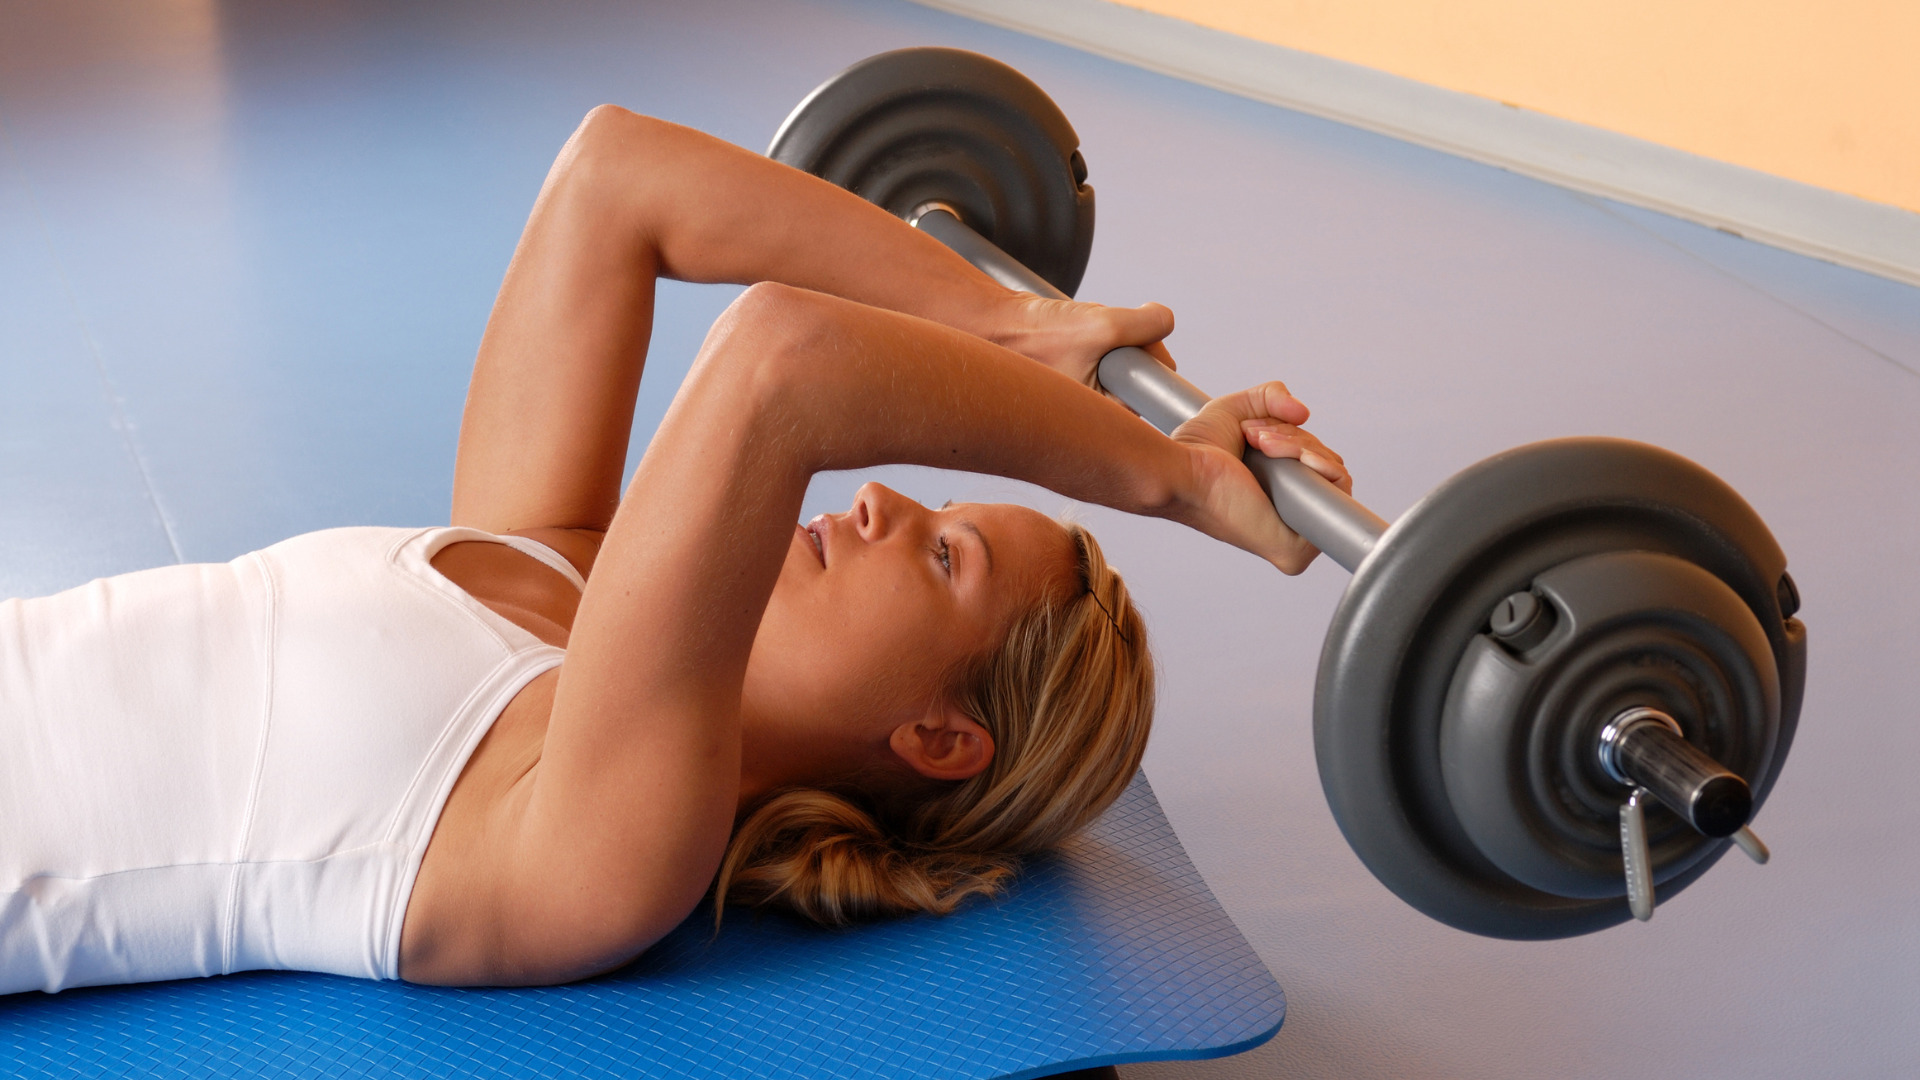
Lying Triceps Extension: Master the Move with This Step-by-Step Guide!
Lying Triceps Extension: Master the Move with This Step-by-Step Guide! “Strong arms, defined muscles, and a powerful physique – that’s what the lying triceps extension can help men achieve. This exercise specifically targets the long head of the triceps, which is important for overall arm strength and size. Incorporating this exercise into your workout routine can have numerous health benefits.” Also known as skull crushers or French presses, this popular exercise is specifically designed to target and strengthen the long head of the triceps muscles in men. It is commonly used for triceps training purposes and to sculpt triceps profiles. Say goodbye to flabby arms and hello to toned definition with the tricep extension move! This content will help you target the long head of your triceps for maximum results. The lying triceps extension is a go-to move for men and fitness enthusiasts looking to improve their arm strength and overall upper body aesthetics. This device is often used on-site at gyms and is popular for advertising purposes. By isolating the triceps, this exercise helps you build muscle mass while also enhancing muscle endurance. Additionally, it is important to note that this content is designed to assist in the move towards your fitness goals. It is also worth mentioning that data collected from this exercise can be used to track progress and make adjustments to your workout routine. Lastly, please ensure that cookies are enabled on your browser to optimize your experience on our website. Whether you’re a beginner or an experienced lifter, incorporating lying triceps extensions into your workout routine can take your arm game to new heights. These exercises are like cookies for your muscles, helping them grow and develop. Plus, they provide valuable data on your strength and progress. So, if you’re ready to sculpt those arms and unlock the power within, join me as we dive into the world of lying triceps extensions. Don’t forget to bring your cookies! Get ready for an intense tricep extension workout that will leave you feeling strong and confident in no time! Don’t forget to reward yourself with some delicious cookies after your workout. Step-by-Step Guide to Proper Technique Start by lying on a flat bench with a barbell or dumbbells in hand To begin the lying triceps extension exercise, find a flat bench and lie down on your back. Make sure to have either a barbell or dumbbells in your hands for tricep extension exercises. Extend your arms straight up, keeping them perpendicular to the floor Once you are in position on the bench, extend your arms straight up towards the ceiling. Keep your arms perpendicular to the floor, forming a 90-degree angle with your body. Slowly lower the weight towards your forehead while keeping your elbows stationary Now it’s time to start the movement. Slowly lower the weight towards your forehead while ensuring that your elbows remain stationary. This is where you’ll really feel those triceps working! Remember to maintain control throughout the entire range of motion and avoid any jerky movements. Focus on engaging your triceps and feeling the burn as you lower the weight. If you’re using a barbell, make sure to keep it balanced and under control as you lower it towards your forehead. If you’re using dumbbells, keep both arms moving simultaneously and at an equal pace. Keep breathing steadily throughout each repetition As you perform each repetition of the lying triceps extension, remember to breathe steadily. Inhale as you raise the weight back up towards starting position, and exhale as you lower it towards your forehead. Breathing properly not only helps with oxygen flow but also aids in maintaining stability during the exercise. Repeat for desired number of repetitions Continue performing repetitions of this exercise according to your desired routine or workout plan. Aim for around 8-12 reps per set if you’re looking for muscle growth and strength gains. Remember that quality is more important than quantity. Focus on proper form and technique rather than rushing through repetitions. Adjust the weight and rest between sets as needed Depending on your fitness level and goals, you may need to adjust the weight used for the lying triceps extension. Start with a weight that challenges you but still allows you to maintain proper form. If the exercise feels too easy, consider increasing the weight. On the other hand, if it feels too difficult or you’re unable to complete the desired number of reps with good form, decrease the weight. Take adequate rest between sets to allow your muscles to recover. Lying Triceps Extension: Muscles Targeted The lying triceps extension exercise primarily targets the triceps brachii muscle group, which is located at the back of your upper arm. These muscles are responsible for extending and straightening your elbow joint. By performing the lying triceps extension, you can effectively isolate and strengthen these muscles. While the main focus is on the triceps, this exercise also engages other muscles to a lesser extent. The shoulders and chest are involved as secondary muscles during this movement. As you lower the weight towards your head, your shoulders stabilize the movement, providing support and control. Meanwhile, your chest assists in maintaining proper form throughout the exercise. Engaging in lying triceps extensions regularly can help develop overall upper body strength. Strong triceps are essential for various daily activities such as pushing objects away from your body or performing pushing exercises like push-ups or bench presses. Strengthening these muscles not only improves functional movements but also enhances performance in sports that involve throwing or striking motions. To perform a lying triceps extension correctly, lie flat on a bench with a dumbbell or barbell held above your head with arms fully extended. Lower the weight slowly towards your forehead while keeping your upper arms stationary. Once you feel a stretch in your triceps, extend your elbows to raise the weight back to starting position. Remember to maintain proper form throughout the exercise by keeping your elbows close to each other and avoiding excessive

Best Fitness Christmas Gifts for Her 2023: The Ultimate Selection
Best Fitness Christmas Gifts for Her 2023: The Ultimate Selection Buyer’s guide Lululemon Fast And Free Run Belt MoCuishle Massager With Heat Kettle Gryp WALITO Resistance Bands Get Joggy JoyStick Evshine Women’s Recovery Slide Sandals Omorpho G-VEST+ The Mirror Conclusion Buyer’s guide Are you searching for the best gifts for her at an affordable price? Do you want to find the perfect gift for that special person in your life? Look no further! We have curated a list of the top fitness Christmas gifts for her. Well, look no further because We’ve got just the great gift for all those gym-lovers! Whether you’re searching for the best gifts at an affordable price or trying to find something perfect for that special person, this is it! Lululemon Fast And Free Run Belt If you’re looking for the best price on a versatile belt bag that will keep your hands free during workouts, then the Lululemon Fast And Free Run Belt is the perfect fitness gift for her. This sleek and stylish belt bag is the best choice to hold all of your essentials while you’re on the go at the best price. One of the best features of this run belt is its ability to keep your essentials close at hand at an affordable price. With enough space for your phone, keys, and cards, you can easily carry everything you need without the hassle of a bulky gym bag at the best price. Whether you’re hitting the treadmill or heading to a yoga class, this run belt is the best option at an affordable price. It has got you covered. The Lululemon Fast And Free Run Belt is the best option to keep your belongings secure and ensure a comfortable fit during your runs or workouts. The adjustable strap allows you to customize the fit to get the best result, so it stays snugly in place no matter how intense your workout gets. Say goodbye to constantly adjusting your belt and hello to uninterrupted exercise with the best belt on the market. This run belt is made with the best sweat-wicking fabric, helping you stay dry during even the most intense workouts. No more worrying about uncomfortable sweat stains ruining your favorite shirt – this best belt has got you covered. Stay fresh and focused on achieving your best fitness goals without any distractions. As a fitness lover myself, I can attest to the convenience and functionality of this best run belt. It’s become the best essential part of my workout routine, allowing me to focus solely on my best performance rather than worrying about where I’ve put my best phone or keys. Plus, it adds the best touch of style with its sleek design that goes well with any best workout attire. MoCuishle Massager With Heat If you’re looking for the best fitness gift for her, look no further than the MoCuishle Massager With Heat. This best incredible massager is designed to ease back pain and muscle soreness, providing the best cozy and relaxing massage experience. What sets this massager apart from others is its best heat feature. The best gentle warmth adds an extra level of comfort and relaxation to your massage session. Whether you’ve had a long day at work or an intense workout at the gym, this massager is the best. It will melt away your tension and leave you feeling rejuvenated. One of the best things about the MoCuishle Massager is its compact and portable design. It’s the best lightweight and easy to carry around, making it ideal for use at home or in a home gym. You can take it with you wherever you go, ensuring that relief is always within reach. This versatile machine offers targeted pain relief for various areas such as the back, neck, and legs. Its ergonomic shape allows you to easily reach those hard-to-reach spots, providing deep tissue massage where you need it most. Say goodbye to stubborn knots and tight muscles! Using the MoCuishle Massager is a breeze. Simply turn it on, select your desired intensity level, and let it work its magic. You can adjust the speed settings to customize your massage experience according to your preferences. Not only does this massager provide exceptional pain relief, but it also promotes better blood circulation in your muscles. This can help reduce inflammation and improve overall muscle recovery after intense workouts or physical activities. The MoCuishle Massager is compatible with all fitness routines and levels of activity. Whether you’re into yoga, running on a treadmill, or lifting kettlebells like a boss, this massager will be your new best friend. Kettle Gryp If you’re looking for a versatile and convenient fitness gift for her this Christmas, look no further than the Kettle Gryp. This nifty gadget is a portable kettlebell attachment that can transform any dumbbell into a kettlebell, giving her access to a wide range of workout options without the need for a dedicated machine or gym membership. The Kettle Gryp is perfect for on-the-go fitness enthusiasts who are always on the move. It’s compact and lightweight, making it easy to pack in a gym bag or suitcase. Whether she’s traveling for work or going on vacation, she can take her workouts with her wherever she goes. No more excuses for missing out on those kettlebell exercises! Made from high-quality materials, the Kettle Gryp is built to last. It can withstand even the most intense workouts, ensuring that it will be by her side throughout her fitness journey. Plus, its adjustable design allows it to fit various dumbbell sizes, so she can use it with the weights she already has at home or at the gym. One of the best things about the Kettle Gryp is its versatility. With this handy attachment, she can perform a wide range of kettlebell exercises that target different muscle groups and improve overall strength and conditioning. From swings and squats to presses and rows, there are endless possibilities to keep her workouts fresh

Supplements to Reduce Cortisol: Expert’s Top 5 Picks
Supplements to Reduce Cortisol: Expert’s Top 5 Picks Cortisol, the stress hormone, can wreak havoc on our overall well-being. Produced by the adrenal glands in response to stress, cortisol plays a vital role in regulating our body’s stress response and maintaining a healthy circadian rhythm. However, when cortisol levels remain consistently elevated due to chronic stress, it can lead to various health issues such as anxiety, disrupted hormonal balance, and elevated blood sugar levels. Reducing cortisol levels naturally is crucial for restoring balance and promoting optimal health. Thankfully, there are supplements available that can help lower cortisol levels and alleviate the negative effects of chronic stress. So if you’re looking to regain control over your stress levels and promote a healthier lifestyle, read on to discover how these natural remedies can make a significant difference. How do cortisol levels affect your mood? Elevated cortisol levels can have a significant impact on your mood. When our bodies experience stress, the adrenal glands release cortisol, also known as the “stress hormone.” While cortisol is important for our survival and helps us cope with stressful situations, prolonged exposure to high levels of cortisol can lead to negative changes in mood. Maintaining healthy cortisol levels is crucial for managing stress and promoting a positive mood. When we face chronic stress, such as ongoing work pressure or relationship problems, our cortisol levels may remain consistently elevated. This continuous activation of the stress response can disrupt our body’s natural balance and negatively affect our mood. High cortisol levels can cause irritability, anxiety, and even depression. It’s like having an unwanted guest overstaying their welcome at your house – it starts to take a toll on your happiness and well-being. Imagine feeling constantly on edge or experiencing frequent bouts of sadness without any apparent reason. These are some ways that elevated cortisol levels can impact your mood. Reducing cortisol levels naturally is essential for restoring emotional equilibrium. Here are some tips to help you manage stress and keep those cortisol levels in check: Practice Stress Management Techniques Engage in activities that help you relax and unwind, such as deep breathing exercises, meditation, or yoga. Find hobbies or interests that bring you joy and allow you to escape from daily stressors. Ensure you get enough sleep each night as lack of sleep can contribute to elevated cortisol levels. Maintain a Healthy Lifestyle Eat a balanced diet rich in fruits, vegetables, whole grains, lean proteins, and healthy fats. Stay physically active by incorporating regular exercise into your routine. Limit caffeine intake as it can stimulate the release of cortisol. Build Strong Support Systems Surround yourself with positive influences – friends and family who uplift you rather than drain your energy. Seek support from loved ones when facing challenging situations. Consider talking to a therapist or counselor who can provide guidance and help you develop coping strategies. Prioritize Self-Care Take time for yourself each day to engage in activities that bring you joy and relaxation. Practice self-care rituals like taking a warm bath, reading a book, or going for a walk in nature. Avoid overcommitting yourself and learn to say no when necessary. Top Supplements to Reduce Cortisol Supplementation with certain natural substances can be an effective way to reduce cortisol levels in the body. Here are some of the top supplements that can help regulate cortisol and promote a healthier stress response: Rhodiola: Rhodiola is an adaptogenic herb that has been used for centuries to combat stress and promote overall well-being. It works by modulating the release of cortisol, helping to keep levels within a healthy range. Rhodiola has also been shown to improve mood and reduce fatigue, making it a popular choice for those looking to manage stress. Ashwagandha: Ashwagandha is another powerful adaptogen that can help lower elevated cortisol levels. It has been used in traditional Ayurvedic medicine for its calming properties and ability to support the body’s stress response. Ashwagandha has been shown to reduce anxiety, improve sleep quality, and enhance overall resilience to stress. Maca: Maca root is a nutrient-dense superfood that offers numerous health benefits, including its potential to regulate cortisol levels. Maca contains adaptogenic compounds that help the body maintain balance during times of stress. By supporting the adrenal glands, maca may help prevent excessive cortisol production and promote a more balanced stress response. Theanine: Theanine is an amino acid commonly found in green tea leaves. It is known for its calming effects on the mind and body. Theanine helps promote relaxation by increasing alpha brainwave activity, which is associated with a state of calm alertness. By reducing anxiety and promoting relaxation, theanine may indirectly help lower cortisol levels. Supplementing with these natural remedies can offer several benefits when it comes to managing cortisol: Reduced cortisol levels: These supplements have been shown to help bring down elevated cortisol levels back into a healthier range. Improved mood: By regulating cortisol secretion, these supplements may help improve mood and reduce symptoms of anxiety and depression. Enhanced stress resilience: Adaptogenic supplements like rhodiola, ashwagandha, maca, and theanine can support the body’s ability to adapt to stressors, making it easier to cope with daily challenges. Better sleep quality: Lowering cortisol levels can contribute to improved sleep quality, helping you feel more rested and rejuvenated. While these supplements can be beneficial for reducing cortisol levels, it’s important to remember that they should not replace a healthy lifestyle. Regular exercise, proper nutrition, adequate sleep, and stress management techniques are all essential for maintaining balanced cortisol levels. Other natural ways to reduce your cortisol levels Exercise Regularly One effective way to regulate your cortisol levels is through regular exercise. Engaging in physical activity helps to reduce stress and promote the release of endorphins, which are natural mood boosters. Whether it’s going for a brisk walk, playing a sport, or dancing to your favorite tunes, find an activity that you enjoy and make it a part of your routine. Incorporate Stress Management Techniques Managing stress is crucial for
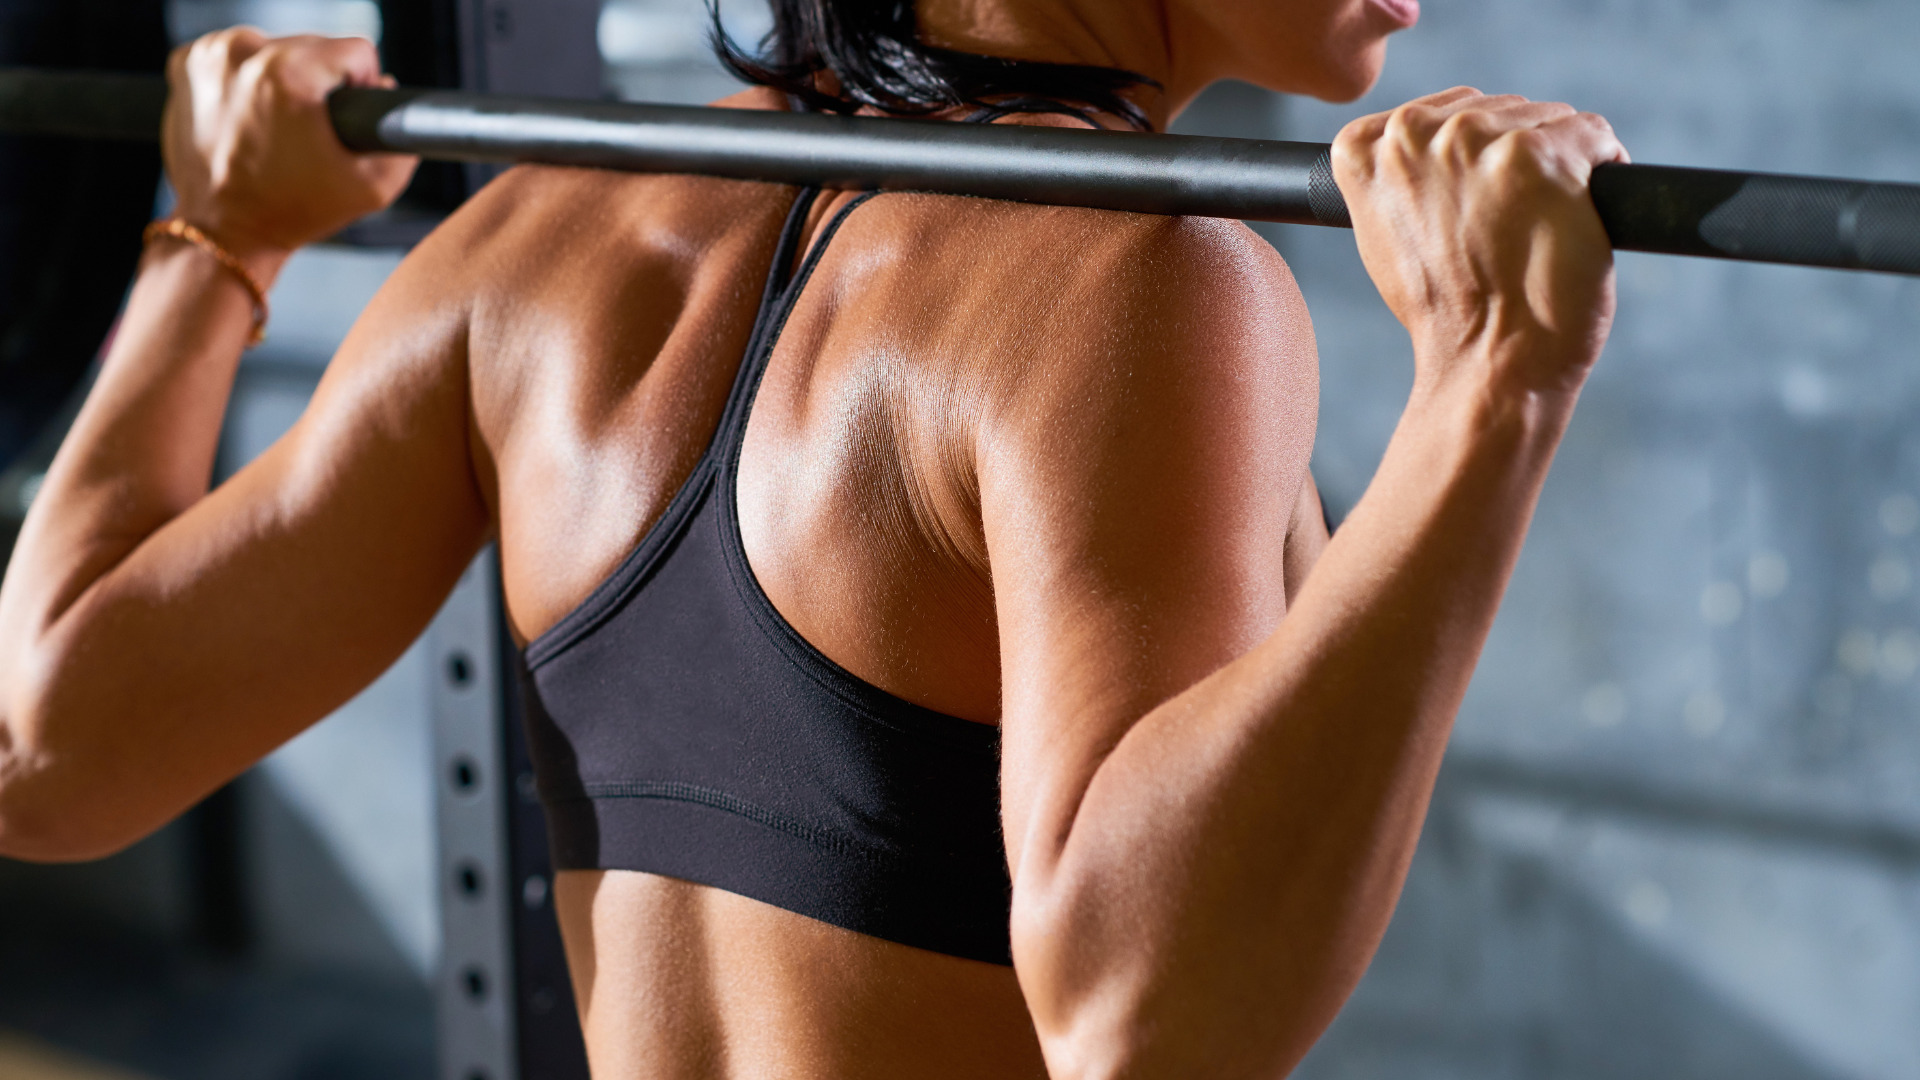
Exercises for Back Fat: 9 Effective Tips
Exercises for Back Fat: 9 Effective Tips Struggling with back fat and looking for targeted exercises to help you get rid of it? Want to tone your glutes, lats, leg muscles, and shoulders? Excess fat in the back area can be stubborn, but with the right exercises, you can effectively target the lats and shoulders, reducing unwanted back fat and improving upper body body composition. By incorporating exercises that target your lats, arms, and shoulders into your routine, you’ll not only strengthen your back muscles but also engage other muscle groups like your legs. These exercises can be done on a bench. Say goodbye to back fat and hello to a more confident you with lifestyle changes that target your shoulders, arms, and plank exercises! Get ready to embark on a journey towards stronger shoulders, leg muscles, and arms as we explore a variety of effective exercises, including the plank, that will help you eliminate that pesky back fat once and for all. Understanding the Causes of Back Fat Factors Contributing to Back Fat Back fat can be a pesky problem that many people struggle with, especially around the shoulders and arms. Making changes to your workout routine, such as adding more sets, can help target and tone these areas. But have you ever wondered why certain areas, like the back, arms, and shoulder, are more prone to storing excess fat? These changes in fat distribution can be influenced by various factors, including genetics and lifestyle. So, when designing your workout routine, make sure to incorporate exercises that target these specific areas with multiple sets for optimal results. Let’s dive into the factors that contribute to the accumulation of back fat and understand why it can be so stubborn. One major factor is the position of our shoulders and arms. One of the main causes of back fat is excess body weight, which can also lead to flabby arms. When we consume more calories than our bodies need, they get stored as fat. It is important to engage in regular back exercises to strengthen the upper back muscles. Unfortunately, some individuals may find that their bodies tend to store this excess fat in their backs. This can happen due to genetic factors or simply because different people have different body shapes and tendencies. However, incorporating fat exercises and back exercises into your routine can help with fat loss, particularly in the upper back region. Hormonal Imbalances Genetics play a significant role in determining where our bodies store fat, including in the upper back. Incorporating specific back exercises can help target and strengthen this area. Some people may have a genetic predisposition to accumulate more fat in their backs compared to other areas. This means that even with regular exercise and a healthy diet, they may still struggle with back fat. Lifestyle choices also contribute to the development of back fat. Lack of physical activity and poor dietary habits can lead to weight gain overall, including in the back area. To combat upper body fat, incorporating fat exercises into your routine can be beneficial. Sitting for long periods without proper posture can also contribute to the formation of unsightly back fat deposits. Lack of Muscle Tone Having weak muscles in your back can make it easier for excess fat to accumulate there. Building strength through targeted exercises not only helps burn calories but also tones and strengthens the muscles in your back, reducing body fat. This can help reduce the appearance of back fat over time. High-Calorie Diets Consuming a diet high in calories, especially from unhealthy sources such as sugary drinks and processed foods, can contribute to the formation of back fat. These types of foods are often low in nutrients and high in empty calories, which can lead to weight gain and fat accumulation. Stress and Poor Sleep Stress and poor sleep have been linked to weight gain and difficulty losing excess fat. When we are stressed, our bodies release cortisol, a hormone that can increase appetite and promote fat storage. Lack of quality sleep can disrupt hormonal balance and metabolism, making it harder to maintain a healthy weight and reduce body fat. Incorporating fat exercises into your routine can help combat this issue. Effective Diet Tips for Reducing Back Fat To effectively reduce back fat, it’s important to make certain dietary changes. By incorporating these fat exercises into your routine and adopting healthy eating habits, you can work towards achieving a leaner and more toned back area with reduced body fat. Learn about Dietary Changes that can Aid in Reducing Back Fat One of the key aspects of reducing back fat is maintaining a healthy diet. This means making smart choices. By focusing on nutrient-dense options and avoiding processed or high-fat foods, you can support your body in shedding excess fat. Discover Nutrition Tips Specifically Targeted at Eliminating Excess Back Fat Certain nutrients play a crucial role in reducing back fat. Incorporating fat exercises into your diet can help speed up the process of reducing body fat. For example, increasing your intake of lean proteins such as chicken breast or tofu can promote muscle growth and aid in burning fat. Explore Healthy Eating Habits that Promote a Reduction in Unwanted Back Fat In addition to specific nutrients, developing healthy eating habits is essential for reducing back fat. One effective strategy for reducing body fat is portion control – being mindful of how much food you consume during meals. By listening to your body’s hunger cues and stopping when you’re satisfied, you can prevent overeating and support weight loss. Find out which Foods Can Help You Achieve Your Goal of a Leaner, More Toned Back Area Certain foods have been found to be particularly beneficial for reducing back fat due to their nutritional properties. Some examples include: Fruits and vegetables are beneficial for reducing body fat because they are low in calories but high in fiber, vitamins, and minerals. Opting for whole grain breads, rice, or pasta

Low Sugar Desserts for Thanksgiving: 20 Healthy Recipes
Low Sugar Desserts for Thanksgiving: 20 Healthy Recipes Buy on Amazon Imagine this: Thanksgiving dinner is over, and you’re craving a healthy dessert to top off the feast. How about some delicious pumpkin cookies, brownies, or cupcakes? But you also want to keep your sugar intake in check, especially if you have diabetes. It’s important to be mindful of the calories in your desserts and opt for healthy dessert options that align with diabetic exchanges. Don’t worry! We’ve got you covered with a delectable array of low-sugar desserts, including vanilla ice cream, that will satisfy your sweet tooth without the guilt. These desserts are suitable for individuals with diabetes and can be easily incorporated into diabetic exchanges. Plus, they are low in calories. From mouthwatering diabetic exchanges and fruit-based desserts to creative spins on classic diabetic exchanges favorites, we’ll explore a variety of options that are both tasty and low in sugar. These recipes are perfect for those with diabetes who are looking for nutritious and delicious options. Say goodbye to traditional high-sugar dessert recipes and hello to healthier alternatives that are low in calories and suitable for diabetic exchanges. These nutritious desserts don’t compromise on flavor. Whether you’re hosting Thanksgiving dinner or attending as a guest, these dessert recipes will add a touch of sweetness to your holiday celebration without sending your blood sugar levels soaring. These dessert recipes are perfect for individuals who need to manage their blood sugar levels, as they are made with diabetic exchanges and are low in starch and calories. Additionally, these recipes prioritize nutrition without compromising on taste. Get ready for a delightful journey through the world of low-sugar dessert recipes for Thanksgiving! Discover delicious options that are suitable for diabetic exchanges and packed with nutrition. Diabetic Carrot Cake If you’re a fan of carrot cake but need a low-sugar recipe that is also low in calories, don’t worry! This carrot cake recipe is both delicious and nutritious. It is low in fat and packed with essential nutrients. You can still enjoy this classic dessert recipe without compromising your nutrition and adding unnecessary fat and calories. Moist and Flavorful Carrot Cake The key to a great carrot cake lies in its moisture, flavor, and nutrition. Traditional recipes often call for a significant amount of sugar, which can be problematic for those concerned about calories, nutrition, fat, cholesterol, and diabetes. However, there are alternative sweeteners available that can provide the desired sweetness without negatively impacting blood sugar levels or adding unnecessary calories, sodium, cholesterol, and nutrition. One option for improving nutrition is to use natural sweeteners like stevia or monk fruit extract. These sweeteners can help reduce calories and fat intake while still providing a satisfying taste. These alternatives have minimal impact on blood sugar and can be used in place of refined sugars in baking recipes. Additionally, they are low in calories and fat, and high in nutrition and fiber. You can experiment with spices like cinnamon and nutmeg to enhance the flavor profile of your carrot cake while also considering its nutritional value, such as its fiber content, fat content, and calorie count. Diabetic-Friendly Sweeteners It’s essential to choose sweeteners that are suitable for diabetics, while also considering their calorie content, nutritional value, cholesterol levels, and fiber content. Here are some popular options: Stevia: This natural sweetener, derived from the leaves of the Stevia rebaudiana plant, is low in sodium and cholesterol and a good source of fiber and nutrition. It has zero fat and calories and doesn’t raise blood sugar levels. Additionally, it is rich in nutrition and fiber, while being low in cholesterol. Monk Fruit Extract: Also known as Luo Han Guo, monk fruit extract is another excellent choice for diabetics looking to add fiber, nutrition, and low calories to their diet while managing cholesterol levels. It contains natural compounds called mogrosides that provide sweetness without affecting blood glucose levels. Additionally, this fruit is low in cholesterol and calories, making it a nutritious choice. Furthermore, it is also high in fiber, which is important for maintaining a healthy diet. Erythritol: This sugar alcohol is commonly used as a substitute for table sugar, with fewer calories and no cholesterol. It also has a low amount of sodium and provides some fiber. It has fewer calories and is low in fat, making it a great choice for those watching their nutrition. Additionally, it doesn’t cause significant spikes in blood sugar levels, making it suitable for individuals concerned about cholesterol and fiber intake. By using these diabetic-friendly sweeteners, you can enjoy a moist and flavorful carrot cake while keeping your blood sugar under control. Plus, this cake is low in calories and fat, making it a healthy choice for those watching their nutrition. Additionally, the carrot cake is packed with fiber, which is beneficial for digestion and overall health. Cream Cheese Frosting No carrot cake is complete without its signature cream cheese frosting. The delicious treat adds flavor and texture to the cake, while also adding fat and calories. However, it’s important to be mindful of portion sizes and overall nutrition when enjoying this indulgent dessert. Additionally, keep in mind that cream cheese frosting typically contains cholesterol, so moderation is key. Fortunately, you can still enjoy this delectable topping while staying within your diabetic diet, without compromising on nutrition, fat, cholesterol, and sodium. Here’s how: Use low-fat cream cheese to keep the calorie, fat, cholesterol, and sodium content in check. Sweeten with alternative sweeteners: Instead of powdered sugar, use a diabetic-friendly sweetener like powdered stevia or erythritol to achieve the desired sweetness. This is a great way to reduce the amount of fat and cholesterol in your recipes. Enhance the taste of your frosting by adding a splash of pure vanilla extract, which adds flavor and does not contain any fat or cholesterol. This will give it a rich and aromatic flavor without adding any additional sugar, fat, or cholesterol. With these modifications, you can create a creamy and tangy cream cheese

Best Vitamins to Build Muscle Growth: Boost Your Gains
Best Vitamins to Build Muscle Growth: Boost Your Gains Are you looking to maximize your muscle gains? Wondering which vitamins and protein supplements can help you achieve your muscle growth goals and weight gainers for muscle gain? Proper nutrition, including enough protein from protein supplements, plays a vital role in supporting muscle growth during weight training exercise programs. Certain vitamins and minerals are also essential for muscle development. It’s not just about hitting the gym hard. To optimize muscle tissue repair, growth, and overall performance, it is important to provide your body with enough protein. Incorporating whey protein into your exercise program can help ensure you are consuming the necessary calories for optimal results. Vitamins like vitamin B12 are crucial for exercise performance, proper muscle contraction, and energy production. Minerals like calcium, magnesium, and potassium play a vital role in maintaining strong and healthy muscle cells. It is also important to ensure you consume enough protein for optimal exercise performance. Iron, magnesium, and vitamin B12 are necessary for oxygen transport through red blood cells, ensuring optimal endurance during workouts at the gym. Vitamin deficiencies can hinder performance. Discover how magnesium, iron, and calories impact your muscles, their effects on performance, and what happens when there is a deficiency. Research has shown the importance of these nutrients for optimal muscle function. Get ready to take your muscle building and muscle gain journey to the next level with the power of proper nutrition! Achieve your muscle growth goals by focusing on consuming the right amount of calories. Importance of Essential Amino Acids for Muscle Recovery Amino acids play a crucial role in muscle repair and recovery, making them essential for anyone looking to build muscle growth. Additionally, research has shown that iron and vitamin deficiency can hinder muscle growth. Therefore, it is important to ensure that you are meeting your body’s need for these nutrients. These building blocks of protein, rich in iron, are responsible for rebuilding and repairing muscles after intense workouts. Research shows that consuming enough calories is crucial for maintaining a healthy weight. Among the various types of amino acids, essential amino acids are particularly important for muscle gain as they cannot be produced by the body and must be obtained through diet or supplementation. This is where iron from the pharmacy comes into play, as it is crucial for weight management. Amino acids aid in muscle repair and recovery. After an intense workout, our muscles undergo microscopic damage. This is where amino acids step in to help with muscle gain and the repair process. They can be found at your local pharmacy. Amino acids act as the building blocks for protein synthesis, which is necessary for muscle tissue repair. By providing the necessary materials, amino acids support the regeneration of damaged muscle fibers and promote faster recovery. Essential amino acids are crucial for rebuilding muscles. While all amino acids play a role in muscle recovery, essential amino acids (EAAs) are especially vital. EAAs, essential for muscle gain, include nine specific amino acids that cannot be synthesized by our bodies on their own. These include histidine, isoleucine, leucine, lysine, methionine, phenylalanine, threonine, tryptophan, and valine. Ensuring an adequate intake of these essential amino acids is key to promoting optimal muscle growth and repair. Role of amino acids in reducing muscle soreness post-workout. One common side effect of intense exercise is delayed onset muscle soreness (DOMS), which can make it difficult to perform subsequent workouts or daily activities comfortably. Fortunately, amino acid supplementation has been shown to alleviate this discomfort by reducing inflammation and aiding in the removal of waste products from muscles. By mitigating DOMS symptoms, amino acids enable individuals to recover more quickly and continue their fitness journey without unnecessary pain or discomfort. How essential amino acids support the growth of lean muscle mass. Building lean muscle mass requires not only regular strength training but also adequate nutrition. Essential amino acids play a crucial role in this process by stimulating muscle protein synthesis and promoting the growth of lean muscle tissue. Leucine, in particular, has been identified as a key amino acid for triggering protein synthesis and maximizing muscle growth. By incorporating essential amino acids into their diet or supplementation routine, individuals can optimize their muscle-building potential. Harnessing the Power of Branched-Chain Amino Acids (BCAAs) for Muscle Growth BCAAs, or branched-chain amino acids, are an essential tool in the quest to build lean muscle mass. These powerful compounds play a crucial role in promoting protein synthesis and muscle growth, making them a must-have supplement for anyone looking to maximize their gains at the gym. BCAAs promote protein synthesis and muscle growth Protein is king. BCAAs are unique because they contain three essential amino acids: leucine, isoleucine, and valine. These amino acids serve as the building blocks for proteins in your body and are especially effective at stimulating muscle protein synthesis. By taking BCAAs before or after your workout, you provide your muscles with the necessary fuel to repair and grow. This increased protein synthesis leads to greater gains in lean body mass over time. So if you’re looking to pack on some serious muscle, incorporating BCAAs into your supplement routine is a smart move. Benefits of BCAAs in reducing exercise-induced fatigue In addition to promoting muscle growth, BCAAs also offer significant benefits. When you push yourself during intense workouts, your body produces tryptophan—an amino acid that can make you feel tired and fatigued. However, by supplementing with BCAAs, you can actually reduce the amount of tryptophan that enters your brain. This helps combat fatigue and allows you to train harder for longer periods without feeling completely drained. Leucine, isoleucine, and valine: the key components of BCAAs Let’s break down the three key components of BCAAs: leucine, isoleucine, and valine. Leucine: Known as the “king” of amino acids, leucine is the most important component of BCAAs. It activates a protein called mTOR, which plays a crucial role in stimulating muscle protein synthesis. Isoleucine: Isoleucine helps regulate blood sugar
HIIT Workouts for Beginners – Quick & Effective!
HIIT Workouts for Beginners – Quick & Effective! Did you know that just a few minutes of high-intensity interval training (HIIT) with cardio, sprints, fast feet, and tempo squats can deliver the same benefits as longer, steady-state workouts? HIIT, also known as high intensity workouts, has taken the fitness world by storm due to its effectiveness. Incorporating a combination of weight training and cardio, these intense exercise work sessions deliver impressive results. These short bursts of intense exercise, also known as high intensity workouts or HIIT exercises, followed by brief periods of rest are not only time-efficient but also incredibly effective for beginners looking to improve their fitness levels quickly. Incorporating just a few minutes of HIIT into your routine can lead to great HIIT results. Incorporating HIIT into your exercise work can help you burn calories and lose weight efficiently while boosting your cardiovascular health. This workout plan is particularly effective when combined with resistance training to target fat. The best part? HIIT workouts, which combine weight training and resistance training, can be done with various exercises, making them versatile and adaptable to your preferences and fitness level. Incorporating both cardio and tempo squats, these workouts offer a comprehensive approach to improving overall fitness. Whether you’re a beginner or an experienced exerciser, incorporating a HIIT workout plan with resistance training and cardio can offer a great way to challenge yourself and push your limits. From weight training to high-intensity intervals, this type of exercise routine can help you achieve your fitness goals. So if you’re ready to kickstart your fitness journey with some heart-pumping cardio and calorie-burning action, let’s dive into the world of HIIT workouts for beginners! Incorporating cardio, weight training, resistance training, and exercises that target the hamstrings, these workouts are a great way to get started on your fitness goals. Benefits of HIIT Training for Beginners HIIT workouts, also known as High-Intensity Interval Training, are a fantastic way for beginners to kickstart their fitness journey and engage in full body cardio exercises that target the hamstrings. These workouts typically last around 20-30 mins and provide a high-intensity workout for optimal results. These hiit exercises involve short bursts of intense exercise, making them perfect for beginner hiit training. Each exercise lasts only a minute, followed by brief periods of rest or low-intensity activity. If you’re new to the world of HIIT, you’ll be thrilled to know that there are numerous benefits awaiting you. HIIT is a form of exercise work that combines cardio and resistance training for maximum results in a short amount of time. In just a few mins, you can get a full-body workout that boosts your heart rate and builds muscle. Let’s dive into why HIIT training is perfect for beginners looking to exercise work and target cardio. HIIT workouts typically last for just a few mins, making them ideal for those with limited time. Increased Cardiovascular Endurance and Improved Heart Health One of the best ways to improve cardiovascular endurance and heart health is by incorporating HIIT into your fitness routine. HIIT workouts typically last for a duration of minutes and are known for their effectiveness in improving overall fitness. By engaging in high-intensity interval training (HIIT exercises), your heart has to work harder to pump blood throughout your body, effectively strengthening it over time. HIIT training is a great way to incorporate cardio into your workout routine, especially for beginners looking for a beginner HIIT workout. As a beginner, incorporating hiit exercises into your workout routine can help lay a solid foundation for better overall cardiovascular fitness. Whether you’re doing a hiit session or a hiit workout high, these exercises are the best choice to improve your fitness level. Boosted Metabolism and Weight Loss Support For those looking to shed pounds or maintain a healthy weight, HIIT workouts are the best tool for cardio. The best beginner HIIT exercises significantly ramp up your metabolism during and even after your workout session. Even after completing a high-intensity interval training (HIIT) workout, your body keeps burning calories at a high rate. This makes HIIT workouts the best option for beginners looking to burn calories quickly. Regular HIIT sessions can help you achieve your desired weight loss goals and work best for weight loss efforts. Convenience and Time Efficiency As a beginner with a busy schedule, finding time for the best high-intensity interval training (HIIT) workout can be challenging. Luckily, HIIT workouts come to the rescue with their shorter durations and maximum efficiency. Unlike traditional cardio exercises that may require hours at the gym, HIIT allows you to complete an effective workout in as little as 20 minutes or less. This beginner HIIT workout makes it easier than ever before to fit exercise into your hectic lifestyle without sacrificing results. Mood Enhancement through Endorphin Release Exercise, especially a hiit workout, has long been associated with improved mood and mental well-being due to the release of endorphins, often referred to as the “feel-good” hormones. HIIT workouts, with their intense bursts of activity, can trigger the release of these endorphins, leaving you feeling energized and positive after each session. As a beginner, incorporating a hiit workout into your fitness journey can provide an extra boost in mood and help you stay committed. Improved Strength and Stamina As a beginner starting out on your fitness journey, it’s natural to want to see progress and improvements over time in your HIIT workout. With consistent practice of HIIT workouts, you can expect significant enhancements in both strength and stamina. The high-intensity intervals work challenge your muscles and push them beyond their comfort zone, leading to increased strength and endurance over time. This not only helps you perform better during workouts but also carries over into everyday activities. Best 19-Minute HIIT Workout for Beginners If you’re new to HIIT workouts and looking for a quick and effective routine to get started, this 19-minute workout is perfect for you. It includes a warm-up, four intervals, and a cool-down period, making it

Low Sugar Candy Options for Halloween: Top 10 Healthy Picks!
Low Sugar Candy Options for Halloween: Top 10 Healthy Picks! Imagine this: it’s Halloween night, and you’re surrounded by a sea of colorful candy wrappers filled with caramels, smarties, and other sweet treats. Your sweet tooth is calling, but you’re determined to make healthier choices this year. Luckily, there are plenty of healthy candy options and candy alternatives available that can satisfy your cravings without the guilt. Say goodbye to artificial sweeteners and hello to delicious and guilt-free candy treats. Don’t worry, I’ve got you covered! Who says you can’t enjoy delicious treats without excessive sugar? There are plenty of healthy candy options available that use alternative sweeteners. Instead of reaching for a traditional candy bar, consider trying some candy alternatives that are better for your health. With these healthy candy treats, you can satisfy your cravings while keeping your sugar intake, calories, and carbs in check. In this blog post, we’ll explore the various sweeteners used in healthy candy bars and explain why they can be a guilt-free choice for your Halloween celebrations. So get ready to indulge without the sugar rush! Say goodbye to high-sugar candies and embark on a guilt-free Halloween adventure with these low sugar options. These healthy alternatives have fewer carbs and calories, making them a great choice for those watching their food intake. Buckle up and get ready to discover a whole new approach to satisfying your sweet tooth while managing your fat, calories, fiber, and carbs. Benefits of Choosing Low Sugar Halloween Candy One of the most exciting pieces is indulging in delicious treats that are low in fat and calories but high in protein. However, the excessive consumption of sugary candies can have negative effects on our health, particularly our dental health, blood sugar levels, and the amount of carbs, calories, fat, and grams we consume. That’s why opting for low sugar, low carbs, low calories, and low fat candy options with high fiber content for Halloween can be a smart choice. Reduce the Risk of Dental Issues We all know that consuming too many carbs and fat can wreak havoc on our teeth, as well as increase calories and grams intake. The high sugar content in traditional candies provides fuel for harmful bacteria in our mouths, leading to tooth decay and cavities. These candies are high in carbs and calories, which can contribute to weight gain. Additionally, they are low in fiber and high in fat, making them an unhealthy choice for our overall health. By choosing low sugar candy options, you can significantly reduce the risk of dental issues while still satisfying your sweet tooth. These options are low in carbs, calories, and fat, and often high in fiber. Pro Tip: Look for candies that are sweetened with natural alternatives like stevia or xylitol, which have fewer carbs, calories, and fat and more fiber. They are also less likely to contribute to tooth decay. Enjoy Flavors without Negative Health Effects Indulging in the flavors of Halloween doesn’t have to come at the expense of your health. You can enjoy the treats while being mindful of the calories, fat, serving size, and fiber content. Low sugar candies provide a guilt-free way to enjoy the taste and excitement of Halloween treats while reducing the intake of calories, carbs, fat, and increasing fiber. Example: Choose dark chocolate treats over milk chocolate ones for fewer calories, less fat, more fiber, and fewer carbs. Dark chocolate is a healthier choice because it contains less added sugars and is rich in antioxidants, making it low in fat, calories, and carbs while high in fiber. Keep Blood Sugar Levels Stable High-sugar foods cause spikes in blood glucose levels, which can lead to an increase in carbs and calories consumed. These spikes are followed by crashes that leave us feeling tired and sluggish due to the high amounts of fat and grams present in these foods 1. Trader Joe’s Dark Chocolate Peanut Butter Cups Buy on Amazon If you’re looking for a delicious treat that satisfies your sweet tooth without the guilt, Trader Joe’s Dark Chocolate Peanut Butter Cups are the perfect choice. With only [fat grams] of fat and [calories] per serving, they are a guilt-free indulgence. These delectable candies combine the richness of dark chocolate with a creamy peanut butter filling, creating an irresistible flavor explosion in every bite. With their low fat and calorie content, these candies make for a guilt-free treat. Each serving is also packed with carbs to give you an energy boost. Rich Dark Chocolate and Creamy Peanut Butter Filling Trader Joe’s Dark Chocolate Peanut Butter Cups are a delicious treat with a rich and creamy peanut butter center. Each serving contains a satisfying amount of fat and protein, making them a satisfying snack. The serving of this delicious dish contains a low amount of fat and only a few grams of fiber, creating a harmonious balance that is sure to delight your taste buds. Each serving delivers a satisfying blend of sweetness and nuttiness, with low fat and calories and high fiber content, making it hard to resist reaching for another. Guilt-Free Indulgence One of the biggest advantages of Trader Joe’s Dark Chocolate Peanut Butter Cups is their low sugar content, which means they have fewer calories and grams of fat and carbs. While traditional peanut butter cups can be loaded with sugar and calories, these guilt-free treats are low in fat, carbs, and grams. They are made with less sugar and fewer calories than their counterparts, allowing you to enjoy a sweet treat without worrying about excessive sugar intake. These treats have reduced carbs and higher fiber content, with only a few grams per serving. Classic Taste with Less Sugar Despite having reduced sugar content, Trader Joe’s Dark Chocolate Peanut Butter Cups still contain the same classic taste we all know and love, while also being low in calories, carbs, and grams of sugar, and high in protein. The combination of rich dark chocolate and creamy peanut butter ensures

How to Calm Anxiety: 14 Tips for Control
How to Calm Anxiety: 14 Tips for Control Anxiety, including panic disorder, a common mental health condition characterized by excessive worry and heightened stress levels, can feel overwhelming and debilitating. It is a response to a perceived threat. But here’s the good news: there are effective strategies to help you calm excessive worry and reduce stress levels, allowing you to regain control of your life even if you suffer from panic disorder or feel threatened. By understanding the causes and symptoms of excessive worry, you can take proactive steps towards managing anxiety and improving your overall well-being. Excessive worry can lead to elevated stress levels and impact brain chemistry. Additionally, it is important to be mindful of the effects of caffeine on anxiety levels. Therapy, medication, and lifestyle changes are powerful tools for people with anxiety disorder to manage stress levels and reduce alcohol consumption. Therapy provides a safe space for people with anxiety disorders to explore their thoughts and emotions while learning coping mechanisms. This can be especially helpful for individuals who may turn to alcohol as a way to manage their anxiety. Being part of a therapy group can provide additional support and understanding from others who are going through similar experiences. Medication can help regulate brain chemistry, reducing anxiety symptoms. Lifestyle changes such as exercise, mindfulness practices, healthy sleep habits, and caffeine consumption contribute to long-term anxiety management for people in a group setting. Remember, you’re not alone in this battle against anxiety. With the right support and techniques, people can find relief and live a fulfilling life, even if they consume caffeine. Recognizing Symptoms of Anxiety and Panic Attacks Recognizing the symptoms of anxiety and panic attacks in people who consume caffeine is crucial for early intervention and effective treatment. By understanding the physical and emotional signs, people can identify when anxiety is taking hold and take steps to calm themselves down. Caffeine can exacerbate these symptoms, so it’s important for individuals to be mindful of their caffeine intake. Let’s dive into some common symptoms of anxiety and panic attacks to help people better recognize them. Common Symptoms of Anxiety Anxiety is a condition that affects people, characterized by excessive worry, restlessness, and difficulty concentrating. It can manifest in various ways for people, both physically and emotionally. Here are some common symptoms: Excessive worrying: People feeling constantly on edge or worrying excessively about everyday situations. Restlessness: Being unable to relax or feeling restless. Difficulty concentrating: Many people are finding it hard to focus or experiencing mind blanks. Irritability: Feeling easily irritated or becoming agitated over small things. Muscle tension: Tightness in muscles, often leading to headaches or body aches. Sleep disturbances: Having trouble falling asleep, staying asleep, or experiencing restless sleep. These symptoms may vary from person to person, but they often interfere with daily life activities and cause distress. Understanding Panic Attacks Panic attacks are intense episodes that come on suddenly without warning. They usually reach their peak within minutes but can last longer in some cases. During a panic attack, you may experience the following symptoms: Rapid heartbeat: Your heart may start pounding rapidly or feel like it’s racing. Shortness of breath: You may struggle to catch your breath or feel like you’re suffocating. Chest pain or discomfort: A tightness or pressure sensation in your chest may occur. Sweating: Profuse sweating even when not engaging in physical activity. Trembling or shaking: Uncontrollable trembling or shaking of the body. Dizziness or lightheadedness: Feeling faint, dizzy, or lightheaded. Nausea or stomach distress: Upset stomach, queasiness, or even vomiting. Fear of losing control: A sense of impending doom or fear of going crazy. Fear of dying: Feeling like you’re about to die or that something terrible is happening. Panic attacks can be terrifying and overwhelming, often leading individuals to seek immediate medical attention. The Importance of Recognizing Symptoms Recognizing the symptoms of anxiety and panic attacks is crucial for several reasons: Early intervention: Identifying symptoms early allows for prompt intervention and treatment, preventing the condition from worsening. Effective treatment: Understanding the signs helps healthcare professionals provide appropriate treatment tailored to your needs. Reducing distress: Recognizing symptoms allows you to take steps to calm yourself down and manage anxiety more effectively. Seeking support: Knowing the signs enables you to reach out to loved ones for support and understanding. By recognizing these symptoms, you take a significant step towards managing your anxiety and seeking help when needed. Seeking Professional Help for Untreated Anxiety Untreated anxiety can have a significant impact on your daily life and overall well-being. It’s important to recognize that excessive worry, fear, and panic attacks are not something you have to face alone. Seeking professional help from a mental health professional can provide valuable guidance and support in managing your anxiety. It’s crucial to consult with a qualified health professional who specializes in anxiety disorders. They have the knowledge and expertise to assess your symptoms accurately and develop an individualized treatment plan tailored to your needs. Therapy: A Pathway to Calmness One of the most effective treatments for anxiety disorders is therapy, specifically cognitive-behavioral therapy (CBT). CBT focuses on identifying negative thought patterns and behaviors that contribute to anxiety and teaches strategies to challenge and replace them with more positive and rational thoughts. During CBT sessions, you’ll work closely with a therapist who will help you understand the root causes of your anxiety. They will guide you through various techniques such as relaxation exercises, breathing techniques, and exposure therapy. These techniques aim to reduce anxiety symptoms gradually by exposing you to feared situations in a controlled manner. Therapy provides a safe space for individuals struggling with anxiety to express their fears, worries, and concerns openly without judgment. It equips them with coping mechanisms that empower them to manage their symptoms effectively in everyday life. Medication: When Extra Support is Needed In some cases, medication may be prescribed alongside therapy for treating severe or persistent anxiety symptoms. Medications such as selective serotonin reuptake inhibitors (SSRIs) or

Lazy Girl Exercises: 5 Full-Body Workouts
Lazy Girl Exercises: 5 Full-Body Workouts Tired of complicated fitness routines that require hours at the gym? Try an easy lazy girl workout that only takes a few minutes. This arm workout is perfect for those looking for a quick and effective way to tone their arms. Lazy girl exercises are here to save the day. These easy yet effective glute bridges and stretch routines are perfect for busy women who want to achieve their fitness goals without spending endless hours sweating it out with weights. The best part? You don’t need any fancy gym equipment or a personal trainer for an easy, lazy girl workout. Try this 10-minute arm workout. With lazy girl exercises, you can increase your arm workout strength and flexibility by using weights at your own pace, right in the comfort of your own home. Whether you’re a beginner or have been on a fitness journey for a while, these lazy girl workout moves cater to all levels of fitness. Incorporate these arm workout exercises to tone your abs. Full-body lazy girl exercises at home Engage multiple muscle groups with easy-to-follow workouts Who says you need to spend hours at the gym to get a full-body workout? Whether you’re looking to tone your abs, strengthen your arms, or even exercise in bed, there are plenty of options available. With these lazy girl arm workout exercises, you can engage multiple muscle groups right from the comfort of your own bed. These easy-to-follow arm workouts are perfect for those days when you just don’t feel like leaving the house. Whether you’re looking to tone your arms or build strength, these exercises will help you achieve your fitness goals. Stay motivated and get fit with these convenient at-home arm workouts. One of the best lazy girl exercises is squats. Not only do they work your lower body, but they also engage your core and even your upper arms if you add some weights. This lazy girl workout is perfect for those who want to stay fit without spending too much time or effort. Justiz Start by standing with your feet shoulder-width apart for an effective arm workout, then lower yourself down as if you’re sitting back into an imaginary chair. Make sure to keep your knees aligned with your toes during your arm workout and push through your heels as you rise back up. Another great arm workout exercise that targets multiple muscle groups is lunges. Lunges work your glutes, hamstrings, quads, and calves all at once. To do a lunge, step forward with one foot and lower your body until both knees are bent at a 90-degree angle. Push through the heel of your front foot to return to the starting position and repeat on the other side. Burn calories and tone your body without leaving the house Lazy girl exercises aren’t just about convenience; they’re also effective for burning calories and toning your body. By incorporating these simple yet powerful workouts into your routine, you can achieve great results without ever stepping foot outside. Planks are an excellent exercise for engaging multiple muscle groups while also strengthening your core. To perform a plank, start in a push-up position with your hands directly under your shoulders and toes on the ground. Engage your abs and hold this position for as long as possible while maintaining proper form. In addition to planks, mountain climbers are another fantastic exercise that gets your heart rate up while working various muscles simultaneously. Begin in a push-up position and bring your right knee towards your chest, then quickly switch to the left knee. Continue alternating legs in a running motion while keeping your core engaged. Incorporate squats, lunges, and planks into your routine for a complete workout To get the most out of your lazy girl exercises, it’s essential to incorporate a variety of movements that target different muscle groups. By combining squats, lunges, and planks into your routine, you can ensure a well-rounded full-body workout. Start with a set of squats to engage your lower body and core. Follow this up with lunges to work your legs even further. Finally, finish off with planks to strengthen your core and upper body. By combining these exercises in a circuit-style workout, you’ll keep yourself engaged and maximize the benefits. Stay motivated with fun and time-efficient exercises One of the biggest challenges. But with these fun and time-efficient lazy girl exercises, you’ll find it easier than ever to stick to your fitness routine. Dance workouts are an excellent way to make exercise enjoyable while working multiple muscle groups at once. There are plenty of online dance tutorials available that cater to different styles such as hip-hop or Zumba. So put on some music that gets you moving and have fun shaking off those calories! High-intensity interval training (HIIT) is another fantastic option for time-efficient workouts that deliver results. With HIIT, you alternate between short bursts of intense exercise followed by brief periods of rest or low-intensity activity. This type of workout not only saves time but also keeps boredom at bay by constantly changing up the exercises 5-minute lazy girl workouts for quick results In today’s fast-paced world, finding time to exercise can be a challenge. But just because you’re a busy girl doesn’t mean you can’t stay fit and healthy. With these 5-minute lazy girl workouts, you can squeeze in a quick exercise session even on your busiest days. So grab your workout gear and get ready to break a sweat! Squeeze in a Short Exercise Session During Busy Days We all have those days when it feels like there aren’t enough hours in the day. But that doesn’t mean you have to skip your workout altogether. By incorporating short bursts of exercise into your day, you can still reap the benefits of physical activity without sacrificing too much time. Set aside just five minutes in the morning or during your lunch break to do a quick workout. Choose exercises that target multiple

Shrink Your Waist: Best Ways to Reduce Size
Shrink Your Waist: Best Ways to Reduce Size Ready to achieve a smaller waistline and boost your confidence with abdominal exercises? These body weight loss exercises will help you reach and maintain a healthy weight. Incorporate these body exercises into your routine for maximum results. In this ultimate guide, we’ll reveal effective strategies for abdominal exercises to help you shrink your waist and achieve a more defined figure. These body weight loss exercises will contribute to a healthy weight and overall body fitness. Say goodbye to stubborn belly fat and hello to a trimmer, healthier you with effective body weight loss techniques. With the guidance of a certified personal trainer, you can achieve your fitness goals and enhance your waist training routine. Incorporating regular cardio exercises into your workout routine will help you burn calories and shed unwanted pounds. A smaller waist isn’t just about aesthetics; it’s also crucial for overall health. One way to reduce visceral fat and achieve a smaller waist is through practicing yoga regularly. Incorporating yoga into your weekly routine can be an effective method for targeting and reducing excess belly fat. Excess abdominal fat, including subcutaneous and visceral fat, can increase the risk of various health issues, such as waist training and yoga. We’re here to show you how to tackle that stubborn belly bulge through waist training and yoga. From targeted exercises like side planks to creating a calorie deficit through diet and exercise, we’ll cover all the bases. Get ready for actionable tips and tricks that will help you shed those inches around your waist in no time. So buckle up and get ready for a transformative journey towards a slimmer waistline. Risks of Waist Trainers and Fast Solutions Potential Dangers of Waist Trainers Waist trainers have gained popularity in recent years as a quick solution for shrinking your waistline. However, it’s important to be aware of the potential dangers associated with their use. These garments are typically made of tight-fitting materials that compress your midsection, aiming to create an hourglass figure. While they may provide temporary results, there are risks involved. One major concern is that waist trainers can restrict your breathing and limit your lung capacity. The tight compression around your abdomen can make it difficult to take deep breaths, leading to shallow breathing patterns. This can impact the oxygen flow in your body and potentially cause dizziness or fainting spells. Another risk is that waist trainers can put excessive pressure on your internal organs. The constant compression can disrupt their proper function and lead to discomfort or even more serious health issues over time. Organs like the liver, kidneys, and intestines need space and freedom of movement to perform optimally. Unsustainability of Fast Solutions While the promise of quick results may be tempting, it’s essential to understand that fast solutions for waist reduction are often unsustainable in the long run. Waist trainers offer temporary changes in appearance but do not address the underlying factors contributing to excess weight or lack of muscle tone. Relying solely on waist trainers without making lifestyle changes such as adopting a healthy diet and engaging in regular exercise will likely lead to disappointment once you remove the garment. Your waistline may return to its original size once you stop using the trainer since no real changes have occurred within your body. Moreover, fast solutions often neglect overall health considerations. It’s crucial to prioritize holistic well-being rather than focusing solely on aesthetics. Sustainable weight loss involves creating a balance between physical activity, nutrition, mental well-being, and self-care practices. Risks Associated with Solely Relying on Waist Trainers Depending solely on waist trainers for shrinking your waistline can pose several risks to your health and body image. Firstly, it may contribute to an unhealthy obsession with achieving an unrealistic body shape. Constantly striving for an unnaturally small waist can lead to negative body image, low self-esteem, and even the development of eating disorders. Relying solely on waist trainers may discourage you from adopting healthier habits that promote overall well-being. Instead of focusing on nourishing your body with nutritious foods and engaging in regular exercise, you might become fixated on finding shortcuts or quick fixes. Lastly, wearing waist trainers for extended periods can cause discomfort and skin irritations due to prolonged pressure on the skin. This can lead to rashes, chafing, or even more severe conditions like bruising or damage to the underlying tissues. Healthier Alternatives for Waist Reduction Instead of resorting to fast solutions like waist trainers alone, it’s advisable to explore healthier alternatives that yield better and safer results in the long term. Here are a few options worth considering: Regular Exercise: Engaging in a combination of cardiovascular exercises (such as running or swimming) and strength training (like weightlifting) can help burn calories, build muscle tone, and reduce overall body fat—including around the waistline. Balanced Diet: Adopting a balanced diet rich in whole foods—such as fruits, vegetables, lean proteins, whole grains—can support healthy weight loss by providing essential nutrients while reducing excess calorie intake. Core Strengthening Exercises: Targeted exercises like planks, crunches, or yoga poses that engage the core muscles can help strengthen abdominal muscles and improve posture. Consistency & Patience: Remember that sustainable changes take time. Be patient with yourself throughout your journey towards a healthier lifestyle. By prioritizing these alternatives over quick fixes like waist trainers alone, you can achieve better, safer, and more long-lasting results for waist reduction. Effective Exercises for a Smaller Waist To achieve a smaller waist, it’s essential to incorporate targeted exercises into your fitness routine that specifically focus on toning and trimming your midsection. By engaging in core-strengthening workouts, you can maximize your efforts in shrinking your waistline and achieving the desired results. Let’s explore some effective exercises that will help you on your journey to a smaller waist. Abdominal Exercises: Crunches and More Abdominal exercises are key. One of the most popular exercises is the crunch, which targets the rectus abdominis muscles responsible for giving you those coveted

Inner Thigh Exercises: Sculpt and Tone Legs
Inner Thigh Exercises: Sculpt and Tone Legs Are you tired of neglecting your hamstrings and inner thighs during your leg exercises? It’s time to incorporate body exercises that target these areas. Consider working with a personal trainer to ensure you’re getting the most out of your workout routine. It’s time to give them the attention they deserve! Targeting your inner thighs and hamstrings with specific exercises not only helps tone and strengthen those muscles but also offers a range of benefits for your overall fitness. Whether you’re working out with a personal trainer or doing a quick couple workout, incorporating a 10-minute leg workout into your routine can make a significant difference. Incorporating inner thigh exercises into your workout routine can improve the stability and flexibility of your hips, engage the hamstrings and hip abductors, activate the adductor muscles, and target the outer thighs, outer glutes, and pelvic floor. These couple workout exercises can contribute to building a strong pelvic floor, enhancing core strength, and even improving posture by targeting the hamstrings and hip adductors. Get ready to discover effective thigh exercises that will help you target your hamstrings, glutes, and other key muscles. These exercises are perfect for a couple workout, and they offer numerous benefits such as toned and strong inner thighs. Say goodbye to neglected inner thighs and hello to a well-rounded fitness routine with body exercises and leg exercises! Incorporate a couple workout to target your hamstrings for a complete lower body workout. Importance of Inner Thigh Strengthening Stability and Balance: The Foundation of Strong Inner Thighs Strong inner thighs, hamstrings, and glutes are essential for maintaining stability and balance in our daily lives. Incorporating body exercises that target these muscles into your leg workout can help strengthen and tone them effectively. Whether we’re walking, running, or even just standing, the muscles in our inner thighs, hamstrings, glutes, hips, and knees play a crucial role in keeping us upright and steady. By strengthening the hamstrings, glutes, and hips, we can enhance our body’s overall stability and reduce the risk of falls or accidents. Partner exercises can be a great way to target these muscles. Boosting Athletic Performance with Inner Thigh Strength Athletes across various sports understand the importance of functional strength in their training routines. Whether it’s tennis, skiing, or any other sport, having strong hamstrings, glutes, and hips is particularly beneficial. Partner exercises can be a great way to target these muscle groups. These hamstrings, glutes, hips, and knees provide the power and control needed for swift changes in direction and quick lateral movements on the field or court. Preventing Injuries through Targeted Exercises Engaging in targeted inner thigh exercises can significantly contribute to injury prevention for the outer thighs, hips, glutes, and knees. Weak inner thigh muscles can lead to imbalances within the body, placing additional stress on other areas such as the knees or lower back. This can hinder fat loss and hinder progress towards achieving target weight loss goals. It is important to target the right muscles, such as the core, to improve overall strength and stability. By incorporating knee and core exercises into your fitness routine, you can strengthen these muscles and target fat in this area, alleviating strain on other parts of your body. Sculpted Lower Body: Toning Your Inner Thighs For those looking to achieve a sculpted lower body appearance, toning the inner thighs is an important aspect of their fitness journey. This is because targeting the fat in this specific area can help strengthen the core and improve overall balance. Plus, having strong inner thighs is crucial for performing exercises correctly and avoiding injury. To effectively tone your inner thighs, it’s essential to choose the right exercises and engage a partner for added support and motivation. While spot reduction is not possible (you cannot solely focus on losing fat from one specific area), performing exercises that target the inner thighs helps build muscle tone and definition in that region. It is important to engage the core muscles while performing these exercises to maximize results. Additionally, having a workout partner can provide support and motivation to stay consistent with your routine. Remember to balance your exercises by targeting both the right and left inner thigh muscles for optimal development. Combined with a balanced diet and overall strength training program, targeted exercises can contribute to achieving a more sculpted lower body by reducing fat and promoting a thigh gap. These exercises focus on the right muscles in your core. There are several exercises you can incorporate into your workout routine to target fat loss in specific areas. For example, you can do side planks to work your obliques on the left and right sides of your body. Additionally, having a workout partner can help keep you motivated and accountable to your fitness goals. Sumo Squats: Stand with your feet wider than hip-width apart and toes turned out for an effective inner thigh exercise. This exercise can help you achieve a thigh gap if that’s your goal. Make sure to position your feet correctly and engage the right muscles. You can also do this exercise with a partner for added motivation and support. Lower your body into a squat position, keeping your knees aligned with your toes for an effective inner thigh exercise. Make sure to focus on both the right and left side to target the thigh gap. Push through your heels and engage your thigh muscles to return to the starting position, ensuring that your partner is on your left side for support. Inner Thigh Leg Lifts: Lie on your left side with your legs straight and stacked on top of each other. Your right partner should be on your right side. Lift the top leg as high as you comfortably can while keeping it straight. This exercise helps to improve the thigh gap by targeting the muscles on the right and left sides. You can also perform this exercise with a partner for added support and motivation.
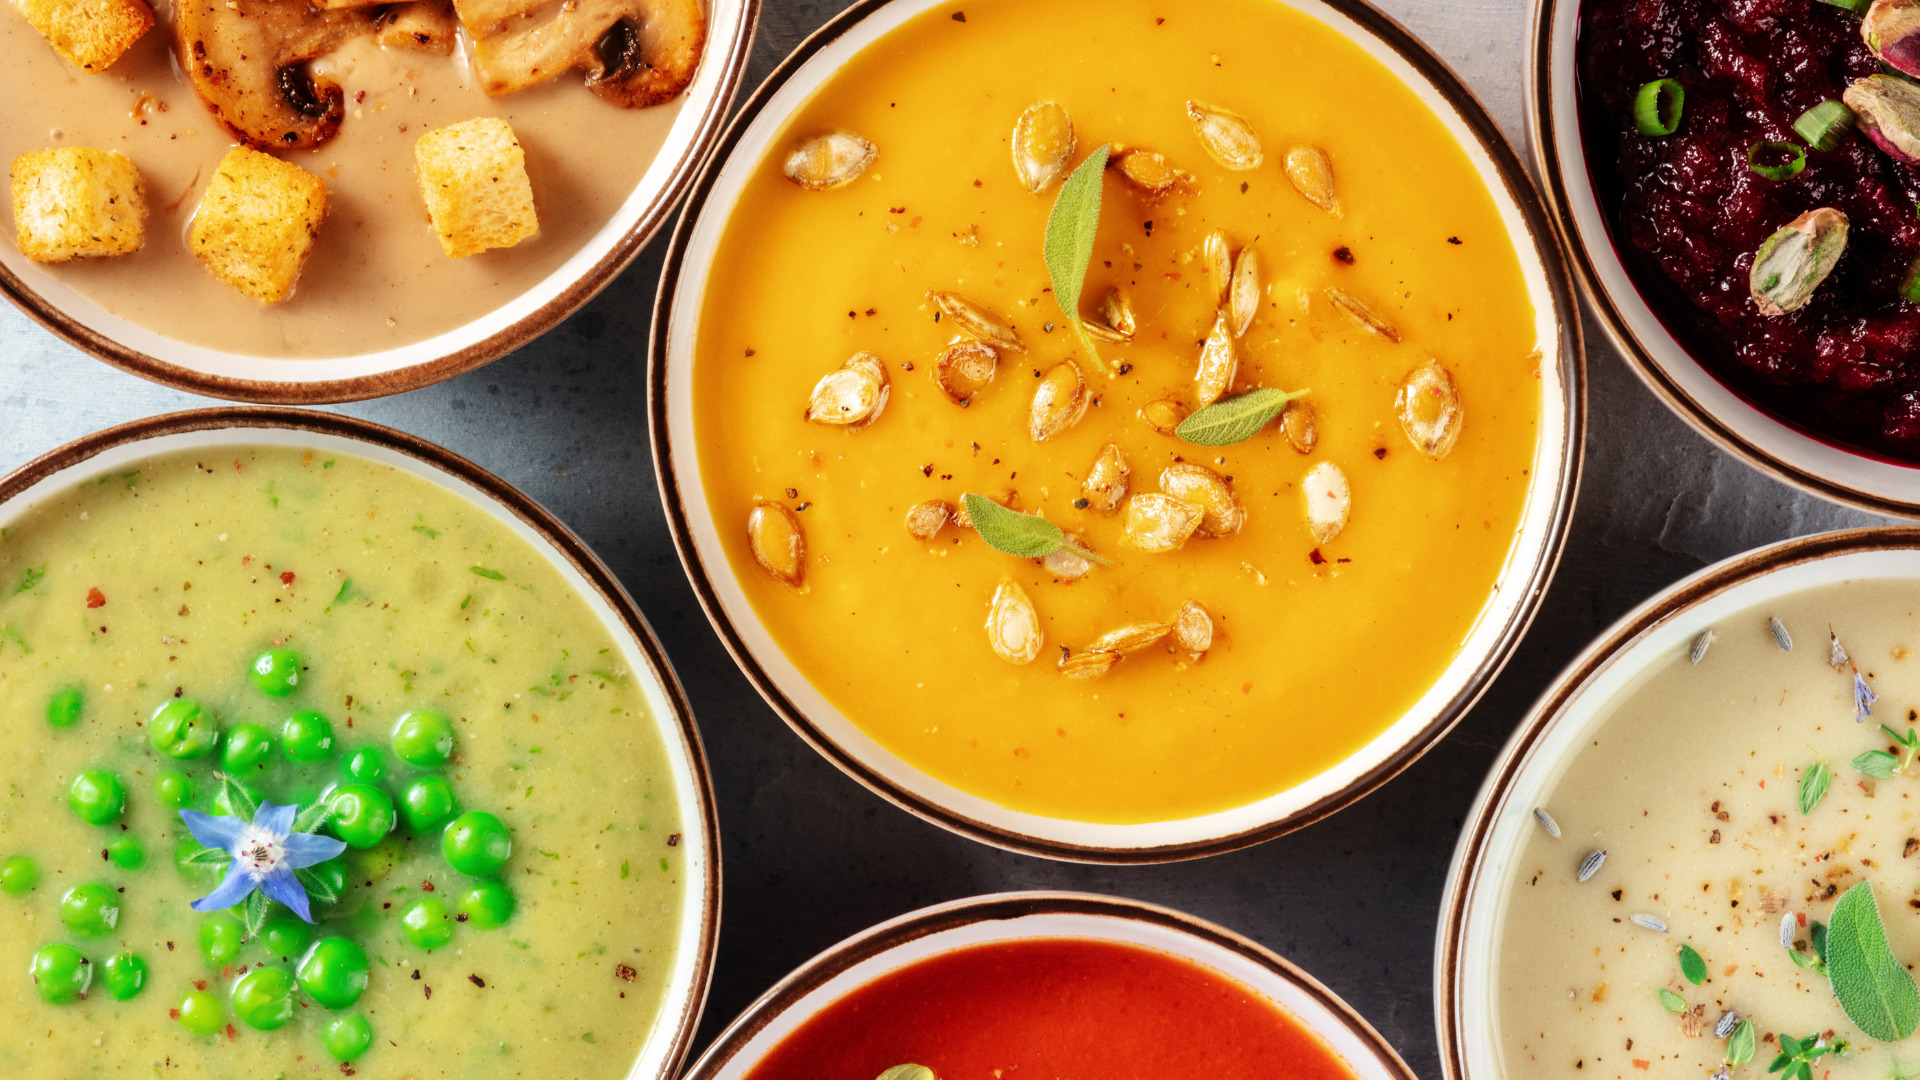
15+ Vegan Low-Calorie Soups: Healthy Recipes for Weight Loss
15+ Vegan Low-Calorie Soups: Healthy Recipes for Weight Loss “Let foods, such as healthy soup like cabbage soup and veggie soup, be thy medicine and medicine be thy food.” – Hippocrates If you’re on the lookout for nutritious and delicious plant-based options that won’t derail your calorie count, vegan low-calorie soups with veggies and lentils are here to save the day. These clever meal choices, like healthy soup and weight loss soup, not only satisfy your hunger but also keep you on track with your health goals. Whether you choose a vegan soup or a healthy butternut squash soup, these options are perfect for maintaining a balanced diet. Packed with vitamins, minerals, and fiber, these butternut squash, tomato, and potato soups are a fantastic way to incorporate more vegetables into your diet without compromising flavor. Try this delicious recipe today! With an array of clever meal calories recipes available, vegan low-calorie soups offer a world of possibilities. These soups are packed with flavor and can be made with ingredients like tomato and potato. From zucchini potato soup to creamy tomato bisques, there’s a flavorful soup recipe for every palate. Whether it’s a hearty vegetable stew or an inflammatory soup, you’ll find something to satisfy your taste buds. Plus, these creamy vegan soups are easy to prepare and customize according to your taste preferences. Whether you’re looking for a vegetable soup recipe or want to experiment with different flavors, these soups are sure to satisfy your cravings. Whether you’re looking for a potato recipe for a light lunch or a comforting dinner option, these soups tick all the boxes. In just minutes, you can enjoy a delicious meal. Plus, there’s a bonus – these soups are easy to make! Benefits of Vegan Soups for Weight Loss Low in calories but high in nutrients Vegan soups are a fantastic option for individuals looking to shed some weight without compromising on nutrition. These soups can be made with various recipes, including a delicious potato soup. Plus, they come with the bonus of being healthy and satisfying. These potato soups are a great recipe for weight loss, as they are typically low in calories. You can enjoy a hearty bowl without worrying about exceeding your daily calorie intake. Plus, as a bonus, they are delicious! The best part? Despite being low in calories, vegan soup recipes are packed with essential nutrients that your body needs to thrive. Whether you’re looking to lose weight or simply enjoy a delicious meal, these potato-based soups are a great option. Plus, as a bonus, they are easy to make and perfect for any occasion. Help control portion sizes and reduce calorie intake One of the biggest challenges. It’s easy to overeat and consume more calories than necessary, leading to weight gain. However, with this bonus vegetable soup recipe, you can enjoy a delicious and healthy meal without worrying about excess calories. However, vegan soup recipes can be a game-changer in this regard. Since soup recipes are already portioned out into bowls or cups, they provide built-in portion control. By enjoying a satisfying bowl of vegan soup as a meal or snack, you can effectively manage your portion sizes and reduce your overall calorie intake. Promote feelings of fullness and satiety Ever find yourself feeling hungry shortly after finishing a meal? Try this delicious and filling soup recipe. That’s where the magic of vegan soups comes into play. These soups are often rich in fiber and protein, two key nutrients known for promoting feelings of fullness and satiety. When you consume a vegan soup that contains these satiating nutrients, you’re likely to feel satisfied for longer periods, reducing the urge to snack on unhealthy foods throughout the day. Aid in digestion and support a healthy metabolism Maintaining good digestion is crucial for weight loss success. Vegan soups can contribute significantly to improving digestive health due to their high fiber content. Fiber helps regulate bowel movements and prevents constipation, ensuring that waste moves through your system smoothly. Consuming vegan soups regularly can support a healthy metabolism by providing your body with essential vitamins and minerals needed for optimal functioning. er nutrients and fiber may further exacerbate weight gain and make it difficult for our bodies to efficiently metabolize fats. Provide a variety of flavors without compromising on health goals Many individuals assume that they have to sacrifice flavor and settle for bland meals, but with the right soup recipe, you can enjoy delicious and flavorful dishes. However, vegan soups prove this notion wrong. These soups come in a wide variety of flavors, from comforting lentil and vegetable soups to spicy chili or creamy mushroom options. You can explore different recipes and experiment with various ingredients to find the perfect soup that satisfies your taste buds while aligning with your health goals. Gluten-Free and Anti-Inflammatory Vegan Soup Recipes Incorporating vegan soups into your diet not only supports weight loss but also offers a range of health benefits. If you have gluten sensitivities or celiac disease, finding suitable soup recipes can be challenging. However, with these gluten-free and anti-inflammatory vegan soup recipes, you can enjoy delicious meals that are both nourishing and satisfying. Ideal for individuals with gluten sensitivities or celiac disease For those looking for a gluten-free soup recipe, it’s essential to find alternatives that won’t cause discomfort or digestive issues. These vegan soup recipes are free from gluten-containing ingredients, making them safe and enjoyable for individuals with gluten sensitivities or celiac disease. By using ingredients like quinoa, rice noodles, or chickpea flour as substitutes for wheat-based products, these soups provide a tasty solution without compromising on flavor or texture. Incorporate ingredients that help reduce inflammation in the body Inflammation is a natural response by the body to protect itself from harm; however, chronic inflammation can lead to various health issues. These vegan soup recipes focus on incorporating ingredients known for their anti-inflammatory properties. Ingredients such as turmeric, ginger, garlic, and leafy greens contain compounds that help reduce inflammation in

Back Exercises at Home: Strengthen Your Back in 15 Minutes!
Back Exercises at Home: Strengthen Your Back in 15 Minutes! Looking to strengthen and tone your trapezius muscles without the hassle of a gym membership? Try using heavy dumbbells for a stretch that targets your back. Not only will these back workouts help improve your overall strength and posture, but they can also be easily performed without any fancy equipment. Incorporating a back workout move like the overhead wall squat can contribute to a strong back. Whether you’re a beginner or a seasoned fitness enthusiast, there are plenty of effective back exercises that you can try at home. These exercises include the trapezius, erector spinae, overhead wall squat, and rhomboids. These exercises include the trapezius, erector spinae, overhead wall squat, and rhomboids. From simple warm-up stretches to challenging variations like the overhead wall squat and prone IYT, we’ll provide step-by-step directions on how to perform each back workout move correctly. Make sure to use an overhand grip for the best results. So, get ready to kickstart your journey towards a stronger back and better posture with exercises that target the trapezius, erector spinae, and rhomboids. Whether you’re at the gym or on a bench, these exercises will help you strengthen and tone these key muscles. It’s time to say goodbye to expensive gym memberships and hello to convenient and effective home workouts with back exercises using a barbell and bench. Increase your reps for better results! Understanding the Anatomy and Function of the Back Muscles To effectively perform back exercises at home, it’s crucial to have a solid understanding of the trapezius and rhomboids muscles. These muscles play a key role in back strength and stability. One exercise that targets these muscles is the barbell row, which is performed with an overhand grip. The trapezius is one of the muscle groups in your back that plays a crucial role in supporting your spine, maintaining proper posture, and facilitating movement throughout your upper body. To target the trapezius, you can perform exercises like barbell shrugs with an overhand grip to engage the muscle on the side of your body. Let’s dive into the details! Gain insights into the different muscles that make up your back and their roles. The upper back muscles, specifically the muscles used in an overhand grip, play a vital role in providing stability and strength to your spine when performing exercises such as the barbell bench press. These muscles are located on the sides of your back. One key muscle group for back exercise is the erector spinae, which runs along both sides of the spine. Incorporating back workouts with a barbell can help strengthen this muscle group. Aim for a certain number of reps to maximize the benefits. These back exercises, such as barbell workouts, help maintain an upright posture and are responsible for extending and rotating the spine. Performing the recommended number of reps will strengthen these muscles effectively. Another important muscle in the upper back is the trapezius. To strengthen and develop this muscle, you can incorporate exercises like barbell rows and overhand pull-ups into your workout routine. These exercises target the trapezius and help increase its size and strength. Aim for a moderate weight and perform 8-12 reps of each exercise for optimal results. Additionally, including exercises like bench presses can also engage the trapezius muscles indirectly, further enhancing their development. To strengthen and develop this muscle, you can incorporate exercises like barbell rows and overhand pull-ups into your workout routine. These exercises target the trapezius and help increase its size and strength. Aim for a moderate weight and perform 8-12 reps of each exercise for optimal results. Additionally, including exercises like bench presses can also engage the trapezius muscles indirectly, further enhancing their development. It spans across your neck, shoulders, and upper back region while performing a row exercise on the bench with weights. Take a step towards building strength and stability. The trapezius is a crucial muscle for back workouts. It aids in shoulder movement, helps stabilize the shoulder blades, and supports good posture. Incorporating back exercises that target the trapezius can help strengthen and tone this important muscle group. Make sure to perform the recommended number of reps and follow proper form to get the most out of your back workouts. Taking this step will ensure you achieve optimal results. There are other muscle groups such as the rhomboids that lie between your shoulder blades, which can be targeted with back workouts. Adding rows to your routine with proper weight and reps can help strengthen these muscles. These back workouts target the muscles that retract or squeeze together your shoulder blades when you pull them toward your spine. Increase the number of reps and weight to make the row exercise more challenging. They also assist with maintaining proper posture during rowing exercises by counteracting slouching or rounding of the shoulders. Understand how these muscles work together to support your spine and facilitate movement. Your back muscles don’t work in isolation; they function as part of a larger system known as the posterior chain. When performing exercises like deadlifts and bent-over rows, it’s important to focus on proper form and technique to effectively target and strengthen these muscles. This can be achieved by using the appropriate weight, completing the desired number of reps and sets, and maintaining control throughout the movement. Whether you’re using a barbell or dumbbells, be mindful of your body positioning and engage your back muscles to maximize the benefits of each exercise. When performing exercises like deadlifts and bent-over rows, it’s important to focus on proper form and technique to effectively target and strengthen these muscles. This can be achieved by using the appropriate weight, completing the desired number of reps and sets, and maintaining control throughout the movement. Whether you’re using a barbell or dumbbells, be mindful of your body positioning and engage your back muscles to maximize the benefits of each exercise. This chain includes not only your upper back but also extends down
Beginner’s Guide to 30 Essential Yoga Poses
Beginner’s Guide to 30 Essential Yoga Poses Picture this: you’re sitting at your desk, feeling the weight of stress and tension in your body, especially in your back. You desperately need to ease the back pain caused by this prolonged sitting. What if I told you that a short yoga session focusing on breath can help? Feeling overwhelmed and exhausted by the deadlines and to-do lists, it’s important to find ease and create space for yourself. Take a moment to exhale and experience the calming effect it has on your mind. What if I told you there was an easy way to ease the weight of these feelings and bring balance back into your life? It’s a good idea to exhale. Enter yoga poses. Yoga poses, also known as asanas, are physical postures that promote strength, flexibility, and relaxation. They involve stretches and exercises that help lengthen and strengthen the body. One example is the backbend, which involves arching the spine while exhaling and extending the arms. By incorporating yoga poses like the asana into your daily routine or attending regular yoga classes, you can experience a myriad of benefits for both your body and mind. These poses, such as the backbend, help to lengthen and reach your muscles, providing overall physical and mental wellness. From reducing stress levels to improving overall well-being, practicing yoga poses such as asanas and backbends can have a transformative effect on your life. These poses help lengthen and strengthen the body, promoting physical and mental wellness. Incorporating these poses into your yoga routine can lead to significant improvements in your overall health. To learn more about the benefits of yoga poses, visit Verywell. So grab your yoga mat and get ready to dive into the wonderful world of yoga poses that will help you reach and lengthen your muscles while using your hands and palms. Beginner Yoga Poses for a Strong Foundation If you’re new to yoga, a pro tip is to start with beginner yoga poses to ground yourself and build a solid foundation for your practice. Focus on engaging your shoulders and arms for a well-rounded experience. These poses are designed to help lengthen your shoulders, arms, and reach, while also focusing on proper alignment, learning essential breathing techniques, and gradually building strength. By incorporating these pro tip poses into your routine, you’ll develop flexibility, balance, and body awareness safely. These poses will help you reach and lengthen your arms. Proper Alignment and Support One of the key focuses of beginner yoga poses is proper alignment, which includes aligning the shoulders, lengthening the reach, and keeping the knees in proper position. Each pose is carefully designed to ensure that your arms and shoulders are aligned correctly, reducing the risk of injury and maximizing the benefits of the pose. Lengthen your arms and shoulders with this pro tip. As a beginner, it’s important to pay attention to the alignment cues given by instructors or follow detailed instructions from reliable sources like Verywell Fit. Here’s a pro tip: when performing exercises, make sure to engage your arms, foot, and shoulders correctly. For example, in Bridge Pose (Setu Bandha Sarvangasana), you lie on your back with knees bent and feet flat on the mat. This pose helps to strengthen the floor of the pelvis, as well as stretching the muscles of the feet and arms. It is important to keep your feet and arms in the correct place to maintain proper alignment in this pose. By pressing your feet into the floor and lifting your hips off the mat while keeping your arms relaxed, you engage your glutes and core muscles. Bend your knees for added stability. This pose helps lift the arms and knees off the floor, strengthening the lower back and legs while opening up the chest. Gradual Strength Building Beginner yoga poses are designed to gradually build strength in your arms, lift your knees, and support your foot. They provide an opportunity for you to engage various muscle groups in your arms, while maintaining proper form by lifting your knees and foot. Consistency in practicing these poses will help you progress in both arm strength and foot flexibility over time. The effect of regularly doing these exercises on the floor is significant. Take Cat-Cow Pose (Marjaryasana-Bitilasana) as an example. This gentle flow between arching and rounding your spine helps improve spinal mobility while engaging the core muscles. Lift your arms, bend your knees, and lower to the floor. It also stretches out the neck, shoulders, and arms, relieving tension in those areas. This lift effect is felt all the way down to the feet. Developing Flexibility Safely Flexibility is another aspect that beginner yoga poses target. Starting with simple poses on the floor allows beginners to work on increasing their range of motion and foot flexibility without pushing themselves too far too soon. This can have a positive effect on their ability to lift their feet higher during more advanced poses. As you become more comfortable and flexible, you can gradually deepen the poses on the floor or explore more challenging variations with the lift of your foot. Child’s Pose (Balasana) is a popular beginner pose that helps release tension in the back, shoulders, hips, and feet. This pose is done by kneeling on the floor and sitting back on your heels, with your toes pointing towards the front. It provides a gentle stretch to the muscles in the foot and can be a great way to relax and unwind after a long day. By kneeling on the floor mat and folding your torso forward, resting your forehead on the ground, you stretch the muscles in your lower back and gently open up the hips. This is a exercise for overall flexibility and relaxation. This pose promotes relaxation and allows for a gentle stretch without putting excessive strain on any particular muscle group. It is a great way to lift your mood and improve flexibility. By engaging the muscles in the

Best Leggings for Women 2023: Top Picks!
Best Leggings for Women 2023: Top Picks! Picture this: You’re ready to embark on a workout session or a casual day out, but you’re struggling to find the perfect bottom wear that combines comfort and style. Look no further! Introducing our high waist yoga pants and leggings with a secure waistband. These high waist options provide the perfect combination of comfort and style for any occasion. High waist yoga pants, also known as tights, have become an essential wardrobe staple for every woman. The high waistband of these pants offers a comfortable and flattering fit. Every woman wears them with confidence. Not only are these stretchy workout leggings incredibly versatile, but they also offer unbeatable comfort and flexibility. Plus, they come in extended sizes, making them the perfect pants for any workout. Whether you prefer compressive tights for intense workouts or want to rock fashionable athleisure pants, we’ve got you covered with a variety of inseam options. Join us as we dive into different styles and materials of leggings, offering a comprehensive review of the top brands in the market. From pants to tights, we’ll cover everything from inseam to waistband. Get ready to elevate your fashion game while enjoying maximum comfort and performance with the best tights for women. The superfit hero waistband ensures a secure fit that flatters every body type. You’ll love how these leggings feel and look when you wear them. Best Leggings for Different Workouts Yoga: Bend and Stretch in Style Comfort and flexibility are key. Look for tights that have a moisture-wicking and breathable fabric to keep you cool during intense hot yoga sessions. The waistband should be comfortable and the inseam should be the right length. Make sure the leggings are the right fit and feel great when worn. Opt for high-waisted workout leggings that provide support and coverage as you move through different yoga poses. Pros: Moisture-wicking fabric keeps you dry during sweaty workouts. Breathable materials allow air circulation, preventing overheating. High-waisted design offers tummy control and prevents slippage. Cons: Some tights may lack sufficient compression for certain yoga poses. Inseam, waistband, and how one wears the leggings can affect their performance. Low-quality fabrics may become see-through when stretched. Running: Stay Cool and Focused When running, you need tights with a comfortable waistband and the right inseam length that can handle the sweat and movement. Look for moisture-wicking fabrics in workout leggings that pull sweat away from your skin, keeping you dry throughout your run. Compression tights, also known as leggings, provide extra support to your muscles, reducing fatigue and enhancing performance during yoga. These tights have been tested and proven to be effective in providing the necessary support. The waistband of these compression tights ensures a comfortable fit while practicing yoga. Pros: Moisture-wicking technology keeps you dry even during intense runs, whether you’re wearing black leggings with a comfortable waistband or tights. Compression leggings offer muscle support, reducing fatigue. Reflective details enhance visibility during early morning or evening runs, especially when wearing black leggings or tights with a comfortable waistband. Cons: Some compression tights might feel too tight or restrictive for some runners. These testers found that wearing yoga tights provided a more comfortable fit. Low-quality materials in tights or black leggings may cause chafing or discomfort during longer runs. It is important for testers to wear high-quality tights or black leggings to avoid any discomfort. Weightlifting: Lift Heavy with Confidence Durability is essential. Look for yoga leggings made from thick, squat-proof fabrics that won’t become see-through when performing deep squats or deadlifts. These yoga leggings are perfect for testers who want to wear a comfortable and durable pair during their workouts. Compression leggings are a great option for weightlifters, as they provide stability and support to your muscles. When choosing a pair, make sure to consider the size that best fits you and wear them as a tester to ensure the perfect fit. Pros: Thick, squat-proof black leggings ensure full coverage during weightlifting movements. Whether you wear a size small or large, these leggings provide the inches you need for a comfortable fit. Compression leggings are a great option for anyone who wears a size that requires muscle support and stability while lifting heavy weights. If you’re a tester, you’ll definitely want to try out a pair of these leggings. High-waisted black leggings designs provide abdominal support and prevent rolling down. When choosing the right size, it’s important to have a tester pair. Cons: Some seamless leggings, depending on the size, may lack compression for certain high-intensity exercises. It’s important to find the right pair of leggings that provide the necessary support and comfort for your workouts. A good tester is to try them on and see if they fit well and offer the desired level of compression. Additionally, consider the inch length of the leggings to ensure they are the right fit for your body type. Low-quality materials may stretch out or lose their shape over time, especially when it comes to black leggings. It’s important to choose the right size and tester pair to avoid this issue. Intense Workouts: Stay Dry and Comfortable For those sweaty, high-intensity workouts like HIIT or spin classes, you need leggings that can handle the heat. As a tester, I recommend getting a pair of leggings that are the right size for you and have a comfortable inch inseam. Look for black leggings with moisture-wicking fabrics that quickly absorb and evaporate sweat, keeping you dry throughout your workout. As a tester, make sure to find the right size pair for optimal comfort. Seamless leggings are an excellent choice for testers as they minimize chafing and maximize comfort during intense movements. These leggings come in various sizes, including pairs that are 28 inches in length. Pros: Moisture-wicking fabrics help keep you dry during intense, sweaty workouts, whether you’re wearing black leggings or any other size and pair of tester. Seamless construction reduces friction and chafing. Breathable materials allow for better airflow, preventing overheating.

Foods That Boost Your Mood: 9 Powerful Choices!
Foods That Boost Your Mood: 9 Powerful Choices! Picture this: you wake up feeling a little down, lacking the energy and motivation to tackle the day ahead. But what if I told you that a simple dietary change could turn your mood around? The connection between food and mood is stronger than you might think. By incorporating certain foods into your diet, you can positively impact your emotional well-being and elevate your overall mindset. Science has shown that specific foods have the power to boost serotonin levels in our brains, which is often referred to as the “happy hormone.” For example, yogurt contains probiotics that support gut health and aid in serotonin production. And let’s not forget about salmon, rich in omega-3 fatty acids that promote brain health and enhance mood. Even oysters, high in zinc, play a role in regulating neurotransmitters associated with mood regulation. So buckle up and get ready to nourish your body for a happier mindset with these powerful food choices. Expert-Backed Recommendations for Mood-Boosting Foods In today’s fast-paced world, it’s not uncommon to feel a little down or stressed from time to time. But did you know that what you eat can have a significant impact on your mood? That’s right! Certain foods are known to boost your spirits and enhance your overall well-being. So, let’s dive in and uncover some expert-backed recommendations for mood-boosting foods. Uncover expert-approved foods that can enhance your mood. Nutritionists and health specialists have identified several key foods that can make a positive difference. These foods are not only delicious but also packed with nutrients that support a positive mindset. So, if you’re feeling low, consider adding the following items to your grocery list: Dark chocolate: Indulging in a small piece of dark chocolate can release endorphins, which are known as “feel-good” hormones. Berries: Loaded with antioxidants and vitamins, berries such as blueberries and strawberries have been linked to improved cognitive function and reduced symptoms of depression. Leafy greens: Spinach, kale, and other leafy greens contain folate, which helps produce serotonin—a neurotransmitter associated with happiness. Fermented foods: Foods like yogurt, sauerkraut, and kimchi are rich in probiotics that promote gut health. Emerging research suggests a strong connection between gut health and mental well-being. Learn from professionals about the best foods to uplift your spirits. Nutritionists play a crucial role in guiding us towards healthier food choices. Their expertise helps us understand how specific nutrients impact our mood. Here are some top recommendations from these professionals: Omega-3 fatty acids: Found in fatty fish like albacore tuna and salmon, omega-3s have been shown to reduce symptoms of depression. Incorporating these fish into your diet can provide a much-needed mood boost. Whole grains: Foods like brown rice, quinoa, and whole wheat bread are excellent sources of complex carbohydrates. These carbs help regulate serotonin levels in the brain, promoting feelings of calmness and happiness. Nuts: Almonds, walnuts, and cashews are not only delicious but also rich in healthy fats and protein. They contain magnesium—a mineral that plays a vital role in regulating mood. Discover evidence-based recommendations for boosting your mood through diet. Numerous studies have explored the relationship between diet and mental well-being. Let’s take a closer look at some research-backed findings: The Mediterranean diet: Researchers have found that adhering to a Mediterranean-style eating pattern—rich in fruits, vegetables, whole grains, lean proteins, and healthy fats—can reduce the risk of depression and improve overall mental health. Vitamin D: Low levels of vitamin D have been linked to an increased risk of depression. While sunlight is the best source of this vitamin, you can also find it in fatty fish (like salmon), egg yolks, and fortified dairy products. B vitamins: B vitamins play a crucial role in brain function and mental health. Foods such as eggs, legumes, leafy greens, and poultry are good sources of these essential nutrients. Get insights into specific nutrients that support a positive mindset. In addition to specific foods mentioned earlier, certain nutrients have been associated with improved mood: Serotonin: This neurotransmitter is often referred to as the “happy hormone.” It helps regulate mood and promote feelings of well-being. The Power of Tea: Green and Black Tea for a Better Mood Tea is not just a beverage; it’s a mood-enhancing elixir that can help brighten your day. Whether you’re feeling down or simply need a pick-me-up, harnessing the power of tea can be a natural way to improve your mood. Green Tea: A Calming Cup of Serenity Green tea has long been revered for its numerous health benefits, but did you know it can also have a positive impact on your mood? This refreshing brew contains an amino acid called L-theanine, which has been shown to promote relaxation and reduce anxiety. By increasing alpha brain waves, L-theanine induces a sense of calmness without causing drowsiness. Sipping on a cup of green tea can be particularly beneficial during stressful situations or when you’re feeling overwhelmed. It helps to take the edge off and allows you to regain focus and composure. The moderate caffeine content in green tea provides an energy boost without the jitters commonly associated with coffee. Black Tea: A Soothing Sip for Emotional Well-being If you prefer something bolder in flavor, black tea might be just what you need to lift your spirits. Known for its rich taste and robust aroma, black tea is packed with compounds that have been linked to improved mood and mental clarity. One such compound is theaflavin, which has been found to increase dopamine levels in the brain. Dopamine is often referred to as the “feel-good” neurotransmitter because it plays a crucial role in regulating emotions and promoting feelings of pleasure and happiness. By boosting dopamine production, black tea can help elevate your mood naturally. Moreover, black tea contains flavonoids that possess antioxidant properties. These antioxidants help combat oxidative stress in the body, which has been associated with mood disorders such as anxiety and depression. By reducing oxidative stress, black tea can contribute to a
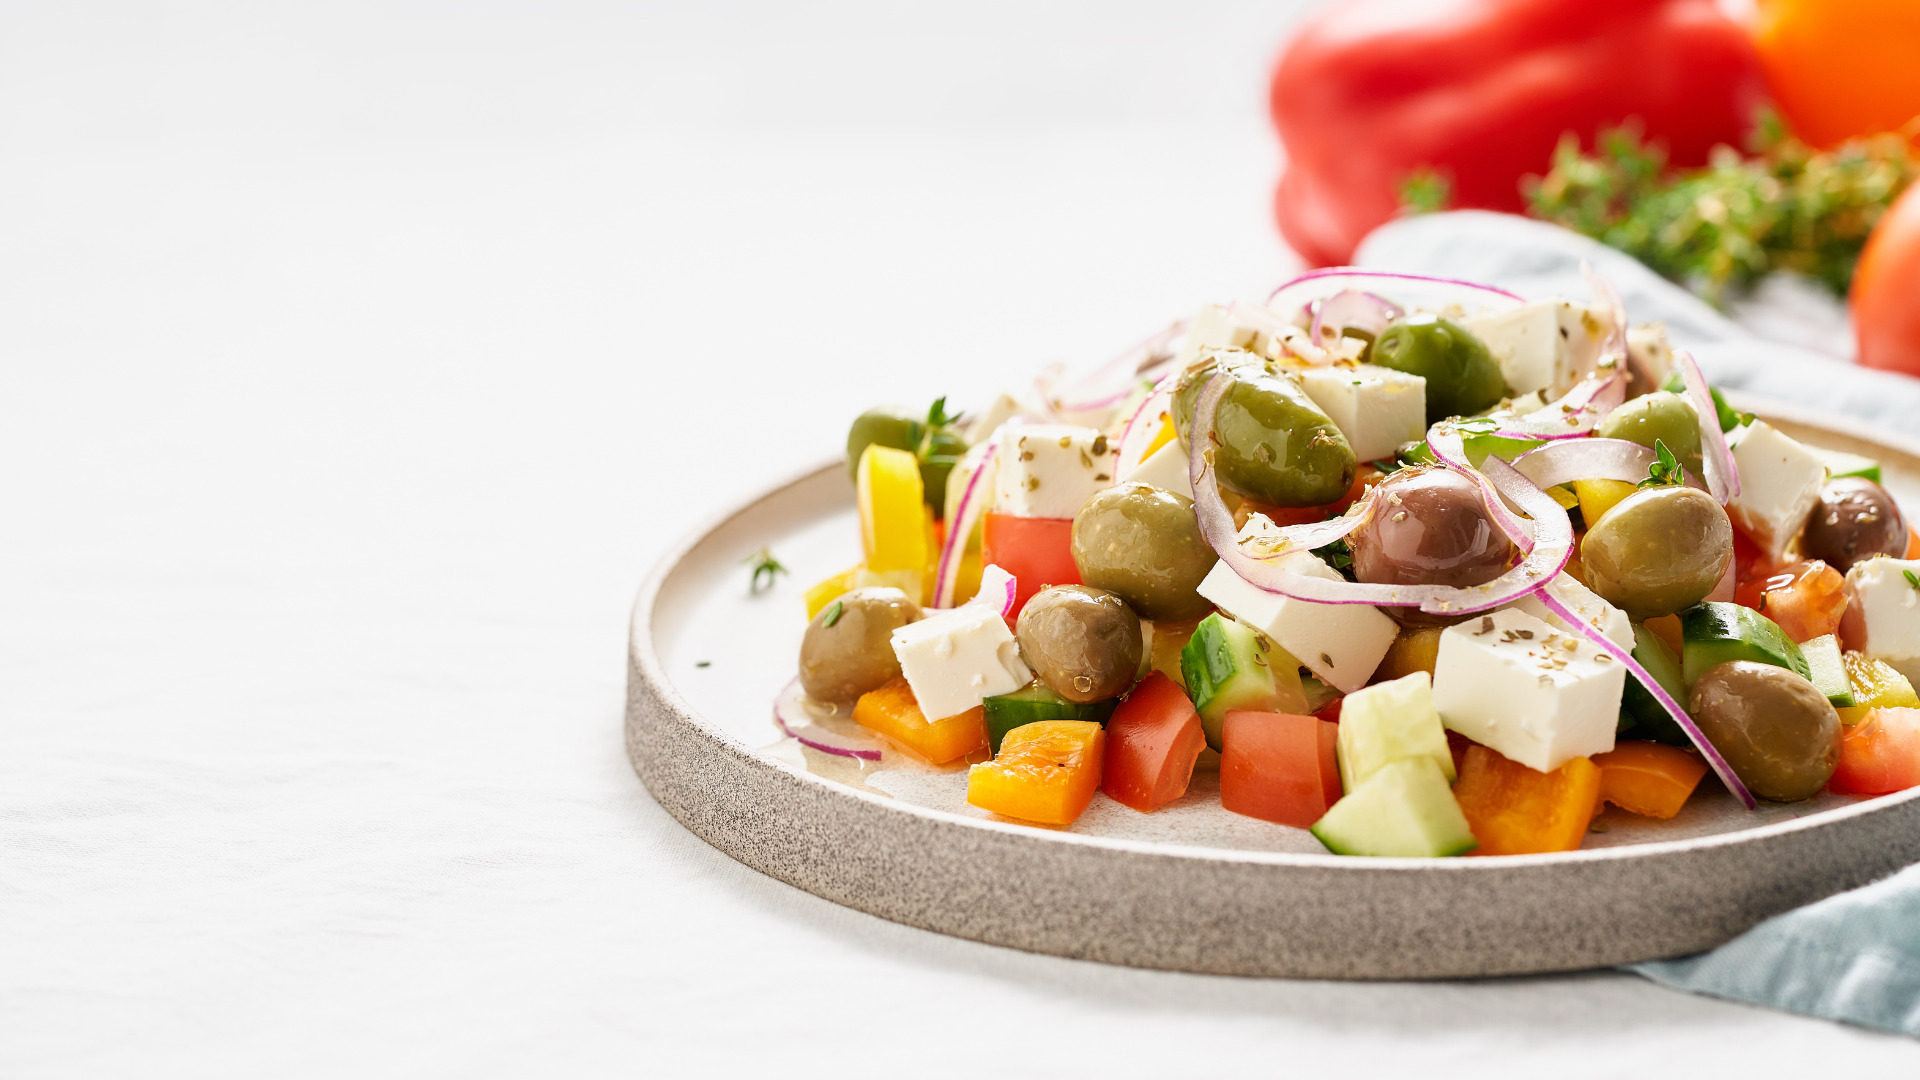
Mediterranean Cuisine for Weight Loss: 5 Delectable Recipes to Try
Mediterranean Cuisine for Weight Loss: 5 Delectable Recipes to Try Embarking on a weight loss journey doesn’t mean depriving yourself of delicious meals. The Mediterranean diet, renowned for its health benefits and culinary delights, offers a balanced and sustainable approach to shedding unwanted pounds. It’s a lifestyle that encourages the consumption of fresh, wholesome ingredients while promoting overall well-being. In this blog, we’ll take a deep dive into the Mediterranean diet and present you with five flavorful recipes specifically designed to support your weight loss goals. These recipes not only taste incredible but also align with the core principles of the Mediterranean diet, featuring an abundance of fruits and vegetables, whole grains, lean proteins, and healthy fats. Here are 5 simple Mediterranean recipes that can help with weight loss: 1. Mediterranean Chicken and Vegetable Skewers Ingredients: Chicken breast pieces Bell peppers, onions, and cherry tomatoes Olive oil Lemon juice Oregano Salt and pepper Instructions: Thread chicken and vegetables onto skewers. Drizzle with olive oil and lemon juice, sprinkle oregano, salt, and pepper. Grill until cooked through, and enjoy! 2. Greek Chickpea Salad Ingredients: Canned chickpeas Cucumber, red onion, and cherry tomatoes Feta cheese Olive oil Lemon juice Fresh herbs (like parsley) Salt and pepper Instructions: Combine chickpeas, diced veggies, and feta cheese in a bowl. Drizzle with olive oil and lemon juice. Add fresh herbs, salt, and pepper to taste. Toss and serve. 3. Mediterranean Tuna Wrap Ingredients: Canned tuna Whole-wheat tortillas Spinach or arugula Sliced cucumbers and tomatoes Greek yogurt or hummus Lemon juice Salt and pepper Instructions: Mix tuna with Greek yogurt or hummus, lemon juice, salt, and pepper. Spread the tuna mixture on a tortilla. Top with spinach or arugula, cucumber, and tomato slices. Roll up the tortilla and enjoy. 4. Mediterranean Roasted Vegetables Ingredients: Zucchini, bell peppers, and red onion Olive oil Garlic powder Dried oregano Salt and pepper Instructions: Cut vegetables into chunks and place them on a baking sheet. Drizzle with olive oil and sprinkle garlic powder, oregano, salt, and pepper. Roast in the oven until tender and slightly browned. 5. Quinoa and Avocado Salad Ingredients: Cooked quinoa Diced avocado Cherry tomatoes Cucumber Red onion Fresh lemon juice Olive oil Salt and pepper Instructions: Combine cooked quinoa, diced avocado, halved cherry tomatoes, diced cucumber, and chopped red onion. Drizzle with fresh lemon juice and olive oil. Season with salt and pepper to taste. Toss and serve. These simple Mediterranean recipes are not only delicious but also support your weight loss efforts. They feature fresh, wholesome ingredients and are easy to prepare, making them perfect for a healthy and satisfying diet. Enjoy these meals as part of your balanced eating plan, and remember to stay active and practice portion control for the best results. Bon appétit! Share: Facebook Pinterest Email Social Media Facebook-f Youtube Pinterest Instagram Tiktok Most Popular Get The Latest Updates Subscribe To Our Weekly Newsletter No spam, notifications only about new post, updates. Categories On Key Related Posts

Quick & Healthy Grab-and-Go Snacks
Looking for quick and convenient healthy snacks, like protein bars, to fuel your busy lifestyle? Want to promote better eating habits even when you’re on the go?

Prevent Fitness Injuries & Protect Yourself: 9 Expert Tips to Prevent Fitness Injuries
Prevent Fitness Injuries & Protect Yourself: 9 Expert Tips to Prevent Fitness Injuries Picture this: you’ve just started a new workout, excited to push your limits and achieve your goals. But before you begin, it’s crucial to stretch and warm up properly to prevent workout injury. But then, out of nowhere, a sports injury on the road derails your progress in your home workout. It’s time to consult a sports medicine expert. It’s frustrating when a workout injury occurs, as it can set you back for seconds, weeks, or even months. These sports injuries can be demotivating and hinder your progress. That’s why preventing fitness injuries is crucial. Injuries are all too common in the world of sports, especially when it comes to children. Engaging in physical activity helps children develop lean muscles and improve their overall health. However, it is important to remember that accidents can happen in a matter of seconds. From lean sprains and fractures to street muscle strains and tears, sports injuries can hold happen to anyone at any time. These setbacks hinder your lean physical health and impede your overall progress toward achieving optimal fitness in sports. These setbacks hold you back from reaching your fitness goals. Proper training techniques in sports play a vital role in injury prevention. It is important to lean on these techniques to hold off potential harm. By understanding the causes and types of sports injuries, you can tailor your sports workouts to minimize the risk. Taking a proactive approach to injury prevention not only safeguards your well-being but also ensures consistent progress on your fitness journey. So let’s dive into the world of injury prevention together and discover how we can keep ourselves healthy, strong, and injury-free throughout our fitness endeavors. Tips to Avoid Exercise Injuries Gradually increasing intensity and duration of workouts One of the most important things to keep in mind is gradual progression. It can be tempting to push yourself too hard, too soon, especially when you’re motivated and eager to see results. However, this approach often leads to injuries that can set you back in your fitness journey. Instead, start with a manageable intensity and duration for your workouts and gradually increase them over time. This allows your body to adapt and build strength without overwhelming it. Using appropriate equipment and gear for each exercise Using the right equipment and gear is crucial in preventing workout injuries. Wearing proper footwear that provides adequate support can help prevent common issues like shin splints or ankle sprains. Using appropriate safety equipment such as knee pads or wrist guards when necessary can protect vulnerable areas during exercises like weightlifting or skateboarding. Always make sure your equipment is in good condition and fits properly before starting any exercise routine. Incorporating rest days into the workout routine Rest days are just as important as active training days. Giving your body time to recover allows muscles, tendons, and ligaments to repair themselves from the stresses of exercise. Overtraining without enough rest can lead to fatigue, decreased performance, and an increased risk of injury. Aim for at least one or two rest days per week where you engage in lighter activities or simply take a break from intense workouts. Listening to the body’s signals and avoiding overexertion Your body has a way of communicating with you if something doesn’t feel right during a workout. It’s essential to listen attentively to these signals instead of pushing through pain or discomfort. Ignoring these warning signs may lead to more severe injuries down the line. If something feels off or painful during an exercise, stop immediately and assess what could be causing the issue. Adjust your form, decrease the intensity, or consult a fitness professional for guidance. Seeking guidance from a qualified fitness professional Seeking guidance from a qualified fitness professional can make a significant difference. They have the knowledge and expertise to design an exercise program tailored to your specific needs and goals while minimizing the risk of injury. A fitness professional can also teach you proper form and technique for each exercise, ensuring that you perform them correctly and safely. Don’t hesitate to reach out to a trainer or coach who can provide valuable insights and support on your fitness journey. By following these tips, you’ll be well on your way to preventing workout injuries and staying on track with your fitness goals. Remember that consistency is key but not at the expense of your well-being. Take care of your body, listen to its signals, and seek professional guidance when needed. With these precautions in place, you can enjoy a safe and fulfilling exercise routine. Proper Technique and Warm-Up Importance Before we jump into the exciting world of fitness, it’s crucial to understand the importance of proper technique and warm-up exercises. These two factors play a significant role in preventing fitness injuries and maximizing performance. Let’s dive into why they are so essential. Significance of Proper Form Using the correct form is everything. Proper technique ensures that you engage the right muscles, target specific areas, and avoid unnecessary strain on your body. It also helps you maintain balance and stability during exercises. Using incorrect form can lead to various injuries. For example, performing squats with improper alignment can put excessive pressure on your knees or lower back, leading to strains or even tears. Similarly, lifting weights with poor posture can strain your back or shoulders. To prevent such injuries, it’s essential to learn the proper form for each exercise you perform. Seek guidance from a qualified trainer who can teach you the correct techniques and provide feedback on your form. Benefits of Warming Up Warming up before any physical activity is crucial for injury prevention and optimal performance. A good warm-up routine prepares your body by increasing blood flow to your muscles, raising your core temperature, and improving joint mobility. By warming up properly, you allow your muscles to become more pliable and flexible, reducing the risk of strains or pulls during

Vegan Pumpkin Spice Latte (Lite)
Vegan Pumpkin Spice Latte As the leaves change color and the air turns crisp, there’s nothing quite like indulging in a warm and comforting beverage that embodies the essence of autumn. Enter the vegan pumpkin spice latte – a delightful twist on the classic favorite that caters to those following a plant-based lifestyle. In this blog post, we will explore the ins and outs of creating a delicious vegan pumpkin spice latte at home, complete with all the flavors and aromas that make this seasonal drink so beloved. Can I use any kind of non-dairy milk for this recipe? Yes you may! Additionally, non-dairy milk, such as almond milk, oat milk, or soy milk, is often used to add creaminess. How do I enhance the taste of this coffee? If you are a pumpkin lover, you can always add a little more pumpkin spice or even substitute the pumpkin puree for pumpkin spice syrup. Products from the Recipe Order products and have it shipped straight to your door step! Pin Print Pumpkin Spice Latte (Lite) Recipe by Custom Curves Course: DrinksCuisine: VeganDifficulty: Easy Servings 1 servingsPrep time 5 minutesCalories 90 kcal Ingredients 1 shot of espresso or 1/2 cup of brewed coffee 1/2 cup of unsweetened almond milk 2 tablespoons of pumpkin puree 1/2 teaspoon of pumpkin spice A dash of stevia or your preferred sweetener Directions Mix all ingredients and heat on the stove, then froth the almond milk and pour it over your coffee. A vegan pumpkin spice latte is the perfect way to embrace the flavors of fall while adhering to a plant-based lifestyle. With just a few simple ingredients and some creativity, you can recreate this beloved seasonal beverage in the comfort of your own home. So, grab your favorite mug, cozy up, and savor the delightful flavors of a vegan pumpkin spice latte this autumn. Share: Facebook Pinterest Email Social Media Facebook-f Youtube Pinterest Instagram Tiktok Most Popular Get The Latest Updates Subscribe To Our Weekly Newsletter No spam, notifications only about new post, updates. Categories On Key Related Posts

10 Low-Calorie Coffee Recipes for Fall: Sip Your Way to Cozy Comfort
10 Low-Calorie Coffee Recipes for Fall: Sip Your Way to Cozy Comfort Fall is a season of crisp air, colorful foliage, and cozy moments by the fireplace. And what better way to embrace the autumnal vibes than with a warm cup of coffee? If you’re watching your calorie intake but still want to indulge in the flavors of fall, we’ve got you covered. In this blog, we’ll explore 10 low-calorie coffee recipes that are perfect for the autumn season. These recipes not only offer a delightful caffeine boost but also capture the essence of fall in every sip. 1. Pumpkin Spice Latte (PSL) Light Calories: Approximately 90 calories Ingredients: 1 shot of espresso or 1/2 cup of brewed coffee 1/2 cup of unsweetened almond milk 2 tablespoons of pumpkin puree 1/2 teaspoon of pumpkin spice A dash of stevia or your preferred sweetener Instructions: Mix all ingredients and heat on the stove, then froth the almond milk and pour it over your coffee. 2. Cinnamon Apple Coffee Calories: Approximately 50 calories Ingredients: 1 cup of black coffee 1/4 cup of unsweetened apple cider 1/4 teaspoon of ground cinnamon A small apple slice for garnish Instructions: Combine the coffee, apple cider, and cinnamon. Garnish with the apple slice. 3. Salted Caramel Cold Brew Calories: Approximately 40 calories Ingredients: 1 cup of cold brew coffee 1 tablespoon of sugar-free caramel syrup A pinch of sea salt Ice cubes Instructions: Stir the caramel syrup into cold brew, add ice, and finish with a pinch of sea salt. 4. Hazelnut Mocha Calories: Approximately 70 calories Ingredients: 1 shot of espresso or 1/2 cup of brewed coffee 1/2 cup of unsweetened almond milk 1 tablespoon of sugar-free hazelnut syrup 1 tablespoon of unsweetened cocoa powder Instructions: Mix cocoa powder and coffee, add almond milk and hazelnut syrup, and heat. Froth the milk and pour it over the coffee. 5. Maple Pecan Latte Calories: Approximately 80 calories Ingredients: 1 shot of espresso or 1/2 cup of brewed coffee 1/2 cup of unsweetened almond milk 1 tablespoon of sugar-free maple syrup A sprinkle of crushed pecans Instructions: Combine coffee, almond milk, and maple syrup. Top with crushed pecans. 6. Vanilla Chai Coffee Calories: Approximately 60 calories Ingredients: 1 cup of brewed coffee 1/2 cup of unsweetened vanilla almond milk 1 chai tea bag Instructions: Steep the chai tea bag in hot coffee and almond milk mixture for a few minutes, then remove the tea bag. 7. Gingerbread Coffee Calories: Approximately 70 calories Ingredients: 1 shot of espresso or 1/2 cup of brewed coffee 1/2 cup of unsweetened almond milk 1/2 teaspoon of ground ginger A pinch of ground nutmeg and cinnamon 1/2 teaspoon of molasses Instructions: Mix all ingredients and heat. Top with a sprinkle of nutmeg. 8. Coconut Caramel Macchiato Calories: Approximately 50 calories Ingredients: 1 shot of espresso or 1/2 cup of brewed coffee 1/2 cup of unsweetened coconut milk 1 tablespoon of sugar-free caramel syrup Instructions: Combine coffee, coconut milk, and caramel syrup. Serve over ice. 9. Spiced Mocha Calories: Approximately 65 calories Ingredients: 1 shot of espresso or 1/2 cup of brewed coffee 1/2 cup of unsweetened almond milk 1/2 teaspoon of cinnamon 1/2 teaspoon of unsweetened cocoa powder Instructions: Mix coffee, almond milk, cinnamon, and cocoa powder. Heat and enjoy. 10. Toasted Almond Coffee Calories: Approximately 45 calories Ingredients: 1 cup of brewed coffee 1/2 teaspoon of almond extract A sprinkle of toasted almond slivers Instructions: Add almond extract to coffee and top with toasted almond slivers. With these 10 low-calorie coffee recipes, you can fully embrace the flavors of fall without worrying about your calorie intake. Whether you prefer a classic Pumpkin Spice Latte or want to try something new like a Maple Pecan Latte, there’s a delightful coffee creation for every autumn enthusiast. Grab your favorite mug, cozy up, and enjoy the taste of fall in every sip. Share: Facebook Pinterest Email Social Media Facebook-f Youtube Pinterest Instagram Tiktok Most Popular Get The Latest Updates Subscribe To Our Weekly Newsletter No spam, notifications only about new post, updates. Categories On Key Related Posts

Vegan Coconut Caramel Macchiato
Vegan Coconut Caramel Macchiato Indulging in a delicious cup of coffee is a cherished ritual for many. With countless variations available, one particular concoction has captured the hearts of coffee enthusiasts worldwide – the coconut caramel macchiato. This delightful beverage combines the rich flavors of coconut, caramel, and espresso, resulting in a truly decadent treat. In this blog post, we will explore the origins, ingredients, preparation methods, and variations of the coconut caramel macchiato. Can I use any kind of non-dairy milk for this recipe? Yes you may! Additionally, non-dairy milk, such as almond milk, oat milk, or soy milk, is often used to add creaminess. How do I enhance the taste of this coffee? You can enhance the taste by adding more caramel syrup or a little agave or sugar, but just keep in mind as you enhance the recipe. You will be increasing the calories. Can I make variations of this coffee? While the classic coconut caramel macchiato is undeniably delicious, there are several variations you can explore to suit your taste preferences: 1. Iced Coconut Caramel Macchiato: Simply follow the same preparation steps but pour the mixture over ice instead of hot espresso for a refreshing twist. 2. Traditional Coconut Caramel Macchiato: Replace plant-based dairy products with regular alternatives such as 2 percent milk or whole milk to create a non-restricted version of this delightful beverage. 3. Salted Coconut Caramel Macchiato: Add a pinch of sea salt to your caramel sauce or sprinkle some on top of your macchiato for a delightful sweet-salty combination. Products from the Recipe Order products and have it shipped straight to your door step! Pin Print Coconut Caramel Macchiato Recipe by Custom Curves Course: DrinksCuisine: VeganDifficulty: Easy Servings 1 servingsPrep time 5 minutesCalories 50 kcal Ingredients 1 shot of espresso or 1/2 cup of brewed coffee 1/2 cup of unsweetened coconut milk 1 tablespoon of sugar-free caramel syrup Directions Combine coffee, coconut milk, and caramel syrup. Serve over ice. The coconut caramel macchiato is a truly indulgent coffee creation that combines the tropical flavors of coconut with the rich sweetness of caramel and the boldness of espresso. Whether you enjoy it hot or iced, this delightful beverage is sure to satisfy your cravings for a unique and decadent coffee experience. Share: Facebook Pinterest Email Social Media Facebook-f Youtube Pinterest Instagram Tiktok Most Popular Get The Latest Updates Subscribe To Our Weekly Newsletter No spam, notifications only about new post, updates. Categories On Key Related Posts

The Beauty of Collagen: Is It Worth Adding to Your Routine?
The Beauty of Collagen: Is It Worth Adding to Your Routine? In the world of health and wellness, collagen has gained significant attention in recent years. You’ve probably seen it advertised in various forms, from supplements and powders to skincare products and even beverages. But what exactly is collagen, and should you consider incorporating it into your daily routine? In this blog post, we’ll explore the fascinating world of collagen, its benefits, and whether or not you should be taking it. What Is Collagen? Collagen is the most abundant protein in the human body, accounting for about one-third of our total protein composition. It is often described as the “glue” that holds our body together because it provides structural support to various tissues, including skin, bones, tendons, ligaments, and muscles. Collagen is made up of amino acids, particularly glycine, proline, and hydroxyproline, which play crucial roles in maintaining the health of our connective tissues. As we age, our body’s natural collagen production begins to decline, which can lead to various signs of aging, such as wrinkles, joint pain, and decreased skin elasticity. Types of Collagen There are several types of collagen found in the human body, with Type I, Type II, and Type III being the most common: Type I Collagen: This type is abundant in the skin, tendons, ligaments, bones, and organs. It provides tensile strength and support to these structures. Type II Collagen: Found in cartilage, this type of collagen is crucial for joint health and flexibility. Type III Collagen: Often found in skin, blood vessels, and other tissues, Type III collagen contributes to skin elasticity and the overall structure of organs. Should You Be Taking Collagen? Now that we have a basic understanding of collagen, let’s explore whether or not you should consider taking collagen supplements or incorporating collagen-rich foods into your diet. Here are some benefits of taking Collagen: Skin Health: Collagen supplements may improve skin hydration, elasticity, and reduce the appearance of wrinkles, fine lines, and sagging skin. Joint Health: Type II collagen supplements have been shown to alleviate joint pain and support overall joint function, making them beneficial for individuals with conditions like osteoarthritis. Hair and Nail Health: Collagen may promote hair and nail growth and reduce brittleness. Gut Health: Collagen can help strengthen the gut lining, potentially improving digestion and reducing symptoms of conditions like leaky gut syndrome. Muscle Mass: Collagen supplements may help maintain and increase muscle mass, especially in combination with resistance training. Bone Health: Collagen is a component of bone matrix, and some studies suggest it may contribute to bone density and strength. Wound Healing: Collagen may accelerate wound healing and tissue repair. It’s important to note that while collagen supplements offer potential benefits, individual results can vary. Furthermore, a balanced diet rich in collagen-containing foods, such as bone broth, fish, and lean meats, can also contribute to your collagen intake. Consult a Healthcare Professional Before adding collagen supplements to your routine, it’s essential to consult with a healthcare professional, especially if you have underlying health conditions or allergies. They can provide personalized guidance and ensure that collagen supplementation is safe and suitable for you. Collagen is a vital protein that plays a crucial role in maintaining the health and integrity of various tissues in the body. While collagen supplements offer potential benefits for skin, joints, and overall health, it’s essential to approach them with caution and consult a healthcare professional before starting any supplementation regimen. Make sure to focus on a balanced diet that includes collagen-rich foods can also help support your body’s collagen needs. Ultimately, whether or not you should be taking collagen depends on your individual health goals and needs. Now that you know this…. You decide! Share: Facebook Pinterest Email Social Media Facebook-f Youtube Pinterest Instagram Tiktok Most Popular Get The Latest Updates Subscribe To Our Weekly Newsletter No spam, notifications only about new post, updates. Categories On Key Related Posts

Stay in the Zone: The Best Headphones for Working Out
Stay in the Zone: The Best Headphones for Working Out Whether you’re pumping iron, hitting the pavement, or flowing through yoga poses, a good soundtrack can be your ultimate workout partner. But not all headphones are created equal, especially when it comes to workouts. You need a pair that can keep up with your active lifestyle, delivering high-quality audio while staying firmly in place. In this blog post, we’ll explore the best headphones for working out, catering to various preferences and budgets. Get ready to elevate your fitness routine with the perfect pair of headphones! 1. Apple AirPods Pro “The Premium Pick” Buy on Apple Buy on Amazon Apple’s AirPods Pro are a top-tier choice for fitness enthusiasts. They offer active noise cancellation to block out distractions, a snug in-ear fit, and excellent sound quality. Their IPX4 water resistance rating means they can withstand sweat and light rain, making them ideal for intense workouts. Plus, their quick pairing with Apple devices is a huge convenience. 2. Jabra Elite 85t “The Compact and Comfortable” Buy on Jabra Buy on Amazon The Jabra Elite 85t earbuds are known for their compact design and exceptional comfort. They provide a secure fit and are rated IP55 for water and dust resistance. The sound quality is excellent, and they offer customizable EQ settings via the Jabra Sound+ app. With a long battery life and a durable build, these earbuds are perfect for extended gym sessions. 3. Bose Sport Earbuds “The Immersive Sound” Buy on Bose Buy on Amazon Bose is synonymous with high-quality sound, and their Sport Earbuds are no exception. These wireless earbuds offer clear, immersive audio and a comfortable, secure fit. They are IPX4 rated and designed to stay put during rigorous workouts. Additionally, the Bose Music app allows you to personalize your listening experience. 4. Powerbeats Pro “The Headphones Built for Fitness” Buy on Beats By Dre Buy on Amazon Powerbeats Pro, designed by Beats (a subsidiary of Apple), are built specifically for athletes. They feature ear hooks for a secure fit and are IPX4 sweat and water-resistant. With a powerful bass and long-lasting battery life, these earbuds are great for those who enjoy intense, bass-heavy tunes during their workouts. 5. Anker SoundCore Spirit X2 “The Budget-Friendly Option” Buy on SoundCloud If you’re looking for a budget-friendly option without compromising on quality, the Anker SoundCore Spirit X2 is worth considering. These wireless earbuds offer a secure fit, impressive sound quality, and an IP68 rating for water and dust resistance. With a wallet-friendly price tag, they’re a solid choice for budget-conscious fitness enthusiasts. 6. Sony WF-SP800N “The Active Noise Cancellation” Buy on Sony Buy on Amazon Sony’s WF-SP800N earbuds combine powerful audio with active noise cancellation, allowing you to focus on your workout. They are rated IP55 for water and dust resistance and feature an ambient sound mode to stay aware of your surroundings. These earbuds also offer extra bass for those who like their music with a punch. Finding the best headphones for working out depends on your specific needs and preferences. Whether you prioritize sound quality, a secure fit, or budget-friendliness, there’s a pair of workout headphones out there for you. Remember to consider factors like water resistance, comfort, and battery life when making your decision. Whichever headphones you choose, the right pair can elevate your fitness routine and keep you motivated with your favorite tunes or podcasts. So, gear up and get ready to crush your fitness goals while enjoying top-notch audio quality! Share: Facebook Pinterest Email Social Media Facebook-f Youtube Pinterest Instagram Tiktok Most Popular Get The Latest Updates Subscribe To Our Weekly Newsletter No spam, notifications only about new post, updates. Categories On Key Related Posts

How to Improve Mental Health for Athletes
How to Improve Mental Health for Athletes Being an athlete is not just about physical strength and endurance; it also requires strong mental health. Just like physical training, taking care of our mental well-being is crucial for optimal athletic performance. In this blog post, we will explore effective strategies to improve mental health for athletes. 1. Prioritize Mindfulness and Relaxation Techniques In the fast-paced world of sports, athletes must learn to navigate high levels of stress and pressure. Engaging in mindfulness techniques like deep breathing, visualization, and meditation can help athletes calm their minds, reduce anxiety, and improve focus. By incorporating regular relaxation practices into their routine, athletes can optimize their mental state and achieve better athletic performance. 2. Seek Support and Open Up About Mental Health Athletes often face unique challenges that can impact their mental health. It is crucial for athletes to reach out to mental health professionals, coaches, and teammates to discuss any concerns. Creating a safe and supportive environment will allow athletes to address their mental health needs effectively. Seeking professional help can provide athletes with the necessary tools and coping strategies to overcome challenges and maintain mental well-being. 3. Foster Self-Awareness and Positive Thinking Developing self-awareness is essential for athletes to understand their mental and emotional state. By monitoring their thoughts, emotions, and behaviors, athletes can identify any negative thinking patterns that may hinder their performance. Promoting positive self-talk and self-confidence can help athletes build resilience and enhance their mental well-being. Regular practice of techniques like affirmations and visualization can foster a positive mindset, leading to improved athletic performance. 4. Incorporate Mental Recovery Into Training Regimen Physical recovery is a well-known aspect of athlete training, but mental recovery often gets overlooked. Athletes need to allow ample time for rest, relaxation, and enjoyable activities outside of their training schedule. Proper sleep, engagement in hobbies, and spending quality time with loved ones can prevent burnout and rejuvenate the mind. Prioritizing mental recovery is just as important as physical training to maintain peak performance levels. 5. Set Realistic Goals and Avoid Overpressure Ambition and drive are commendable qualities in athletes, but unrealistic goals and excessive pressure can negatively impact mental health. Setting achievable and realistic goals helps maintain motivation and prevents feelings of failure. Athletes should focus on individual progress rather than comparing themselves to others. By managing expectations and finding a healthy balance, athletes can reduce stress and enjoy the journey of their athletic pursuits. Physical health and mental health are intertwined for athletes striving for excellence. By incorporating mindfulness techniques, seeking support, fostering self-awareness, prioritizing mental recovery, and setting realistic goals, athletes can improve their overall mental health and achieve peak performance. Remember, taking care of our minds is essential for success and well-being in sports and beyond. Embrace these strategies and bring out the best version of yourself both on and off the field. Share: Facebook Pinterest Email Social Media Facebook-f Youtube Pinterest Instagram Tiktok Most Popular Get The Latest Updates Subscribe To Our Weekly Newsletter No spam, notifications only about new post, updates. Categories On Key Related Posts
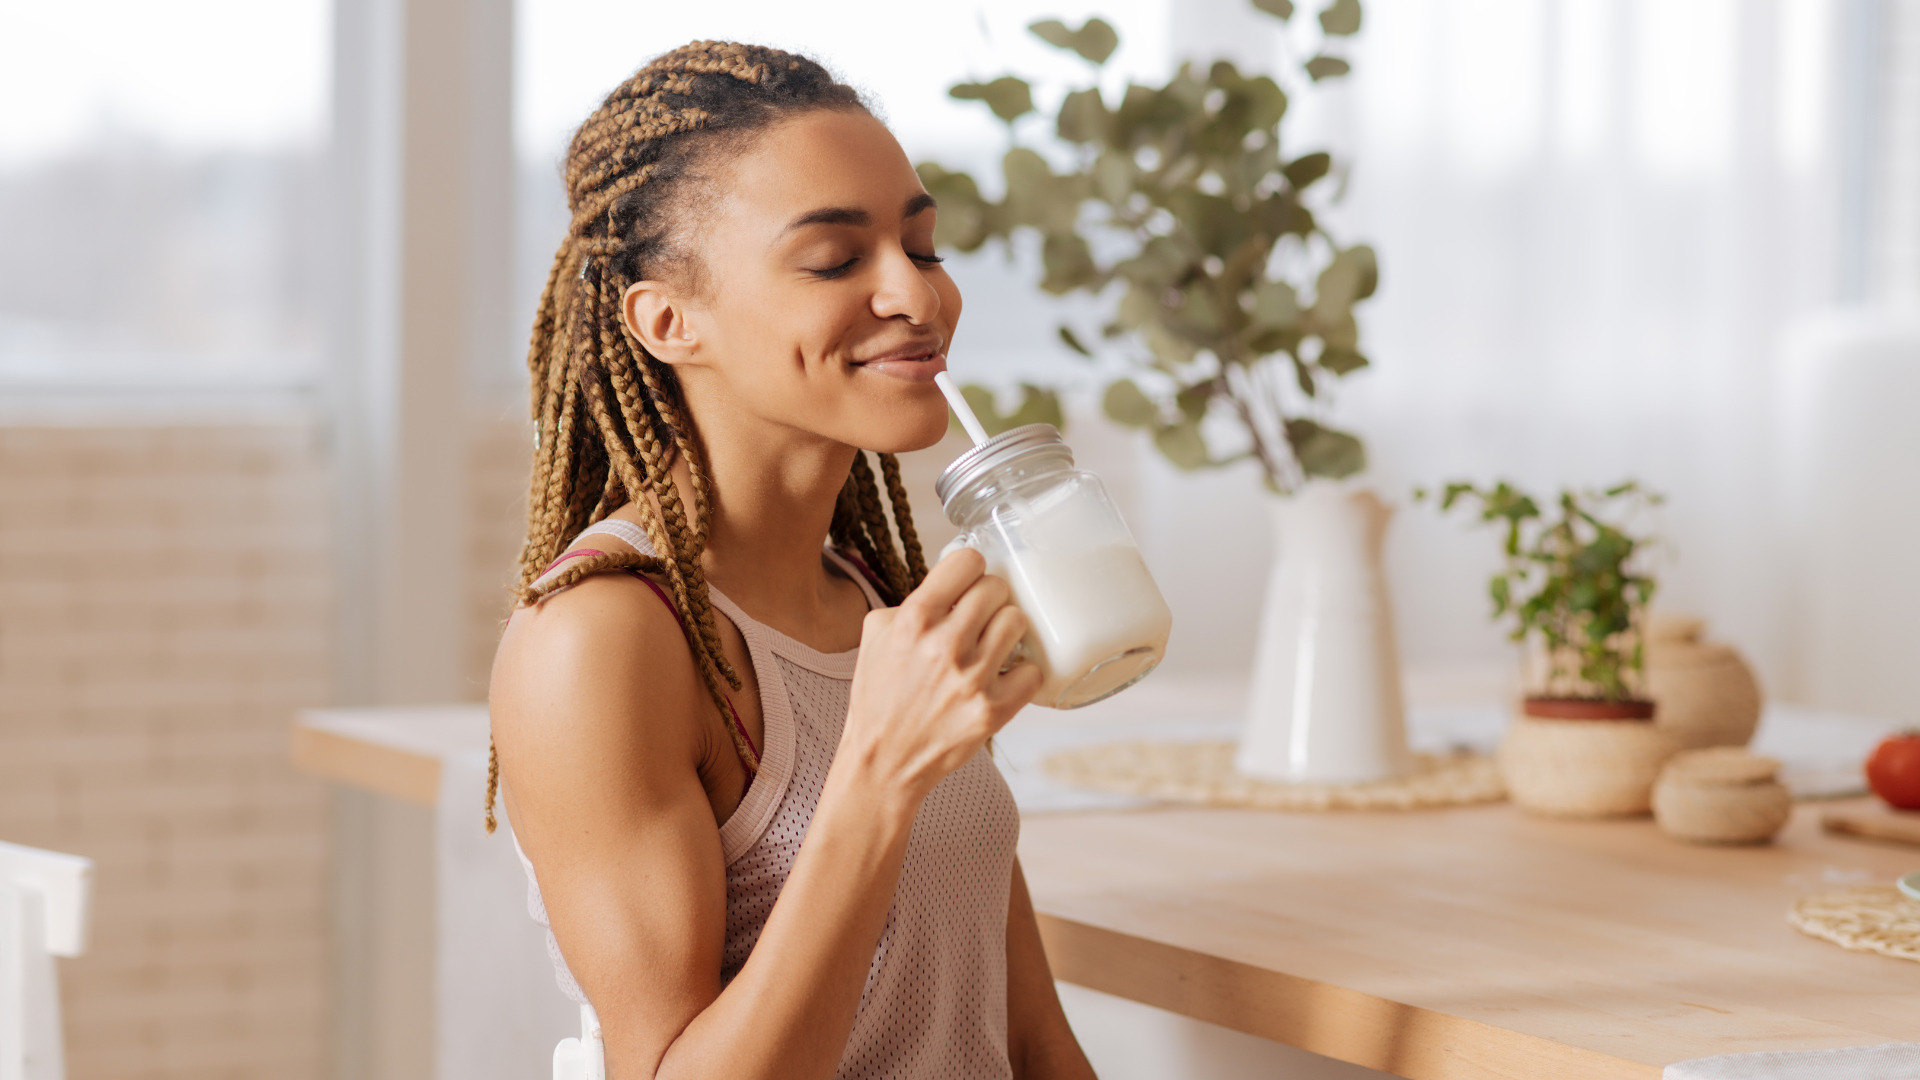
Protein-Packed Delights: 5 Weight Gain Shake Recipes You’ll Love
Protein-Packed Delights: 5 Weight Gain Shake Recipes You’ll Love Gaining weight can be just as challenging as losing it for some individuals, especially those with a fast metabolism or trying to build muscle. Protein shakes are an excellent addition to your diet when looking to increase your caloric intake and gain healthy weight. In this blog post, we’ll introduce you to five delicious and nutritious protein shake recipes that can help you achieve your weight gain goals. 1. Banana Nut Bliss Shake Ingredients: 2 ripe bananas 1/4 cup chopped walnuts 1 cup whole milk 1 scoop of vanilla protein powder 1 tablespoon honey A pinch of cinnamon (optional) Instructions: Combine the bananas, walnuts, milk, protein powder, honey, and cinnamon (if desired) in a blender. Blend until smooth and creamy. Pour into a glass and enjoy the nutty goodness. This shake is packed with healthy fats from walnuts and natural sugars from bananas, making it a calorie-rich option for weight gain. 2. Peanut Butter Chocolate Shake Ingredients: 2 tablespoons peanut butter 1 tablespoon cocoa powder 1 cup almond milk 1 scoop of chocolate protein powder 1 banana 1 tablespoon honey (optional) Instructions: Blend the peanut butter, cocoa powder, almond milk, protein powder, banana, and honey (if desired) until smooth. Pour into a glass and indulge in the rich, chocolatey goodness. This shake combines the satisfying taste of peanut butter and chocolate while providing ample protein and healthy fats to support your weight gain journey. 3. Mango Madness Shake Ingredients: 1 cup frozen mango chunks 1 cup Greek yogurt 1 scoop of vanilla protein powder 1/2 cup orange juice 1 tablespoon honey Instructions: Blend the frozen mango chunks, Greek yogurt, protein powder, orange juice, and honey until smooth. Pour into a glass and savor the tropical delight. Mangoes are not only delicious but also rich in vitamins and antioxidants, making this shake a healthy choice for those looking to gain weight. 4. Oatmeal Cookie Shake Ingredients: 1/2 cup rolled oats 1 scoop of cookies and cream protein powder 1 cup whole milk 1 tablespoon almond butter 1/2 teaspoon vanilla extract 1 tablespoon maple syrup Instructions: Blend the rolled oats, protein powder, milk, almond butter, vanilla extract, and maple syrup until smooth. Pour into a glass and enjoy the taste of an oatmeal cookie in liquid form. This shake combines the heartiness of oatmeal with the deliciousness of cookies and cream, making it a calorie-dense option for weight gain. 5. Berry Blast Shake Ingredients: 1 cup mixed berries (strawberries, blueberries, raspberries) 1 scoop of berry-flavored protein powder 1 cup Greek yogurt 1/2 cup water or milk 1 tablespoon honey (optional) Instructions: Blend the mixed berries, protein powder, Greek yogurt, water or milk, and honey (if desired) until smooth. Pour into a glass and enjoy the burst of berry flavors. This shake is packed with antioxidants from the berries, protein from the yogurt, and can help you gain weight while keeping your diet nutritious. These five protein shake recipes offer a delightful and nutritious way to help you gain weight. Incorporate these shakes into your daily routine, and remember to combine them with a balanced diet and regular exercise to achieve your weight gain goals in a healthy and sustainable way. Cheers to a tastier and weightier you! Share: Facebook Pinterest Email Social Media Facebook-f Youtube Pinterest Instagram Tiktok Most Popular Get The Latest Updates Subscribe To Our Weekly Newsletter No spam, notifications only about new post, updates. Categories On Key Related Posts

How to Get Bigger Thighs
How to Get Bigger Thighs If you’re looking to add volume and definition to your thighs, there are several effective methods that can help you achieve your goal quickly and safely. In this guide, we’ll explore the best exercises, dietary changes, and lifestyle modifications that can help you get thicker thighs fast. Exercise Your Way to Thicker Thighs Squats Squats are the most effective exercise for building thicker thighs. These exercises target the quadriceps, hamstrings, and glutes, which are the primary muscle groups in your thighs. To perform squats correctly, follow these steps: Stand with your feet shoulder-width apart and your hands on your hips Slowly lower your body down into a squat or lunge position, keeping your back straight and your knees behind your toes. Push through your heels to return to the starting position. Lunges Lunges are another exercises for building thicker thighs. To perform lunges correctly, follow these steps: Stand with your feet shoulder-width apart and your hands on your hips Step back and slowly lower your body down into a s lunge position, keeping your back straight Push through your heels to return to the starting position. Repeat with opposite legs Leg Press Leg press is another effective exercises for building thicker thighs. These exercises target the quadriceps and hamstrings, which are responsible for the size and shape of your thighs. To perform leg press correctly, follow these steps: Sit down on a leg press machine with your feet shoulder-width apart on the platform. Push the platform away from you, extending your legs fully. Slowly lower the platform back down to the starting position. Deadlifts Deadlifts are another great exercise for building thicker thighs. This exercise targets the entire lower body, including the quadriceps, hamstrings, and glutes. To perform deadlifts correctly, follow these steps: Stand over the bar with your feet shoulder-width apart. Bend down and grab the bar with your hands shoulder-width apart. Keeping your back straight and your core engaged, lift the bar off the ground and stand up. Lower the bar back down to the starting position. Dietary Changes for Thicker Thighs In addition to exercise, making certain dietary changes can also help you achieve thicker thighs. Here are some tips: Eat More Protein Protein is essential for building and repairing muscle tissue, including the muscles in your thighs. Aim to consume at least 1 gram of protein per pound of body weight daily. Good sources of protein include lean meats, fish, eggs, dairy products, and plant-based options like beans and tofu. Increase Your Caloric Intake To build muscle mass, you need to be in a calorie surplus, meaning you need to consume more calories than your body burns. Aim to increase your daily caloric intake by 250-500 calories to support muscle growth. Eat Carbohydrates Carbohydrates provide energy for your workouts and help you recover faster. Aim to consume at least 2-3 grams of carbohydrates per pound of body weight daily. Good sources of carbohydrates include whole grains, fruits, vegetables, and starchy vegetables like sweet potatoes and corn. Lifestyle Modifications for Thicker Thighs In addition to exercise and diet, making certain lifestyle modifications can also help you achieve thicker thighs. Here are some tips: Get Enough Sleep Sleep is essential for muscle recovery and growth. Aim to get at least 7-9 hours of sleep per night. Reduce Stress High levels of stress can lead to muscle breakdown and a slower rate of muscle growth. Find ways to manage stress, such as meditation, yoga, or deep breathing exercises. Stay Hydrated Proper hydration is essential for muscle function and recovery. Aim to drink at least 8-10 glasses of water per day. Getting thicker thighs requires a combination of exercise, dietary changes, and lifestyle modifications. By incorporating the exercises, dietary tips, and lifestyle modifications outlined in this guide, you can achieve thicker thighs quickly and safely. Remember to be patient and consistent, as building muscle takes time and effort. Share: Facebook Pinterest Email Social Media Facebook-f Youtube Pinterest Instagram Tiktok Most Popular Get The Latest Updates Subscribe To Our Weekly Newsletter No spam, notifications only about new post, updates. Categories On Key Related Posts

How to Reduce Bloating Naturally: 10 Tips for a Flatter Belly
How to Reduce Bloating Naturally: 10 Tips for a Flatter Belly Bloating can strike at the most inconvenient times, making you feel uncomfortable and self-conscious. Whether it’s caused by dietary choices, lifestyle factors, or underlying health issues, there are practical steps you can take to reduce bloating and regain control of your digestive comfort. In this blog post, we’ll explore twelve proven tips that can help you beat the bloat and enjoy a happier, more comfortable life. 1. Stay Hydrated One of the simplest ways to combat bloating is to drink plenty of water. Dehydration can lead to water retention, making you feel puffy and bloated. Aim to consume at least eight glasses of water a day, and consider adding herbal teas, infused water, and foods with high water content, such as cucumbers and watermelon, to your diet. 2. Watch Your Fiber Intake While fiber is essential for digestive health, consuming too much of it, especially insoluble fiber, can lead to bloating and gas. Gradually increase your fiber intake and focus on soluble fiber sources like oats, legumes, and fruits to avoid excessive gas production. 3. Mind Your Portions Overeating can strain your digestive system, leading to discomfort and bloating. Pay attention to portion sizes, and try to eat smaller, more frequent meals throughout the day. This can prevent your stomach from becoming overly full and distended. 4. Slow Down While Eating Eating too quickly can introduce excess air into your digestive system, contributing to bloating. To reduce this risk, chew your food thoroughly, and take your time during meals. This also aids in better digestion and nutrient absorption. 5. Limit Gas-Producing Foods Certain foods are notorious for causing gas and bloating. These include beans, cruciferous vegetables (like broccoli and cauliflower), carbonated beverages, and artificial sweeteners. Reduce your consumption of these foods if you’re prone to bloating. 6. Be Mindful of Food Sensitivities Food intolerances, such as lactose intolerance or gluten sensitivity, can cause significant bloating and discomfort. If you suspect you have a food sensitivity, consider eliminating the suspected trigger foods from your diet or consult a healthcare professional for testing and guidance. 7. Reduce Sodium Intake Excessive sodium intake can lead to water retention, making you feel bloated. To reduce sodium, avoid processed and salty foods, and try seasoning your meals with herbs and spices instead. 8. Probiotics and Digestive Enzymes Probiotics are beneficial bacteria that can help maintain a healthy gut microbiome. Consider taking a probiotic supplement or incorporating probiotic-rich foods like yogurt, kefir, and fermented vegetables into your diet. Digestive enzyme supplements may also aid in better digestion. 9. Stay Active Regular physical activity can promote healthy digestion by preventing constipation and reducing gas buildup. Aim for at least 30 minutes of moderate exercise most days of the week. 10. Manage Stress Stress can disrupt digestion and contribute to bloating. Practice stress-reduction techniques such as deep breathing, meditation, yoga, or spending time in nature to help relax your body and mind. Bloating is a common issue, but it doesn’t have to be a constant companion. By implementing these ten effective strategies, you can reduce bloating, improve your digestive health, and ultimately feel your best. Remember that individual responses to these methods may vary, so it’s essential to find what works best for you through trial and error. If persistent bloating or discomfort persists, consult a healthcare professional to rule out any underlying medical conditions. Share: Facebook Pinterest Email Social Media Facebook-f Youtube Pinterest Instagram Tiktok Most Popular Get The Latest Updates Subscribe To Our Weekly Newsletter No spam, notifications only about new post, updates. Categories On Key Related Posts

Collagen Consumption: Are You Taking the Right Amount?

Homemade Oil Free Vegan Butter
Homemade Oil-Free Vegan Butter Recipe As the popularity of veganism continues to rise, so does the demand for plant-based alternatives to traditional dairy products. One such staple in many kitchens is butter, which adds richness and flavor to a wide range of dishes. Fortunately, creating a vegan version of this beloved ingredient is easier than you might think. In this blog post, we will guide you through a simple yet delicious recipe for vegan butter that can be made at home. Homemade oil-free vegan butter is a versatile and delicious alternative to traditional dairy butter. It is a oil- free plant-based spread that mimics the creamy texture and rich flavor of butter, making it an excellent choice for those following a vegan or dairy-free diet. This homemade version allows you to have full control over the ingredients, ensuring a healthier and more sustainable option. Can I use any kind of non-dairy milk for this recipe? To make homemade oil-free vegan butter, you will need a few simple ingredients that are easily accessible. Additionally, non-dairy milk, such as almond milk or soy milk, is often used to add creaminess. How do I enhance the taste of homemade oil-free vegan butter? One common ingredient in homemade oil free vegan butter is nutritional yeast. Nutritional yeast not only adds a subtle cheesy flavor but also provides essential nutrients like B vitamins. Other flavorings such as salt, apple cider vinegar, and lemon juice can be added to enhance the taste and mimic the tanginess of traditional butter. One of the advantages of homemade vegan butter is that it allows customization according to personal preferences. By experimenting with different oils and flavorings, individuals can create their own unique variations of vegan butter tailored to their taste buds. What can I use homemade oil-free vegan butter on?Homemade vegan butter can be used in various ways in cooking and baking. It can be spread on toast, used for sautéing vegetables, or incorporated into recipes that call for butter. It can also be used as a substitute for dairy butter in baking, providing moisture and richness to cakes, cookies, and pastries. In addition to being a suitable option for vegans and those with dairy allergies, homemade vegan butter also offers environmental benefits. The production of traditional dairy butter requires significant amounts of water, land, and resources. By opting for homemade oil-free vegan butter, individuals can contribute to reducing their carbon footprint and promoting sustainability. Products from the Recipe You dont have to cook if you dont feel like it. Order Vegan Butter and have it shipped straight to your door step! Pin Print Homemade Oil-Free Vegan Butter Recipe Recipe by Custom Curves Course: SidesDifficulty: Medium Servings 8 servingsPrep time 4 hours Cooking time 2 hours Calories 104 kcal Ingredients 1 cup raw cashews 1/4 cup unsweetened soy milk 2 tablespoons nutritional yeast 1 tablespoon apple cider vinegar 1 teaspoon salt (adjust to taste) 1/2 teaspoon turmeric powder (for color) 1/4 teaspoon garlic powder (optional) Directions Soak the cashews in water overnight or for at least 4 hours. This will help soften them and make them easier to blend. Drain the soaked cashews and rinse them thoroughly. In a high-speed blender or food processor, combine the soaked cashews, unsweetened soy milk, nutritional yeast, apple cider vinegar, salt, turmeric powder, and garlic powder (if using). Blend until smooth and creamy. 4. If the mixture is too thick, you can add a little more soy milk to achieve the desired consistency. Once blended, transfer the mixture into a small container or silicone mold. Place the container in the refrigerator and allow the mixture to set for at least 2 hours or until firm. Once firm, your homemade oil-free vegan butter is ready to use! You can spread it on toast, use it for baking, or melt it for cooking purposes. Notes Store your homemade oil-free vegan butter in an airtight container in the refrigerator for up to two weeks. You can also freeze it for longer storage. Serving size is 2 tbsp for this recipe It is important to note that while homemade oil-free vegan butter can be a healthier alternative to dairy butter, it should still be consumed in moderation. Like any other high-fat food, excessive consumption may lead to weight gain and other health issues. It is always recommended to consult with a healthcare professional or registered dietitian for personalized dietary advice. In conclusion, homemade vegan butter is a versatile and customizable plant-based spread that provides a delicious alternative to traditional dairy butter. With its creamy texture and rich flavor, it can be used in various cooking and baking applications. By making your own vegan butter at home, you have control over the ingredients and can contribute to a more sustainable food system. In conclusion, homemade vegan butter is a versatile and customizable plant-based spread that provides a delicious alternative to traditional dairy butter. With its creamy texture and rich flavor, it can be used in various cooking and baking applications. By making your own vegan butter at home, you have control over the ingredients and can contribute to a more sustainable food system. Share: Facebook Pinterest Email Social Media Facebook-f Youtube Pinterest Instagram Tiktok Most Popular Get The Latest Updates Subscribe To Our Weekly Newsletter No spam, notifications only about new post, updates. Categories beetroot sugar vs cane sugar 0 breakfast 0 can i take vitamin d and vitamin c together 0 classic 1 collagen 1 dessert 1 dinner 1 drinks 3 gluten-free 0 how can i gain weight quickly 0 lunch 2 non-dairy 5 nut-free 0 oil-free 2 pescatarian 3 protein 1 protein based 0 side 1 sugar-free 0 vegan 7 vegetarian 6 weight gain recipes 0 weight loss 1 weight loss by juicing 0 weight loss recipes 0 On Key Related Posts
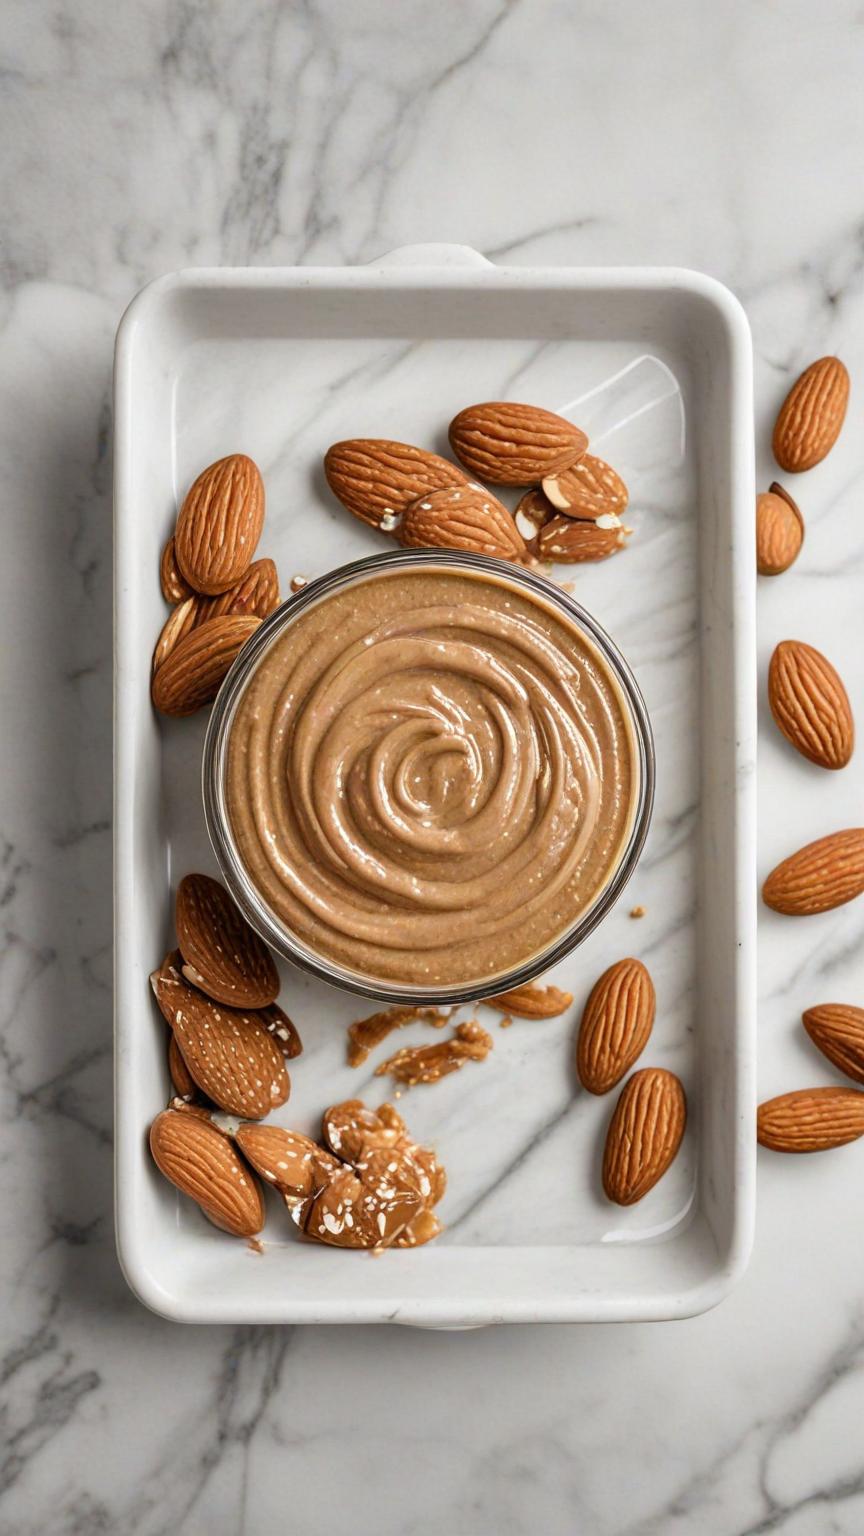
Oil Free Almond Butter
Oil Free Almond Butter Almond butter is a delicious and nutritious spread that can be enjoyed on toast, in smoothies, or as a dip for fruits and vegetables. While traditional almond butter recipes often include added oils, it is possible to make a healthier version without any oil. In this recipe, we will guide you through the process of making oil-free almond butter at home. How do I enhance the taste of homemade oil-free almond butter? Homemade almond butter is a versatile and delicious ingredient that can be used in a variety of ways. Its creamy texture and nutty flavor make it a great addition to both sweet and savory dishes. Here are some ideas on how to use homemade almond butter: 1. Spread: One of the most common uses for almond butter is as a spread. You can use it as a healthier alternative to traditional spreads like peanut butter or Nutella. Spread it on toast, bagels, or crackers for a quick and nutritious snack. You can also add a drizzle of honey or sprinkle some cinnamon on top for extra flavor. 2. Smoothies: Almond butter can be a great addition to smoothies, adding creaminess and richness. Simply blend it with your favorite fruits, vegetables, and liquid base (such as almond milk or coconut water) for a nutritious and filling smoothie. It pairs well with ingredients like bananas, berries, spinach, and cocoa powder. 3. Baking: Almond butter can be used in various baked goods to add moisture and flavor. You can substitute it for other nut butters or even regular butter in recipes like cookies, brownies, muffins, and cakes. It works particularly well in recipes that call for nuts or have a nutty flavor profile. 4. Dips and Sauces: Homemade almond butter can be used as a base for dips and sauces. You can mix it with ingredients like yogurt, lemon juice, garlic, and herbs to create a creamy dip for vegetables or pita chips. It can also be thinned out with water or oil to make a flavorful sauce for noodles or stir-fries. 5. Salad Dressings: Almond butter can be incorporated into salad dressings to add richness and depth of flavor. Combine it with ingredients like olive oil, vinegar, mustard, honey, and herbs to create a creamy dressing that pairs well with salads containing fruits, vegetables, or grains. 6. Protein Bars and Energy Balls: Almond butter can be a key ingredient in homemade protein bars and energy balls. Its natural oils help bind the ingredients together, while its nutty flavor adds depth. Mix it with oats, dried fruits, nuts, seeds, and sweeteners like honey or maple syrup to create a nutritious and portable snack. 7. Stir-Fries: Almond butter can be used as a sauce or garnish for stir-fried dishes. Its creamy texture and nutty taste complement vegetables, tofu, chicken, or shrimp. You can mix it with soy sauce, ginger, garlic, and other seasonings to create a flavorful sauce that coats the ingredients. 8. Oatmeal: Add a spoonful of almond butter to your morning oatmeal for extra creaminess and flavor. It pairs well with toppings like sliced bananas, berries, nuts, seeds, or a drizzle of honey. 9. Ice Cream Topping: Drizzle homemade almond butter over your favorite ice cream flavors for a decadent treat. The combination of cold ice cream and warm almond butter creates a delightful contrast in textures and temperatures. 10. Homemade Granola: Incorporate almond butter into your homemade granola recipe for added richness and flavor. Mix it with oats, nuts, seeds, dried fruits, sweeteners like honey or maple syrup, and bake until golden brown for a crunchy and nutritious breakfast option. Products from the Recipe. You dont have to cook if you dont feel like it. Order Vegan Butter and have it shipped straight to your door step! Pin Print Oil Free Almond Butter Recipe by Custom Curves Course: SidesCuisine: VeganDifficulty: Easy Servings 8 servingsPrep time 20 minutesCooking time 10 minutesCalories 231 kcal Ingredients 2 cups raw almonds 1/4 teaspoon salt (optional) 1 tablespoon honey or maple syrup (optional) Directions Preheat your oven to 350°F (175°C). Spread the almonds evenly on a baking sheet and roast them for about 10 minutes until they become fragrant and slightly golden. This step helps to enhance the flavor of the almonds. Allow the roasted almonds to cool completely before proceeding to the next step. This will prevent them from turning into almond butter too quickly. Once cooled, transfer the almonds to a high-powered blender or food processor. You can also use a mortar and pestle if you prefer a chunkier texture. Blend or process the almonds on high speed for about 5 minutes, scraping down the sides occasionally. At first, the almonds will turn into a fine powder resembling almond flour. As you continue blending, the almonds will release their natural oils and start clumping together. Keep blending until you achieve a smooth and creamy consistency. This may take some time, so be patient. If desired, add salt and sweetener of your choice (honey or maple syrup) to enhance the flavor of your almond butter. Blend for an additional minute to incorporate these ingredients evenly. Once you have reached your desired consistency, transfer the oil-free almond butter to an airtight container and store it in the refrigerator for up to two weeks. Notes It’s important to use raw almonds for this recipe, as roasted almonds may already contain added oils. If you prefer a crunchy almond butter, you can reserve a small portion of the roasted almonds and chop them finely. Stir them into the creamy almond butter once it’s ready. Feel free to adjust the sweetness and saltiness according to your taste preferences. Oil-free almond butter is a type of almond butter that is made without the addition of any oils. Almond butter is typically made by grinding almonds into a smooth and creamy paste, similar to peanut butter. While some commercial brands of almond butter may contain added oils, such as vegetable oil or palm oil, oil-free almond butter is made solely from almonds. Oil-free almond
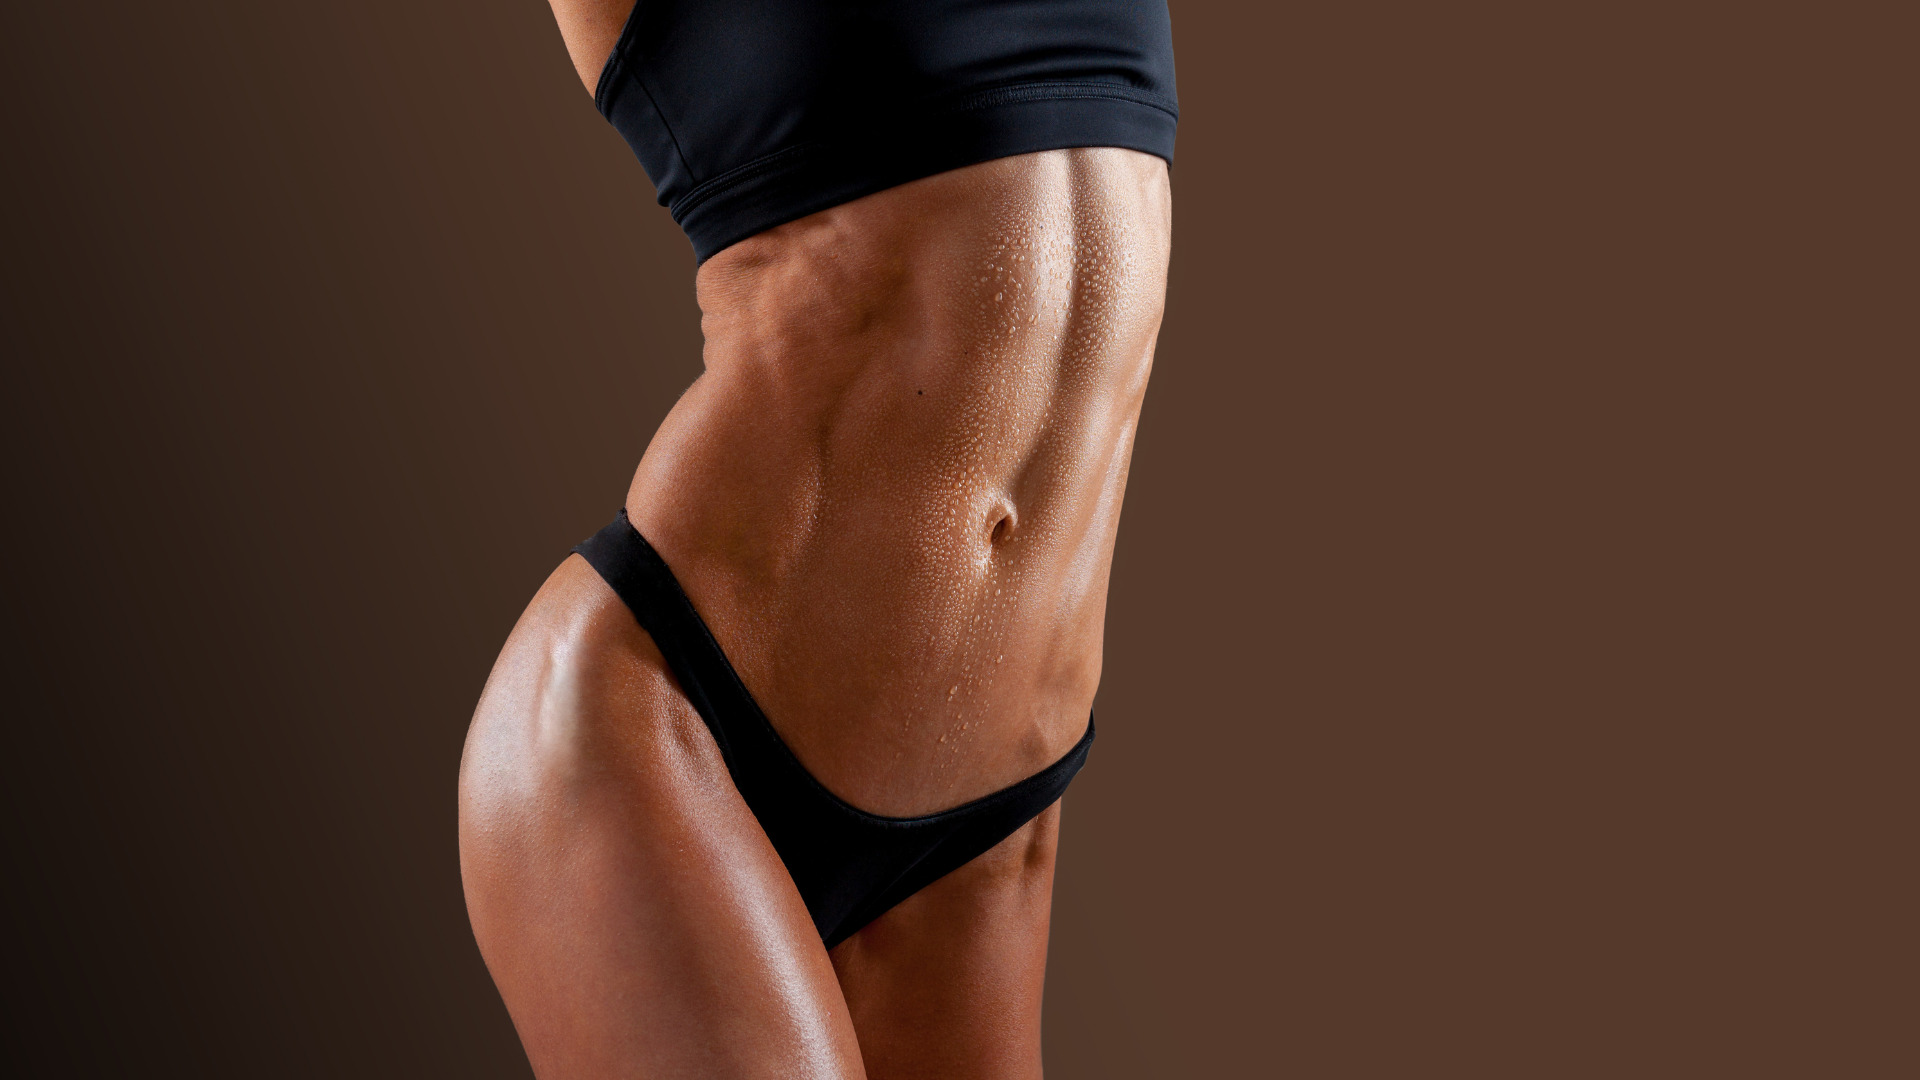
Revamp Your Workout Routine: Innovative Ab Workouts for a Flat Stomach
Revamp Your Workout Routine: Innovative Ab Workouts for a Flat Stomach A flat stomach is a fitness goal many of us aspire to achieve, but it requires more than just wishful thinking. To get those toned abs, you need a combination of a balanced diet, cardiovascular exercise, and, most importantly, targeted ab workouts. In this blog, we’ll explore the best ab workouts that can help you sculpt those enviable flat stomach muscles. 1. CRUNCHES Crunches are a classic abdominal exercise that targets the rectus abdomens, the muscles responsible for the “six-pack” appearance. Here’s how to do them: Lie flat on your back with your knees bent and feet flat on the floor. Place your hands behind your head or cross them over your chest. Contract your abdominal muscles, lifting your upper body off the ground. Exhale as you lift and inhale as you lower your upper body. 2. PLANKS Planks are fantastic for strengthening your core muscles and improving posture. They also engage the obliques, which are essential for a well-defined midsection. To perform a plank: Start in a push-up position with your hands directly under your shoulders. Keep your body in a straight line from head to heels. Engage your core muscles and hold the position for as long as you can. Be sure to keep your hips level, and don’t let them sag or hike up. 3. LEG RAISES Leg raises are a challenging exercise that targets the lower abdominal muscles. Here’s how to do them: Lie flat on your back with your hands under your hips or by your sides. Keep your legs straight or slightly bent at the knees. Lift your legs off the ground, keeping them together. Slowly lower your legs back down without letting them touch the floor. Engage your core throughout the movement to prevent arching your lower back. 4. BICYCLE CRUNCHES Bicycle crunches combine twisting and crunching motions, effectively working both your upper and lower abs, as well as your obliques: Lie on your back with your hands behind your head. Lift your head and shoulders off the ground and bring your right elbow toward your left knee. At the same time, extend your right leg straight out. Alternate sides in a pedaling motion, bringing your left elbow to your right knee while extending your left leg. Keep a controlled pace, focusing on contracting your core muscles. 5. RUSSIAN TWIST Russian twists are another excellent exercise for targeting the oblique muscles: Sit on the floor with your knees bent and feet flat on the ground. Lean back slightly, keeping your back straight and chest lifted. Clasp your hands together in front of you or hold a weight or medicine ball. Twist your torso to the right, bringing the object or your hands to the right side of your body. Return to the center and repeat on the left side. Continue alternating sides. 6. MOUNTAIN CLIMBERS Mountain climbers are not only great for your abs but also provide a cardiovascular workout. Here’s how to do them: Start in a push-up position with your hands under your shoulders. Alternate bringing your knees toward your chest, as if you were running in place. Keep your core engaged and maintain a steady pace. Achieving a flat stomach requires commitment, dedication, and a well-rounded fitness routine. Incorporating these ab workouts into your regimen will help you build a strong core and achieve that toned, flat stomach you desire. Remember to combine these exercises with a balanced diet and cardiovascular exercise for the best results. Stay consistent, stay patient, and watch your hard work pay off as you get closer to your fitness goals. Share: Facebook Pinterest Email Social Media Facebook-f Youtube Pinterest Instagram Tiktok Most Popular Get The Latest Updates Subscribe To Our Weekly Newsletter No spam, notifications only about new post, updates. Categories On Key Related Posts

10 Low-Carb Mexican Recipes for Weight Loss
10 Low-Carb Mexican Recipes for Weight Loss Mexican cuisine is a treasure trove of vibrant and savory flavors, but it often comes with a reputation for being carb-heavy. However, if you’re on a weight loss journey or simply watching your carb intake, you can still enjoy the rich tastes of Mexico with these 10 mouthwatering low-carb Mexican recipes. These dishes are not only delicious but also packed with nutrients to help you achieve your health and fitness goals. Let’s dive into the world of healthy Mexican cooking! 1. Cauliflower Rice Burrito Bowl Ingredients: Cauliflower rice Grilled chicken or lean beef Sautéed vegetables (bell peppers, onions) Guacamole Salsa Instructions: Replace traditional rice with cauliflower rice in your burrito bowl for a low-carb base. Top it with your choice of grilled protein, sautéed veggies, guacamole, and salsa for a satisfying and nutritious meal. 2. Zucchini Enchiladas Ingredients: Zucchini strips Lean ground turkey Black beans Mexican spices Sugar-free enchilada sauce Instructions: Use thinly sliced zucchini as a healthy alternative to tortillas. Fill them with seasoned ground turkey, black beans, and your favorite Mexican spices. Bake with a sugar-free enchilada sauce for an authentic, low-carb enchilada experience. 3. Cabbage-Wrapped Tacos Ingredients: Cabbage leaves Lean ground beef or turkey Diced tomatoes Onions Greek yogurt (as a sour cream substitute) Instructions: Transform cabbage leaves into taco shells, providing a nutritious, low-carb vessel. Fill them with your choice of seasoned meat, diced tomatoes, onions, and a dollop of Greek yogurt for a guilt-free taco feast. 4. Guacamole-Stuffed Chicken Breast Ingredients: Chicken breasts Homemade guacamole Instructions: Elevate your chicken game by stuffing chicken breasts with homemade guacamole. Bake or grill until tender and serve alongside sautéed spinach or a simple salad for a flavorful low-carb meal. 5. Spaghetti Squash Nachos Ingredients: Roasted spaghetti squash strands Ground beef or turkey Melted cheese Diced tomatoes Jalapeños Fresh cilantro Instructions: Swap out tortilla chips with roasted spaghetti squash strands for a crunchy, low-carb base. Top with seasoned ground meat, melted cheese, diced tomatoes, jalapeños, and a sprinkle of fresh cilantro for a mouthwatering nacho experience. 6. Cilantro Lime Shrimp Skewers Ingredients: Shrimp Cilantro-lime marinade Instructions: Marinate shrimp in a zesty cilantro-lime mixture and then grill them to perfection. Serve these skewers with roasted vegetables for a light and refreshing low-carb meal that’s bursting with flavor. 7. Low-Carb Chicken Fajita Salad Ingredients: Grilled chicken strips Bell peppers Onions Fresh lettuce Avocado-lime dressing Instructions: Create a satisfying salad by combining grilled chicken strips, sautéed bell peppers and onions, and fresh lettuce. Drizzle with homemade avocado-lime dressing for that quintessential fajita taste without the carbs. 8. Mexican Cauliflower Casserole Ingredients: Cauliflower florets Lean ground beef or turkey Diced tomatoes Green chilies Shredded cheese Instructions: Mix cauliflower florets with seasoned ground meat, diced tomatoes, green chilies, and a generous helping of shredded cheese for a hearty, low-carb casserole. Bake until golden brown and bubbling. 9. Salsa Verde Pork Chops Ingredients: Pork chops Salsa verde sauce Instructions: Coat pork chops with tangy salsa verde sauce and bake until they’re tender and infused with flavor. Serve alongside steamed broccoli or cauliflower for a balanced, low-carb meal. 10. Low-Carb Mexican Cauliflower Rice Ingredients: Cauliflower rice Onions Garlic Diced tomatoes Fresh cilantro Instructions: Create a healthier alternative to traditional Mexican rice by sautéing cauliflower rice with onions, garlic, diced tomatoes, and fresh cilantro. This flavorful side dish perfectly complements any Mexican-inspired meal. With these 10 simple and delicious low-carb Mexican recipes, you can enjoy the vibrant flavors of Mexico while staying on track with your weight loss goals. These dishes not only satisfy your taste buds but also provide you with the nutrients your body needs. So, don’t hesitate to incorporate these delicious and healthy Mexican recipes into your meal plan and start on a flavorful journey toward your health and fitness objectives. Dive into the world of healthy Mexican cuisine, and let your taste buds and waistline both thank you for this delightful journey to weight loss success! Share: Facebook Pinterest Email Social Media Facebook-f Youtube Pinterest Instagram Tiktok Most Popular Get The Latest Updates Subscribe To Our Weekly Newsletter No spam, notifications only about new post, updates. Categories On Key Related Posts

7 Must-Read Books about Mental Health for Productivity and Life Hacks
7 Must-Read Books about Mental Health for Productivity and Life Hacks Amid the chaos and demands of daily life, we often forget to prioritize our mental well-being. It’s important to know that taking care of our mental health is essential for us to function at our full potential. Fortunately, literature has the power to inspire, educate, and provide solace. In this blog, we will explore seven books that offer valuable insights, guidance, and a path to wellness for those embarking on a journey to better mental health. 1. “The Untethered Soul” by Michael A. Singer Buy on AMAZON Michael A. Singer’s “The Untethered Soul” delves into the nature of consciousness and the inner self. It explores the concept of inner freedom and offers practical tools for letting go of emotional burdens. This book encourages readers to find peace by connecting with their innermost selves and is a must-read for those seeking clarity and inner harmony. 2. “Mindset: The New Psychology of Success” by Carol S. Dweck Buy on AMAZON Carol S. Dweck’s “Mindset” explores the idea that one’s mindset can greatly influence their success and happiness. She distinguishes between a fixed mindset and a growth mindset and demonstrates how cultivating a growth mindset can lead to personal growth, resilience, and improved mental health. 3. “The Body Keeps the Score” by Bessel van der Kolk Buy on AMAZON In “The Body Keeps the Score,” Bessel van der Kolk, a renowned psychiatrist, examines the effects of trauma on the body and mind. He provides a comprehensive understanding of how trauma impacts mental health and offers strategies for healing and recovery. This book is a valuable resource for those dealing with past traumas or seeking to support others on their journey to healing. 4. “The Art of Happiness” by Dalai Lama and Howard Cutler Buy on AMAZON The Dalai Lama, in collaboration with Howard Cutler, presents “The Art of Happiness,” a book that explores the keys to true happiness. Through conversations and insights, readers learn about the importance of compassion, gratitude, and inner peace in achieving lasting happiness. 5. “Radical Acceptance” by Tara Brach Buy on AMAZON Tara Brach’s “Radical Acceptance” offers a compassionate approach to self-acceptance and healing. She guides readers through mindfulness practices and self-compassion techniques to overcome feelings of unworthiness and self-judgment. This book is a powerful tool for those looking to release inner turmoil and embrace self-love. 6. “Feeling Good: The New Mood Therapy” by David D. Burns Buy on AMAZON In “Feeling Good,” psychiatrist David D. Burns explores cognitive-behavioral therapy (CBT) techniques to combat depression and improve mental well-being. This practical guide provides readers with tools to challenge negative thoughts and develop healthier, more positive thinking patterns. 7. “The Alchemist” by Paulo Coelho Buy on AMAZON Paulo Coelho’s “The Alchemist” is a timeless allegorical novel that inspires readers to follow their dreams and discover their true purpose in life. This enchanting story encourages individuals to embark on their own personal journeys of self-discovery and fulfillment, making it a wonderful read for anyone seeking mental clarity and purpose. These seven transformative books offer valuable insights and practical strategies for improving mental health and overall well-being. Whether you’re looking to cultivate inner peace, develop a growth mindset, heal from trauma, or find happiness, these books provide guidance and inspiration. Remember that the path to better mental health is a continuous journey, and these books can serve as valuable companions along the way. So, dive into the world of literature, explore these titles, and embark on a journey towards improved mental health and well-being. Embrace the power of these books, as they hold the keys to a healthier and happier you. Share: Facebook Pinterest Email Social Media Facebook-f Youtube Pinterest Instagram Tiktok Most Popular Get The Latest Updates Subscribe To Our Weekly Newsletter No spam, notifications only about new post, updates. Categories On Key Related Posts

Embrace Your Curves: The Best Shapewear for Women
Embrace Your Curves: The Best Shapewear for Women Every woman possesses unique curves that deserve to be celebrated. However, there are certain occasions or outfits that call for a little extra support and enhancement. This is where shapewear comes in. Shapewear has evolved significantly over the years, and today, it offers a wide range of options to help women embrace and enhance their natural curves. Choosing the right shapewear can make a world of difference in how you feel and look in your favorite outfits. With numerous brands flooding the market, it can be overwhelming to find the best options. To help you navigate through the sea of choices, we have compiled a list of top brands known for their quality, comfort, and ability to flatter and enhance your curves. From trusted industry leaders to innovative newcomers, these brands offer a range of shapewear options to suit your needs. In this blog post, we will explore some of the best shapewear options available that will not only provide you with the desired silhouette but also make you feel confident and comfortable in your own skin. 1. Spanx Spanx is a household name when it comes to shapewear. Renowned for their high-quality products, this brand has been a go-to choice for women worldwide. Spanx offers a vast range of shapewear, including bodysuits, shorts, camisoles, and waist cinchers. Known for their comfortable and seamless design, Spanx shapewear provides excellent control and smoothing effects while allowing for easy movement. BUY ON AMAZON BUY ON AMAZON BUY ON AMAZON 2. Skims Created by celebrity and entrepreneur Kim Kardashian, Skims has gained immense popularity for its inclusive and diverse range of shapewear. Skims offers a variety of options, ranging from high-waisted briefs to sculpting bodysuits, all designed to provide targeted support and enhance your natural curves. The brand focuses on inclusive sizing, ensuring that women of all body types can find the perfect fit and feel confident. BUY ON SKIMS BUY ON SKIMS BUY ON SKIMS 3. Maidenform Maidenform combines style, comfort, and affordability in their shapewear collections. With a long-standing reputation in the industry, Maidenform offers a wide range of options, from smoothing camisoles to waist trainers and thigh slimmers. Their shapewear is designed to provide moderate control and shaping, making it suitable for everyday wear or special occasions. BUY ON TARGET BUY ON AMAZON BUY ON TARGET 4. Yummie Yummie is a brand that prioritizes comfort without compromising on style. Their shapewear collection features innovative designs and high-quality fabrics to provide a seamless and flattering fit. Yummie offers various options, including shaping leggings, tanks, and briefs, all designed to enhance your curves while offering all-day comfort. BUY ON AMAZON BUY ON AMAZON BUY ON AMAZON 5. Leonisa Leonisa is a brand known for its exceptional craftsmanship and attention to detail. Their shapewear is designed to provide targeted compression and contouring. With a focus on quality materials and construction, Leonisa offers a range of options, including waist cinchers, bodysuits, and thigh slimmers. Their shapewear provides excellent support and shaping while remaining breathable and comfortable. BUY ON LEONISA BUY ON LEONISA BUY ON LEONISA 6. Commando For those seeking a no-show, second-skin effect, Commando is the brand to explore. Known for their seamless and invisible designs, Commando offers shapewear options that are virtually undetectable under clothing. Their collection includes high-waisted shorts, slips, and bodysuits, all crafted from lightweight and breathable fabrics for a comfortable fit. BUY ON COMMANDO BUY ON COMMANDO BUY ON COMMANDO Investing in high-quality shapewear can do wonders for your confidence and help you achieve a sleek and polished look. The brands mentioned in this blog post have earned their reputation for producing top-notch shapewear that flatters and enhances a woman’s natural curves. Whether you prefer seamless designs, innovative materials, or inclusive sizing, there is a brand out there that caters to your needs. Remember to prioritize your comfort and desired level of control when selecting shapewear, and embrace the curves. Share: Facebook Pinterest Email Social Media Facebook-f Youtube Pinterest Instagram Tiktok Most Popular Get The Latest Updates Subscribe To Our Weekly Newsletter No spam, notifications only about new post, updates. Categories On Key Related Posts
Best Running Shoes for Women (Fall 2023)
Best Running Shoes for Women (Fall 2023) Running is not just an exercise; it’s a lifestyle. Whether you’re a seasoned marathon runner or a beginner looking to kick-start your fitness journey, choosing the right pair of running shoes is crucial. Women, in particular, need footwear that offers the perfect blend of comfort, support, and style. In this blog, we’ll walk you through some of the best running shoes for women available in the market today. Choosing the right running shoes is a critical decision for several reasons, each of which significantly impacts your running experience and overall well-being. Here are some reasons why you should choose the right running shoes for you. Injury Prevention Ill-fitting or unsuitable shoes can lead to a range of injuries, from shin splints to plantar fasciitis. The right running shoes provide proper cushioning and support to reduce the risk of these injuries. Performance Enhancement Running shoes are designed to optimize your performance. They provide the necessary stability and shock absorption, allowing you to run longer and faster with less effort. Comfort A comfortable pair of running shoes can make your runs enjoyable and motivate you to stay consistent with your fitness routine. Now that we’ve highlighted the significance of choosing the right running shoes, let’s take a look at some of the best options for women: 1. Nike Air Zoom Pegasus 38 Buy on Amazon Buy on CHAMPSSPORTS.COM Comfort 89% Injury Prevention 94% Performance Enhanced 97% The Nike Air Zoom Pegasus 38 is a favorite among runners for its versatility. It’s known for its plush cushioning, responsive Zoom Air units, and secure fit. Whether you’re a beginner or a seasoned runner, these shoes will provide you with the comfort and support you need. 2. Brooks Ghost 14 Buy on Amazon Buy on BROOKSRUNNING.COM Comfort 84% Injury Prevention 93% Performance Enhanced 96% The Brooks Ghost 14 is a neutral running shoe that caters to a wide range of runners. It’s loved for its smooth ride, exceptional cushioning, and adaptable fit. These shoes are perfect for women seeking a balanced blend of comfort and performance. 3. ASICS Gel-Kayano 28 Buy on Amazon Buy on ASICS.COM Comfort 76% Injury Prevention 89% Performance Enhanced 93% If you’re an overpronator or need extra stability, the ASICS Gel-Kayano 28 is an excellent choice. It features a combination of cushioning and support technologies, making it ideal for long-distance runs or those with stability concerns. 4. New Balance Fresh Foam 1080v11 Buy on Amazon Comfort 96% Injury Prevention 69% Performance Enhanced 64% The New Balance Fresh Foam 1080v11 is lauded for its plush cushioning and luxurious comfort. It’s designed for neutral runners looking for a smooth and cushioned ride. The roomy toe box and soft midsole ensure your feet stay comfortable during your runs. 5. Hoka One One Clifton 8 Buy on Amazon Comfort 95% Injury Prevention 57% Performance Enhanced 58% Hoka One One’s Clifton series is renowned for its maximal cushioning and lightweight design. The Clifton 8 is no exception. It provides a cloud-like feel underfoot, making it a great choice for women seeking maximum comfort during their runs. 6. Saucony Kinvara 12 Comfort 59% Injury Prevention 82% Performance Enhanced 90% Buy on Amazon For those who prefer a lightweight and responsive shoe, the Saucony Kinvara 12 is an excellent option. It offers a minimalistic yet supportive design, perfect for speed training and shorter races. 7. Altra Torin 5 Comfort 76% Injury Prevention 79% Performance Enhanced 85% Buy from ALTRARUNNING.COM Buy on Amazon If you’re interested in zero-drop shoes with a wide-toe box, the Altra Torin 5 is worth considering. It promotes a natural foot motion and is a favorite among minimalist runners. 8. Brooks Adrenaline GTS 22 Comfort 83% Injury Prevention 77% Performance Enhanced 92% Buy from BROOKSRUNNING.COM Buy on Amazon The Brooks Adrenaline GTS 22 is a go-to choice for women who overpronate or need extra support. It offers a perfect blend of cushioning and stability, making it an excellent option for both daily training and long-distance runs. 9. Nike React Infinity Run Flyknit Comfort 87% Injury Prevention 62% Performance Enhanced 70% Buy from NIKE.COM Buy on Amazon Nike’s React Infinity Run Flyknit is all about plush cushioning and a responsive ride. These shoes are designed to keep your feet comfortable and reduce the risk of injury while providing a sleek and stylish look. Remember that the best running shoe for you may depend on your individual running style, foot shape, and specific needs. It’s essential to get properly fitted at a running store or consult with a podiatrist if you have any concerns about your feet or gait. Investing in the right pair of running shoes is a crucial step towards enhancing your running experience and reducing the risk of injuries. With the options listed above, you’re sure to find the perfect fit that suits your needs, ensuring that every step you take is comfortable and propels you closer to your fitness goals. So, lace up, embrace the comfort, and let your shoes be the catalyst for incredible runs and accomplishments. Run happy. Run strong. Run in style! Share: Facebook Pinterest Email Social Media Facebook-f Youtube Pinterest Instagram Tiktok Most Popular Get The Latest Updates Subscribe To Our Weekly Newsletter No spam, notifications only about new post, updates. Categories On Key Related Posts
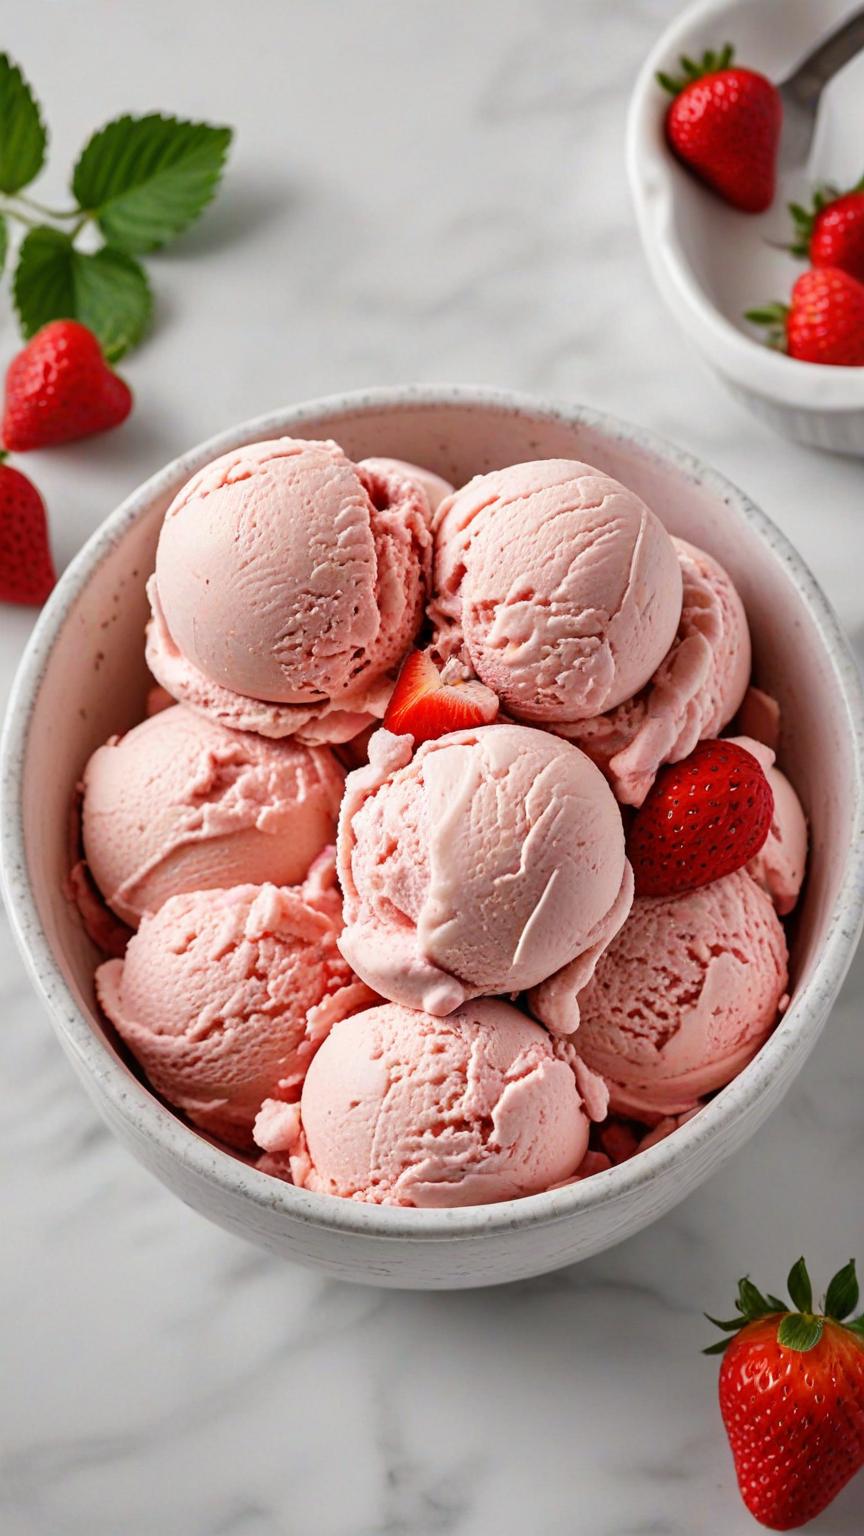
Strawberry Coconut Vegan Ice Cream
Strawberry Coconut Vegan Ice Cream Vegan strawberry ice cream made with a Ninja Creami is a delicious and guilt-free treat that is perfect for those following a plant-based diet or looking for a dairy-free alternative. The Ninja Creami is a versatile and powerful appliance that can create creamy and smooth ice cream without the need for dairy or refined sugars. To make vegan strawberry ice cream with a Ninja Creami, you will need a few simple ingredients. Start by gathering ripe strawberries, coconut milk, a natural sweetener of your choice (such as maple syrup or agave nectar), and a dash of vanilla extract for added flavor. Can I use any kind of non-dairy milk for this recipe? To make homemade vegan ice cream, you will need a few simple ingredients that are easily accessible. The base of this recipe typically consists of plant-based full fat milk. Using full fat coconut milk provide the necessary fat content to achieve the desired texture and consistency. Additionally, non-dairy milk, such a heavy cream or whipping cream could be a alternative solution. How do I enhance the taste of the vegan ice cream? Adding toppings like, sliced strawberries, non-dairy chocolate chips, coconut flakes, non-dairy chocolate syrup can be added to enhance the taste of a homemade vegan ice cream. One of the advantages of homemade vegan butter is that it allows customization according to personal preferences. By experimenting with toppings and flavorings, individuals can create their own unique variations of strawberry ice cream. Items from the Recipe! Order ingredients and have it shipped straight to your door step! Pin Print Strawberry Coconut Vegan Ice Cream Course: DessertCuisine: VeganDifficulty: Easy Servings 8 servingsPrep time 10 minutesCooking time 2 minutesCalories 190 kcal Ingredients 2 cans of full-fat coconut milk 2 cups of fresh or frozen strawberries 1/2 cup of agave nectar or sweetener of choice 1 teaspoon of lemon juice Directions Chill the cans of coconut milk in the refrigerator. Blend together the strawberries, coconut cream, agave nectar, and lemon juice until the mixture is smooth and pink. Transfer the blended mixture to your Ninja Creami and churn according to the manufacturer’s instructions. Once churned, pour the ice cream into a container and freeze until it solidifies. Delight in the refreshing taste of strawberry coconut goodness. The result is a luscious and refreshing vegan strawberry ice cream that is bursting with fruity flavors. The Ninja Creami’s unique technology ensures that you achieve a creamy and smooth texture without the need for traditional dairy products. Plus, the natural sweetness of the strawberries combined with the creaminess of the coconut milk provides a delectable and satisfying dessert option. Feel free to get creative with your vegan strawberry ice cream by adding toppings like fresh sliced strawberries, crushed nuts, or a drizzle of melted dairy-free chocolate. You can also experiment with other flavors and variations by substituting the strawberries with different fruits or adding in mix-ins like chocolate chips or shredded coconut. Overall, making vegan strawberry ice cream with a Ninja Creami is a simple and enjoyable process that allows you to indulge in a creamy and flavorful dessert while adhering to a plant-based lifestyle. Share: Facebook Pinterest Email Social Media Facebook-f Youtube Pinterest Instagram Tiktok Most Popular Get The Latest Updates Subscribe To Our Weekly Newsletter No spam, notifications only about new post, updates. Categories On Key Related Posts

8 Delicious and Keto-Friendly Meals for Effective Weight Loss
8 Delicious and Keto-Friendly Meals for Effective Weight Loss Starting the weight-loss journey can be both challenging and rewarding. The ketogenic diet, known as keto, has gained popularity for its ability to promote weight loss by encouraging the body to burn fat for energy. One of the keys to success on the keto diet is to consume meals that are low in carbs and high in healthy fats. In this blog, we’ll explore 8 delicious keto-friendly meals that not only support your weight loss goals but also satisfy your taste buds. 1. Avocado and Bacon Stuffed Omelet Start your day off with a hearty and nutritious omelet. Beat eggs and pour them into a skillet, Add slices of avocado and cooked bacon. Fold the omelet over and cook until the eggs are set. Avocado provides healthy fats, while bacon adds a savory crunch, making this a perfect keto breakfast. 2. Grilled Chicken Caesar Salad A classic Caesar salad gets a keto twist by swapping out croutons for roasted nuts or seeds and using a creamy Caesar dressing made with olive oil and grated Parmesan cheese. Top it with grilled chicken for a satisfying, protein-packed meal. 3. Zucchini Noodles with Pesto Zoodles, or spiralized zucchini noodles, make an excellent low-carb alternative to traditional pasta. Toss them with homemade or store-bought pesto sauce, and add cooked chicken or shrimp for extra protein. This dish is not only keto-friendly but also rich in vitamins and minerals. 4. Baked Salmon with Asparagus Salmon is a fantastic source of omega-3 fatty acids and protein. Season a salmon filet with lemon juice, garlic, and herbs, then bake it in the oven. Roast asparagus spears alongside the salmon for a simple and nutritious keto meal. 5. Cauliflower Crust Pizza Satisfy your pizza cravings without the excess carbs by making a cauliflower crust pizza. Blend cauliflower florets and combine with cheese, eggs, and your favorite seasonings to create a crust. Top with sugar-free tomato sauce, cheese, and your preferred keto-friendly toppings before baking until golden and bubbly. 6. Steak with Garlic Butter Indulge in a juicy steak seared to perfection and topped with garlic herb butter. Pair it with a side of sautéed spinach or broccoli for added fiber and nutrients. The combination of protein and healthy fats will leave you feeling full and satisfied. 7. Eggplant Lasagna Create a keto-friendly lasagna by using thinly sliced eggplant as the noodle layers. Alternate layers of eggplant with ricotta cheese, mozzarella, and a sugar-free tomato sauce. Bake until the cheese is melted and bubbly for a comforting and guilt-free dish. 8. Creamy Broccoli and Cheese Soup Warm up with a creamy and comforting broccoli and cheese soup. Blend cooked broccoli with heavy cream and chicken broth, then stir in shredded cheddar cheese until melted. This soothing soup is rich in both flavor and healthy fats. You don’t have to give up flavor or enjoyment when following a ketogenic diet to lose weight. With these 8 tasty keto-friendly meal ideas, you can enjoy a variety of flavors while staying on track with your weight loss goals. Remember to prioritize whole, nutrient-dense ingredients and monitor your portion sizes to make the most of your keto journey. Always consult with a healthcare professional before making significant dietary changes, especially if you have any underlying health conditions. Bon appétit and happy keto cooking! Share: Facebook Pinterest Email Social Media Facebook-f Youtube Pinterest Instagram Tiktok Most Popular Get The Latest Updates Subscribe To Our Weekly Newsletter No spam, notifications only about new post, updates. Categories On Key Related Posts
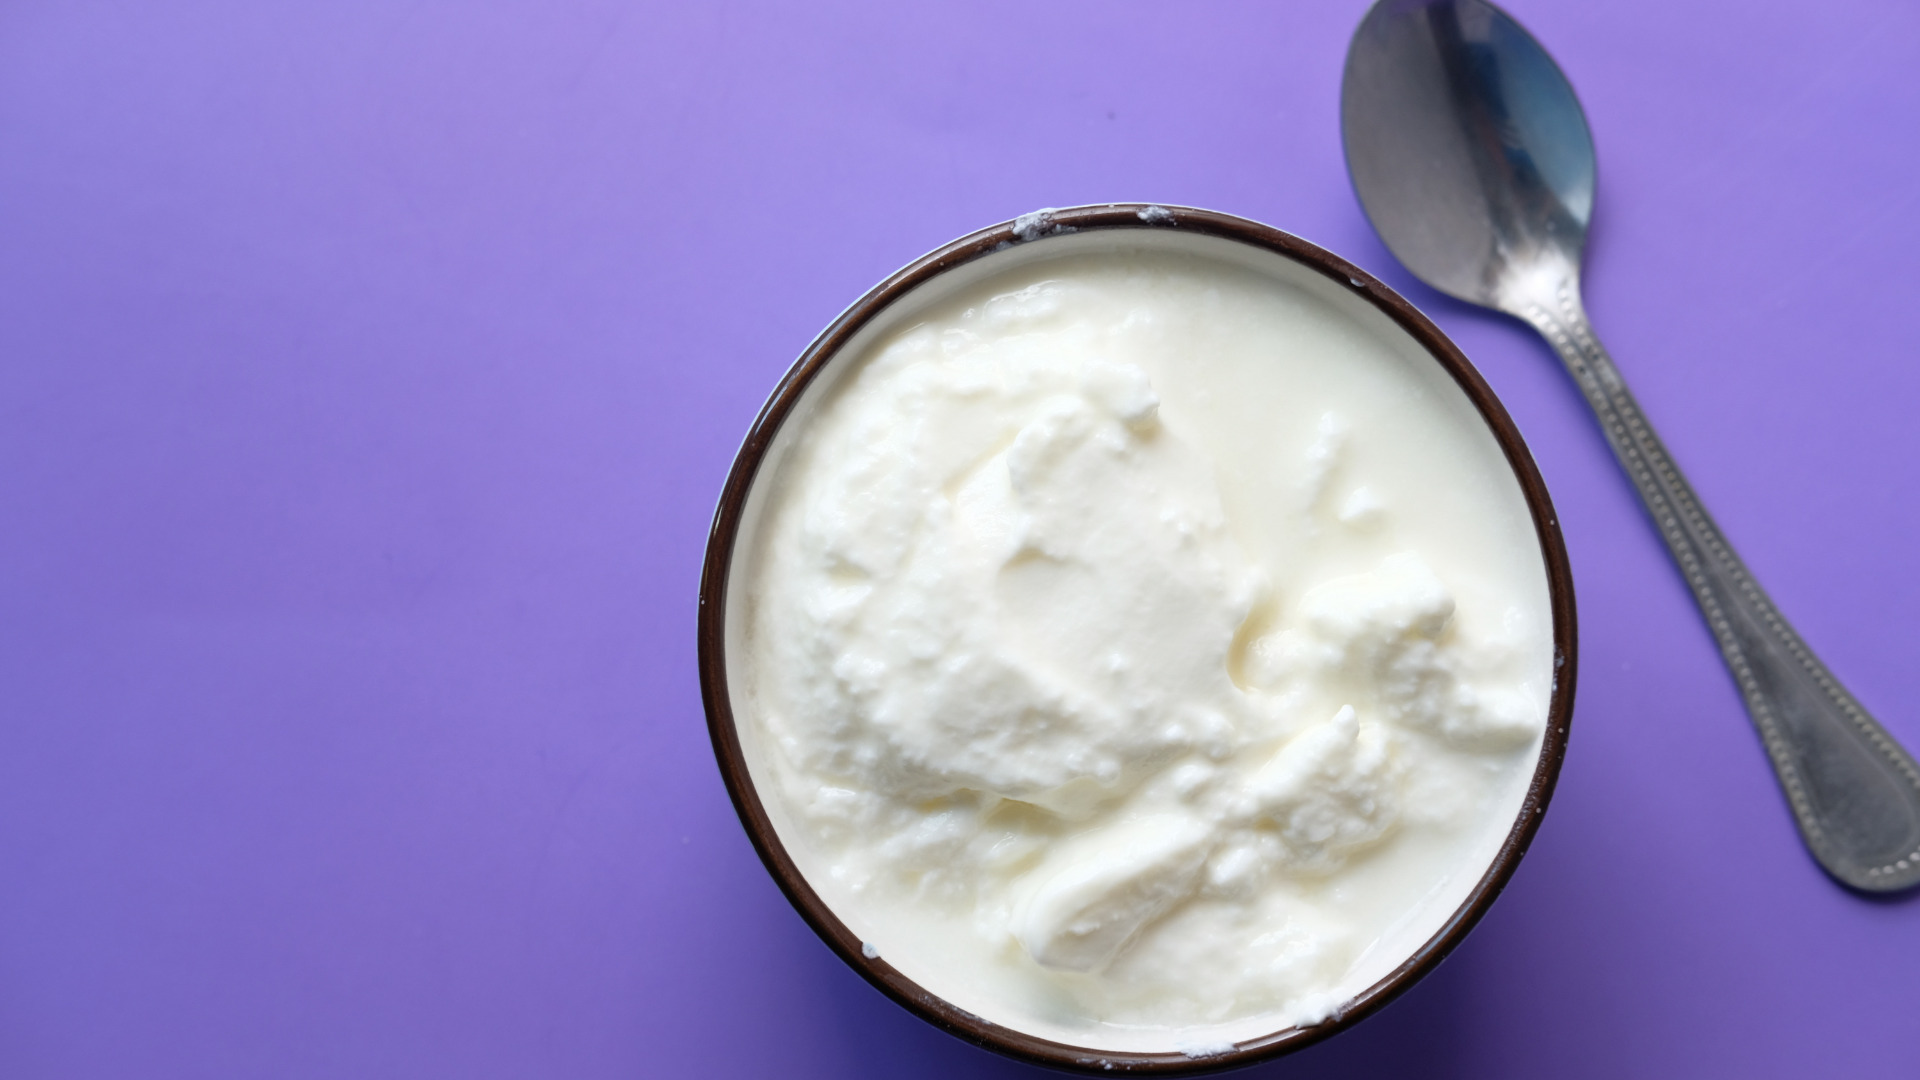
A Simple Guide to Going Dairy-Free: Your Path to Healthy Choices
A Simple Guide to Going Dairy-Free: Your Path to Healthy Choices If you’re thinking about going dairy-free, you’re in for a wholesome adventure. In this easy-to-follow guide, we’ll walk you through the basics of saying goodbye to dairy while keeping your health and taste buds in mind. Why Choose Dairy-Free? Let’s start with why you’re considering going dairy-free. Maybe dairy doesn’t agree with your tummy, or you’re curious about the magic of plant-based living. Whatever your reason, it’s important to know why you’re making this choice. Lactose Intolerance: If dairy leaves your stomach feeling not-so-happy, you could be dealing with lactose intolerance. Going dairy-free might bring relief. Allergies: Dairy allergies can cause symptoms ranging from mild hives to severe anaphylactic reactions. These allergies are often triggered by proteins found in cow’s milk. Health Concerns: Some individuals choose to go dairy-free to alleviate symptoms of chronic conditions like acne, eczema, or irritable bowel syndrome (IBS), which may be aggravated by dairy consumption. Ethical and Environmental Reasons: Embracing a dairy-free lifestyle aligns with concerns about animal welfare and environmental sustainability. Factory farming practices and the carbon footprint of the dairy industry are major considerations. Plant-Based Diet: Individuals following a vegan or plant-based diet exclude all animal products, including dairy, for both ethical and health reasons. Navigating Dairy-Free Options: Once you’ve identified your reasons for going dairy-free, it’s time to explore alternative options that provide the same nutrients without compromising your health or taste buds: Plant-Based Milk: Almond, soy, oat, and coconut milk are dairy-free wonders. They taste great and come with different nutrients. Choose fortified versions to ensure you’re still getting essential nutrients like calcium and vitamin D. Yogurt Alternatives: Look for yogurts made from almond, coconut, or soy milk. These can be used in recipes or enjoyed on their own. Cheese Substitutes: Love cheese? Nut-based cheeses, such as cashew or almond cheese, are rich in flavor and texture. Additionally, some brands offer plant-based cheese alternatives that melt and stretch like traditional cheese. Building a Balanced Diet: Eliminating dairy doesn’t mean sacrificing nutrition. Focus on a diverse and balanced diet to ensure you’re getting all the essential nutrients. Creating a balanced diet without dairy may be easier than you might think: Calcium: Incorporate calcium-rich foods like fortified plant-based milk, leafy greens (kale, spinach), tofu, almonds, and chia seeds. Protein Boost: Fill up on plant-based protein from lentils, beans, tofu, and nuts. They’ll keep you energized. Vitamin D: Since dairy is a primary source of vitamin D, consider supplements or spend some time in the sun to maintain healthy levels. Vital B12: If you’re on a vegan journey, make sure you’re getting enough B12 from fortified foods or supplements, as this vitamin is primarily found in animal products. Reading Labels and Dining Out: Navigating the world of packaged foods can be a challenge, as dairy ingredients can be hidden under various names. Learn to read labels carefully and be cautious when dining out: Hidden Dairy Ingredients: Keep an eye out for terms like whey, casein, lactose, and curds, which indicate the presence of dairy in a product. Restaurant Options: Many restaurants now offer dairy-free menu items. Don’t hesitate to ask about substitutions or modifications to suit your dietary preferences. Fun with Dairy-Free Cooking: Cooking at home gives you full control over your ingredients and allows you to experiment with dairy-free recipes: Recipe Magic: Try dairy-free recipes like creamy pasta with cashew sauce. There’s a wealth of dairy-free recipes available online that are always free for you to explore. Spice It Up: You can use herbs, spices, and nutritional yeast to enhance the flavors of your dishes. Staying Informed and Connected: Be curious and connected on your dairy-free journey by discovering new dairy-free nutrition tips and reading updates from trusted sources. You can also join online groups that stand as your supportive community in your dairy-free journey. Blogs – like Custom Curves | The Fitness Blog – are perfect for sharing experiences and learning from others. Now you’re equipped to step into the dairy-free world with confidence. Whether it’s for your health, the planet, or simply curiosity, going dairy-free can be an exciting and delicious journey. Remember that it’s not just about what you’re leaving behind but the exciting possibilities that lie ahead – improved health, culinary exploration, and a connection to a more sustainable way of living. Here’s to savoring new flavors, nourishing your body, and embracing a dairy-free lifestyle that suits you! Share: Facebook Pinterest Email Social Media Facebook-f Youtube Pinterest Instagram Tiktok Most Popular Get The Latest Updates Subscribe To Our Weekly Newsletter No spam, notifications only about new post, updates. Categories On Key Related Posts

Arm Fat No More: Unlock the Secrets to Slimmer and Confident Arms
Arm Fat No More: Unlock the Secrets to Slimmer and Confident Arms One area that frequently draws attention and self-consciousness is excess arm fat. Arm fat can impact not only how we feel about our bodies but also our overall physical well-being. Whether it’s the desire to rock sleeveless outfits with confidence or to enhance our functional fitness, addressing arm fat can be a rewarding journey. In this blog, we will navigate the realm of arm fat, exploring effective strategies and exercises to help you achieve those sleeker, more toned arms you’ve been aiming for. Remember, the key is persistence and a holistic approach. Now, before we dive into the solutions let’s understand the nature of arm fat. Spot reduction, the idea of losing fat from a specific area, is a misconception. I hate to burst your bubble but the overall fat loss can be achieved through a combination of exercise and a balanced diet. However, targeted exercises can tone and strengthen the underlying muscles, leading to a more sculpted appearance. Here are some things you can do to slim down your arm fat: 1. Cardiovascular Exercise Incorporating cardiovascular exercises into your routine is crucial for overall fat loss, including arm fat. Activities like brisk walking, jogging, cycling, swimming, and dancing elevate your heart rate, effectively burning calories. Aim for at least 150 minutes of moderate-intensity cardio per week. 2. Effective Exercises While you can’t spot-reduce fat, you can target the muscles in your arms to build lean muscle mass and improve their appearance. Incorporate these exercises into your routine: Push-Ups: These target the chest, shoulders, and triceps. Modify them based on your fitness level, using knees or an inclined surface if needed. Tricep Dips: Use a stable surface to perform dips that engage your triceps. You can do these using a chair or parallel bars. Bicep Curls: Use dumbbells or resistance bands to perform bicep curls, which target the front of your upper arms. Tricep Extensions: Hold a dumbbell or resistance band overhead and extend your arms to work the back of your upper arms. Arm Circles: A simple exercise that engages multiple arm muscles. Stand with arms extended and make small circles in both directions. 3. Strength Training Resistance training is a game-changer when it comes to toning your arms. Incorporate full-body strength training into your routine. Building muscle boosts your metabolism, leading to increased calorie burn and fat loss. Compound exercises like squats, deadlifts, and rows engage multiple muscle groups simultaneously. 4. Flexibility and Stretching Include stretching exercises to improve flexibility and prevent muscle imbalances. Yoga or Pilates can help tone your arms and improve overall body strength and flexibility. 5. Balanced Diet A healthy diet plays a pivotal role in achieving your arm-slimming goals. Consume a variety of nutrient-dense foods, including lean proteins, whole grains, fruits, vegetables, and healthy fats. Be mindful of portion sizes and avoid excessive consumption of sugary and processed foods. 6. Hydration Staying hydrated aids in metabolism and helps you feel more energized during workouts. Aim for at least 8 glasses of water a day and reduce sugary drinks. 7. Rest & Recovery Allow your muscles to recover by getting enough sleep and incorporating rest days into your exercise routine. Adequate sleep is crucial for muscle recovery and overall well-being. Lack of sleep can lead to weight gain and affect your body’s ability to recover from workouts. 8. Consistency & Patience Consistency is key when working towards any fitness goal. Set realistic expectations and stay committed to your routine, even on days when progress seems slow. Results won’t be immediate, but sticking to your exercise and nutrition plan will yield positive changes over time. 9. Progress Tracking Achieving toned arms takes time, so be patient with yourself. Take progress photos, measurements, or keep a journal to track your achievements, which can serve as motivation along the way. 10. Lifestyle Changes Adopt an overall healthy lifestyle by managing stress, getting enough sleep, and avoiding unhealthy habits such as smoking and excessive alcohol consumption. The challenges of dealing with arm fat can be addressed with a combination of knowledge, determination, and self-love. Remember, your journey is unique, and your progress is worth celebrating. By making gradual changes, embracing positivity, and committing to a healthy lifestyle, you’ll navigate these challenges and emerge stronger, both physically and emotionally. Embrace the journey, believe in your potential, and transform challenges into triumphs as you work towards your goals. Share: Facebook Pinterest Email Social Media Facebook-f Youtube Pinterest Instagram Tiktok Most Popular Get The Latest Updates Subscribe To Our Weekly Newsletter No spam, notifications only about new post, updates. Categories On Key Related Posts

5 Heavenly Vegan Ice Cream Recipes to Whip Up with Your Ninja Creami
5 Heavenly Vegan Ice Cream Recipes to Whip Up with Your Ninja Creami Indulging in creamy, flavorful ice cream is a joy that shouldn’t be limited by dietary preferences. With the help of the Ninja Creami, you can easily create luscious vegan ice cream recipes that will delight your taste buds and keep you cool during those warm days. These recipes use wholesome ingredients and are sure to please vegans and non-vegans alike. So, grab your Ninja Creami, and let’s dive into these delectable frozen treats! 1. Classic Vegan Vanilla Ice Cream Ingredients: 2 cans of full-fat coconut milk 1/2 cup of granulated sugar or sweetener of choice 1 tablespoon of vanilla extract Instructions: Begin by chilling the cans of coconut milk in the refrigerator for a few hours or overnight. Once chilled, open the cans and scoop out the thick coconut cream into a blender. Add the sugar and vanilla extract to the blender, and blend until the mixture is smooth and well combined. Transfer the mixture into your Ninja Creami and follow the manufacturer’s instructions for churning. After churning, place the ice cream in a container and freeze for a few hours until it reaches your desired firmness. Scoop and enjoy! 2. Chocolate Peanut Butter Vegan Ice Cream Ingredients: 2 cans of full-fat coconut milk 1/2 cup of cocoa powder 1/2 cup of peanut butter 1/2 cup of maple syrup or agave nectar 1 teaspoon of vanilla extract Instructions: Chill the cans of coconut milk in the refrigerator. In a blender, combine the coconut cream, cocoa powder, peanut butter, maple syrup, and vanilla extract. Blend until the mixture is creamy and well-mixed. Pour the mixture into your Ninja Creami and churn as per the provided instructions. Once churned, transfer the ice cream to a container and place it in the freezer to set for a few hours. Serve and savor the irresistible blend of chocolate and peanut butter flavors. 3. Strawberry Coconut Vegan Ice Cream Ingredients: 2 cans of full-fat coconut milk 2 cups of fresh or frozen strawberries 1/2 cup of agave nectar or sweetener of choice 1 teaspoon of lemon juice Instructions: Chill the cans of coconut milk in the refrigerator. Blend together the strawberries, coconut cream, agave nectar, and lemon juice until the mixture is smooth and pink. Transfer the blended mixture to your Ninja Creami and churn according to the manufacturer’s instructions. Once churned, pour the ice cream into a container and freeze until it solidifies. Delight in the refreshing taste of strawberry coconut goodness. 4. Mint Chocolate Chip Vegan Ice Cream Ingredients: 2 cans of full-fat coconut milk 1/2 cup of fresh mint leaves, packed 1/2 cup of dairy-free chocolate chips 1/2 cup of granulated sugar or sweetener of choice 1 teaspoon of vanilla extract Green food coloring (optional) Instructions: Chill the cans of coconut milk in the refrigerator. Blend the fresh mint leaves, coconut cream, sugar, vanilla extract, and a few drops of green food coloring (if using) until the mixture is well combined and green. Transfer the minty mixture to your Ninja Creami and churn according to the provided instructions. In the last few minutes of churning, add the dairy-free chocolate chips for a delightful crunch. Freeze the churned ice cream until it’s ready to be scooped and enjoyed. 5. Coconut Almond Crunch Vegan Ice Cream Ingredients: 2 cans of full-fat coconut milk 1/2 cup of almond butter 1/2 cup of chopped almonds 1/4 cup of maple syrup or agave nectar 1 teaspoon of vanilla extract Pinch of salt Instructions: Chill the cans of coconut milk in the refrigerator. Blend the coconut cream, almond butter, maple syrup, vanilla extract, and a pinch of salt until the mixture is smooth and creamy. Transfer the creamy blend to your Ninja Creami and churn according to the manufacturer’s instructions. During the final stages of churning, add the chopped almonds to infuse the ice cream with a delightful crunch. Freeze the churned mixture until it solidifies, and then indulge in the coconut-almond symphony of flavors. Time to put your Ninja Creami to good use and embark on a delightful adventure into the realm of vegan ice cream! From the classic vanilla to the irresistible chocolate peanut butter and refreshing strawberry coconut, these vegan treats prove that you don’t need dairy to create creamy delights. So, gather your ingredients, let the Ninja Creami work its magic, and indulge in these scrumptious vegan ice creams that are perfect for any moment that calls for a sweet escape. Share: Facebook Pinterest Email Social Media Facebook-f Youtube Pinterest Instagram Tiktok Most Popular Get The Latest Updates Subscribe To Our Weekly Newsletter No spam, notifications only about new post, updates. Categories On Key Related Posts

5 Effortless Lunch Swaps to Supercharge Your Weight Loss Efforts
5 Effortless Lunch Swaps to Supercharge Your Weight Loss Efforts When it comes to losing those extra pounds, making mindful choices about your meals is crucial. Lunchtime provides an excellent opportunity to make healthy swaps that can help you achieve your weight loss goals. Losing weight also doesn’t have to mean sacrificing flavor or satisfaction during your meals. By making a few smart swaps in your lunch choices, you can support your weight loss journey without feeling deprived. Let’s explore five simple and effective lunch swaps that can help you shed those extra pounds while still enjoying delicious meals. 1. Swap White Bread for Whole Grain Bread White bread lacks the essential nutrients and fiber found in whole-grain bread. Make a simple switch by opting for whole-grain bread for your sandwiches or wraps. Whole grains digest more slowly, providing a steady release of energy and helping to curb those mid-afternoon cravings. Action Step: Next time you prepare a sandwich, choose whole-grain bread as the base. Look for options that list whole wheat or whole grains as the first ingredient. 2. Trade in Fried Foods for Grilled Options Fried foods are often high in unhealthy fats and calories. Swap out that fried chicken or crispy snack for grilled alternatives. Grilled chicken, turkey, tofu, or even vegetables offer the same satisfying flavors with fewer calories and less saturated fat. Action Step: You can try marinating lean protein options and grilling them for a delicious and healthy lunchtime treat. 3. Choose Lean Proteins over Fatty Meats Protein is essential for weight loss as it helps you feel full and supports muscle growth. Swap fatty meats like bacon or sausages for lean protein sources like skinless chicken, turkey, fish, or legumes. These options are lower in calories and can help you stay satisfied until your next meal. Action Step: Plan your lunch around a lean protein source and explore new recipes to keep your meals exciting. 4. Opt for Water Instead of Sugary Drinks Sugary drinks contribute unnecessary calories and can lead to weight gain. Replace sugary sodas, fruit juices, or energy drinks with water. Staying hydrated supports digestion and helps control your appetite. Action Step: Keep a reusable water bottle handy and aim to drink water throughout the day. If you’re craving flavor, add a slice of lemon, lime, or cucumber to your water. 5. Embrace Colorful, Nutrient-Rich Veggies Boost the volume and nutrition of your meals by swapping out calorie-dense sides with colorful vegetables. Opt for salads loaded with leafy greens, bell peppers, tomatoes, carrots, and more. These veggies are packed with vitamins, minerals, and fiber, making them a fantastic addition to your weight-loss lunch. Action Step: Create a vibrant and filling salad by mixing a variety of veggies, lean protein, and a light dressing. Experiment with different combinations to find your favorite flavors. Losing weight doesn’t have to be a daunting task, especially when you can make simple and effective lunch swaps. You can choose from whole grains, lean proteins, vegetables, and healthier beverage options. Plus you can support your weight loss goals without sacrificing taste or satisfaction. These swaps are not only beneficial for your waistline but also for your overall well-being. Remember that sustainable weight loss is about making healthier choices consistently, and these lunch swaps can be a significant step in the right direction. Go ahead and transform your midday meal into a delicious and nutritious way to support your weight loss efforts. Share: Facebook Pinterest Email Social Media Facebook-f Youtube Pinterest Instagram Tiktok Most Popular Get The Latest Updates Subscribe To Our Weekly Newsletter No spam, notifications only about new post, updates. Categories On Key Related Posts

2023 Booty Transformation: 6 Must-Try Bubble Butt Exercises for Real Results
2023 Booty Transformation: 6 Must-Try Bubble Butt Exercises for Real Results A rounded and firm bubble butt is a fitness goal that many aspire to achieve. With the latest information in 2023, you can elevate your glute game and turn heads with confidence. Imagine this: a workout routine that not only promises real results but also makes you excited to hit the gym. Well, you’re in luck! We’re about to spill the beans on 6 irresistible bubble butt exercises that will leave you feeling empowered and ready to conquer the world. The best part? You don’t need to be a fitness guru to get started. We’ve broken down these exercises into simple steps that anyone can follow, whether you’re a seasoned gym-goer or just getting started on your fitness journey. 1. HIP THRUST The hip thrust is a superstar exercise for targeting your glutes. Here’s how to perform it effectively: Sit on the ground with your upper back against a bench, your knees bent, and a barbell across your hips. Roll the barbell over your hips and lean against the bench for support. Plant your feet hip-width apart, heels close to your glutes. Press through your heels and lift your hips off the ground until your body forms a straight line from your shoulders to your knees. Squeeze your glutes at the top, then lower your hips down and repeat. 2. SQUATS Squats are a classic compound exercise that engages multiple muscle groups, including your glutes. Here’s how to perform squats for maximum glute activation: Stand with your feet shoulder-width apart. Keep your chest up and your back straight as you lower your hips down and back as if sitting into an imaginary chair. Go as low as your flexibility allows, ideally until your thighs are parallel to the ground. Push through your heels to return to the starting position. 3. BULGARIAN SPILTS SQUATS This exercise targets each leg individually, helping to correct imbalances and activate your glutes effectively: Stand a few feet in front of a bench or step. Place one foot behind you on the bench. Lower your back knee toward the ground in a lunge motion, making sure your front knee doesn’t extend beyond your toes. Push through your front heel to return to the starting position. 4. DEADLIFTS Deadlifts are excellent for overall lower body development and can help sculpt your glutes: Stand with your feet hip-width apart and a barbell in front of you. Bend at your hips and knees to grip the barbell with an overhand or mixed grip. Keep your back straight as you lift the barbell by extending your hips and knees. Lower the barbell back down with controlled motion. 5. GLUTE BRIDGE Glute bridges are a simple yet effective exercise to isolate and activate your glutes: Lie on your back with your knees bent and feet flat on the floor, hip-width apart. Press through your heels to lift your hips off the ground while squeezing your glutes. Hold at the top for a brief pause before lowering your hips back down. 6. DONKEY KICKS This bodyweight exercise effectively targets your glutes while also engaging your core: Start on all fours with your hands directly under your shoulders and knees under your hips. Keeping your knee bent at 90 degrees, lift one leg up towards the ceiling while flexing your foot. Squeeze your glutes at the top of the movement, then lower your leg back down without touching the ground. Repeat on both sides. Start including these 6 bubble butt exercises into your fitness routine for 2023, and watch as your glutes transform over time. But here’s the deal: consistency is where the magic truly happens. Blend these exercises into your routine, sprinkle in wholesome eats, keep yourself hydrated like a pro, and embrace some well-deserved rest. Stay committed, and get ready to flaunt that incredible bubble butt you’ve been dreaming of! Share: Facebook Pinterest Email Social Media Facebook-f Youtube Pinterest Instagram Tiktok Most Popular Get The Latest Updates Subscribe To Our Weekly Newsletter No spam, notifications only about new post, updates. Categories On Key Related Posts

Best Pills and Powders for Weight Gain
Best Pills and Powders for Weight Gain Gaining weight can be just as challenging as losing it. For individuals looking to increase their body mass, pills and powders can be a convenient and effective solution. However, with countless products flooding the market, it can be overwhelming to choose the right ones. In this blog post, we will explore the best pills and powders for weight gain, providing you with valuable insights to make an informed decision. Before delving into specific products, it is crucial to note that weight gain should always be approached in a healthy and balanced manner. Consulting with a healthcare professional or nutritionist is highly recommended before incorporating any new supplements into your routine. 1. WHEY PROTEIN Whey protein is a popular supplement known for its ability to promote muscle growth and weight gain. It is rich in essential amino acids, which are the building blocks of muscle tissue. By adding whey protein to your diet, either through shakes or as an ingredient in meals, you can increase your protein intake and support muscle development. 2. CREATINE MONOHYDRATE Creatine monohydrate is a naturally occurring compound found in small amounts in certain foods like meat and fish. It plays a vital role in energy production within muscle cells, making it an excellent supplement for individuals looking to enhance their strength and muscle mass. By increasing the body’s phosphocreatine stores, creatine monohydrate allows for more intense workouts, leading to greater muscle growth. It also promotes water retention in muscle cells, resulting in increased size and weight gain. 3. MASS GAINERS Mass gainers are specially formulated supplements designed to provide a high-calorie intake in a convenient manner. They typically contain a blend of proteins, carbohydrates, fats, vitamins, and minerals to support muscle growth and weight gain. Mass gainers offer a quick and efficient way to increase calorie consumption, especially for individuals with a high metabolic rate or those who struggle to consume enough food throughout the day. However, it is important to choose a mass gainer that suits your specific nutritional needs and goals. When it comes to weight gain, pills and powders can be valuable tools to supplement a well-rounded diet and exercise routine. Whey protein, creatine monohydrate, and mass gainers are among the top choices for individuals seeking to increase their body mass. Remember, it is essential to prioritize your overall health and consult with professionals before incorporating any new supplements into your regimen. By making informed decisions and using these products responsibly, you can optimize your weight gain journey and achieve your desired results. Share: Facebook Pinterest Email Social Media Facebook-f Youtube Pinterest Instagram Tiktok Most Popular Get The Latest Updates Subscribe To Our Weekly Newsletter No spam, notifications only about new post, updates. Categories On Key Related Posts

Probiotic Drinks That Taste Like Soda
Probiotic Drinks That Taste Like Soda Probiotic drinks have gained immense popularity in recent years due to their potential health benefits. These beverages are packed with live bacteria and yeasts that can promote a healthy gut microbiome, aid digestion, and boost overall well-being. While many people enjoy the taste of soda, it’s important to choose healthier alternatives that still provide a fizzy and refreshing experience. In this blog post, we will explore some of the best probiotic drink brands that offer a soda-like taste without compromising on health benefits. . The refreshing taste of soda, it is often associated with high sugar content and artificial ingredients. However, there are probiotic drinks available that offer the best of both worlds – a delicious soda-like taste combined with the goodness of probiotics. In this blog post, we will explore some of the best probiotic drinks that taste like soda. 1. HEALTH-ADE KOMBUCHA Health-Ade Kombucha is a leading brand known for its delicious and diverse range of flavors. This fermented tea-based beverage contains live cultures and organic acids that support gut health. Health-Ade offers flavors like Ginger-Lemon, Pomegranate, and Pink Lady Apple, which provide a tangy and effervescent experience similar to soda. Their drinks are made with high-quality ingredients and are free from artificial additives or preservatives. It is made by fermenting sweetened tea with a symbiotic culture of bacteria and yeast (SCOBY). The fermentation process for Kombucha produces carbon dioxide, giving kombucha its fizzy texture similar to soda. Kombucha comes in various flavors, including fruity and tangy options, which mimic the taste of traditional sodas. Additionally, it contains live bacteria and yeast strains that can support gut health. 2. KeVita Sparkling Probiotic Drinks KeVita is another popular brand that specializes in sparkling probiotic drinks. Their beverages are made by fermenting organic fruit juices with water kefir cultures, resulting in a bubbly and refreshing drink. KeVita offers a wide range of flavors such as Lemon Cayenne Cleanse, Tart Cherry, and Mango Coconut. These drinks not only provide probiotics but also contain beneficial organic acids and antioxidants. 3. Olipop Prebiotic Drink Olipop drinks are a popular beverage brand that offers a unique and healthier alternative to traditional sodas. These drinks are specifically formulated to provide a refreshing and flavorful experience while also delivering various health benefits. Olipop drinks are known for their low sugar content, natural ingredients, and prebiotic fiber, making them a great choice for those looking to indulge in a fizzy drink without compromising their health. One of the key features of Olipop drinks is their low sugar content. Unlike regular sodas that are loaded with excessive amounts of added sugars, Olipop drinks contain only 2-5 grams of sugar per can. This is significantly lower than the average soda, which can contain up to 39 grams of sugar per serving. By reducing the sugar content, Olipop aims to provide a guilt-free option for individuals who want to enjoy a carbonated beverage without the negative health effects associated with high sugar consumption. In addition to being low in sugar, Olipop drinks are made with natural ingredients. They are free from artificial sweeteners, flavors, and colors, ensuring that consumers can enjoy a beverage that is both delicious and wholesome. The brand takes pride in using real fruit extracts and botanicals to create their unique flavor profiles. Some popular flavors offered by Olipop include Vintage Cola, Ginger Lemon, Strawberry Vanilla, and Classic Root Beer. 4. GT’s Synergy Kombucha: GT’s Synergy Kombucha is a well-established brand that has been producing kombucha for over 20 years. Their kombucha is made from a blend of tea, sugar, and a symbiotic culture of bacteria and yeast (SCOBY). GT’s Synergy Kombucha comes in various flavors, including Gingerberry, Trilogy, and Cosmic Cranberry. The drinks have a naturally carbonated and slightly sweet taste, making them a great alternative to soda. 5. Wild Tonic Jun Kombucha Wild Tonic Jun Kombucha is a unique brand that uses honey instead of sugar as a fermentation source. This results in a milder and less acidic taste compared to traditional kombucha. Their drinks are available in flavors like Blueberry Basil, Raspberry Goji Rose, and Tropical Turmeric. Wild Tonic Jun Kombucha offers a soda-like experience with the added benefits of probiotics and antioxidants. 6. POPPI PREBIOTIC DRINK Poppi soda is a popular beverage that has gained significant attention in recent years. It is a sparkling, low-calorie soda that is made with real fruit juice and natural ingredients. Poppi soda is known for its unique flavors and health benefits, making it a favorite among health-conscious individuals. One of the key features of Poppi soda is its use of prebiotics and apple cider vinegar. Prebiotics are a type of fiber that acts as food for the beneficial bacteria in our gut. By consuming prebiotics, we can support the growth and activity of these good bacteria, which can have numerous health benefits. Apple cider vinegar, on the other hand, has been praised for its potential to aid digestion, support weight loss, and regulate blood sugar levels. Poppi soda comes in a variety of flavors, including strawberry lemon, orange pineapple, blueberry lavender, and raspberry rose. These flavors are carefully crafted to provide a refreshing and enjoyable taste experience while still maintaining the health-conscious nature of the beverage. The use of real fruit juice ensures that each sip is bursting with natural flavors. Poppi soda comes in a variety of flavors, including strawberry lemon, orange, watermelon, and raspberry rose. When it comes to choosing a probiotic drink that tastes like soda, it’s essential to prioritize brands that offer both great flavor and health benefits. Health-Ade Kombucha, KeVita Sparkling Probiotic Drinks, GT’s Synergy Kombucha, Wild Tonic Jun Kombucha, and Brew Dr. Kombucha are all excellent options that provide a fizzy and refreshing experience while delivering the goodness of probiotics. By opting for these probiotic drink brands, you can enjoy the taste of soda without compromising your health or gut microbiome. Share: Facebook Pinterest Email Social Media Facebook-f Youtube Pinterest Instagram Tiktok Most Popular
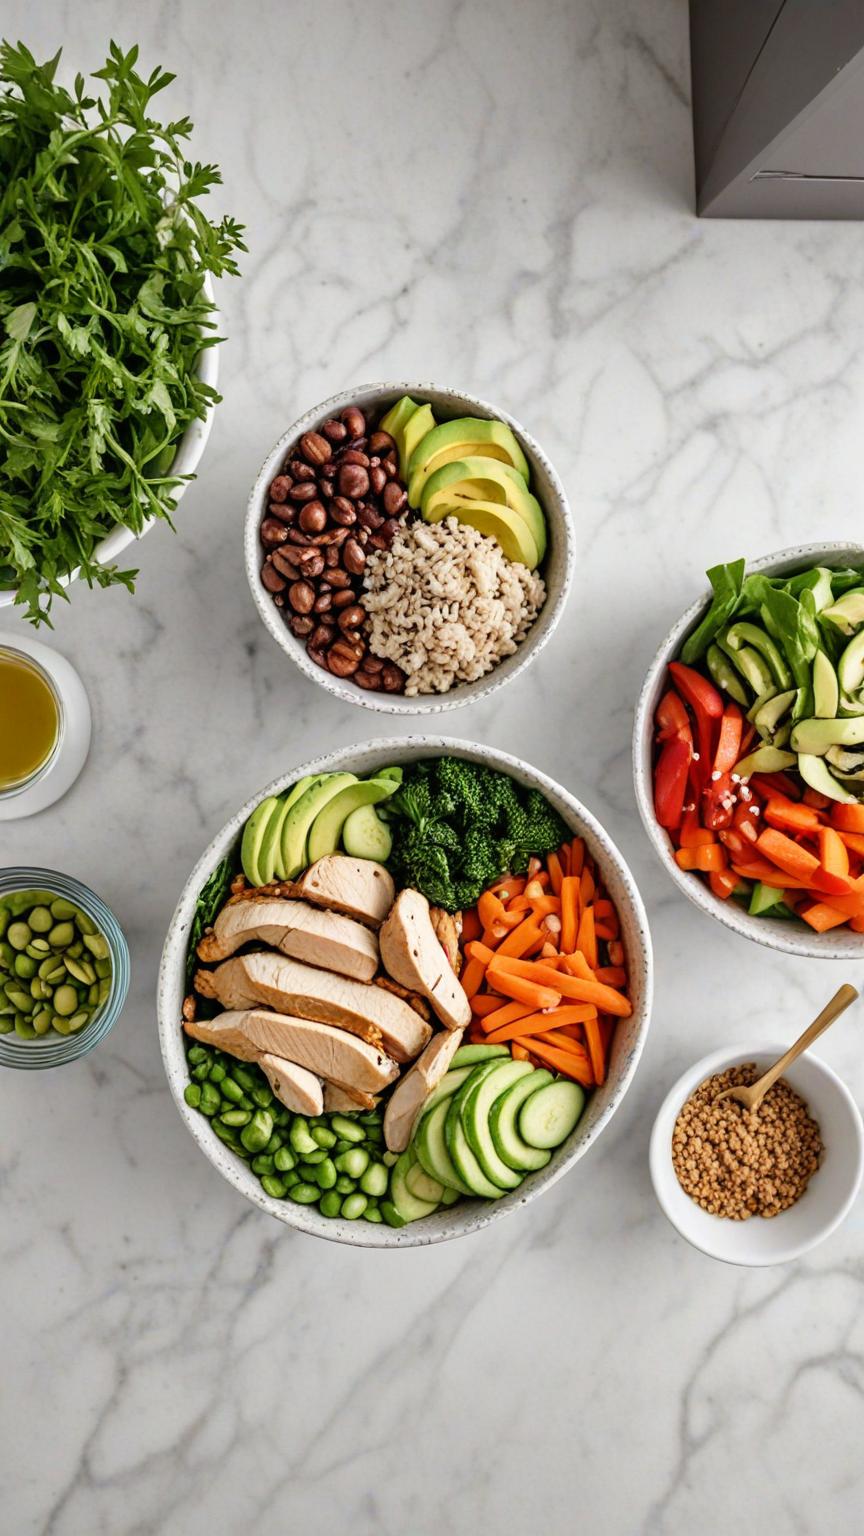
Chicken Buddha Bowl
chicken Buddha Bowl Chicken Buddha bowls are a vibrant and nutritious meal option, perfect for a balanced diet. These bowls typically feature a base of grains like quinoa or brown rice, topped with succulent grilled or roasted chicken. They are packed with an array of fresh and colorful vegetables, such as spinach, carrots, cucumbers, and avocado, offering a variety of textures and flavors. Often finished with a drizzle of tangy dressing or a dollop of hummus, Chicken Buddha bowls provide a satisfying combination of protein, fiber, and healthy fats. Ideal for meal prep or a quick weeknight dinner, they are a delicious way to enjoy a wholesome and balanced meal. Can I use any type of toppings? Of course, the more the merrier! We do recommend if you wish to keep the calorie count down, reframe from additional toppings. Can I make this recipe without chicken? Yes! You can substitute with shrimp, salmon, beef, lamb, or whatever. Or you do not have to substitute at all–just omit the first part of the ingredients and the instructions of this recipe. Psst! Try these dressings! Best thing about budhha bowls is a there are no rules–you dress it how ever you want! Shop Now Shop Now Shop Now Shop Now Pin Print Chicken Buddha Bowl Recipe by Custom Curves Course: Dinner, LunchDifficulty: Medium Servings 4 servingsPrep time 30 minutesCooking time 40 minutesCalories 300 kcal A Nutritious and Flavorful Recipe: Vegetable Buddha Bowl Lunch with Chicken, Quinoa, Chickpeas, Mushrooms, Lettuce, and Tomatoes Ingredients For Chicken 2 whole boneless, skinless chicken breasts 1 Tbsp olive oil 1 tsp paprika 1/2 tsp garlic powder Salt and pepper to taste For the Quinoa 1 cup quinoa 2 cups water or vegetable broth Salt to taste For the chickpeas 1 can (15 ounces) chickpeas (garbanzo beans), drained and rinsed 1 Tbsp olive oil 1/2 tsp ground cumin 1/2 tsp smoked paprika Salt to taste For Mushrooms 8 ounces mushrooms (such as cremini or button), sliced 1 Tbsp olive oil 2 cloves garlic, minced Salt and pepper to taste For Bowl Assembly 4 cups cups mixed lettuce leaves 1 cup cherry tomatoes (halved) Lemon wedges for serving 1 whole avocado, sliced (optional) Directions Preparing the Chicken Preheat your oven to 400°F (200°C). Rub the chicken breasts with olive oil, paprika, garlic powder, salt, and pepper Place the seasoned chicken on a baking sheet and bake for 20-25 minutes or until cooked through. Once done, set aside to cool before slicing. For Cooking the Quinoa Rinse the quinoa under cold water to remove any bitterness. In a medium-sized saucepan, combine the rinsed quinoa, water or vegetable broth, and salt. Bring the mixture to a boil over medium heat, then reduce the heat to low and cover. Simmer for 15-20 minutes or until the liquid is absorbed and the quinoa is tender. Fluff with a fork and set aside. Roasting the chickpeas Preheat your oven to 400°F (200°C). In a bowl, toss the drained and rinsed chickpeas with olive oil, cumin, smoked paprika, and salt Spread the seasoned chickpeas on a baking sheet and roast for 20-25 minutes or until crispy. Stir occasionally for even browning Sautéing the mushrooms: Heat olive oil in a skillet over medium heat. Add minced garlic and sliced mushrooms to the skillet. Sauté for 5-7 minutes or until the mushrooms are tender and golden brown Season with salt and pepper to taste. Assembling the Buddha bowl Divide the mixed lettuce leaves between two bowls as a base Arrange sliced chicken, cooked quinoa, roasted chickpeas, sautéed mushrooms, cherry tomatoes, and any additional vegetables you desire on top of the lettuce. Add any additional topping such as sliced avocado, cabbage or raw broccoli Drizzle your favorite dressing over the bowl or serve it on the side. Squeeze fresh lemon juice over the bowl for an extra burst of flavor. Toss the ingredients together just before eating to combine all the flavors. In conclusion, Chicken Buddha bowls are a versatile and nutritious meal option that combines the best of both taste and health. With a harmonious blend of tender chicken, fresh vegetables, and wholesome grains, these bowls offer a balanced array of nutrients essential for a healthy diet. Their customizable nature allows for endless creativity, making them suitable for various dietary preferences and lifestyles. Whether enjoyed as a quick lunch or a hearty dinner, Chicken Buddha bowls provide a satisfying, delicious, and nutrient-packed dining experience that can easily become a staple in anyone’s meal repertoire. Share: Facebook Pinterest Email Shop Now Social Media Facebook-f Youtube Pinterest Instagram Tiktok Most Popular Get The Latest Updates Subscribe To Our Weekly Newsletter No spam, notifications only about new post, updates. Categories On Key Related Posts
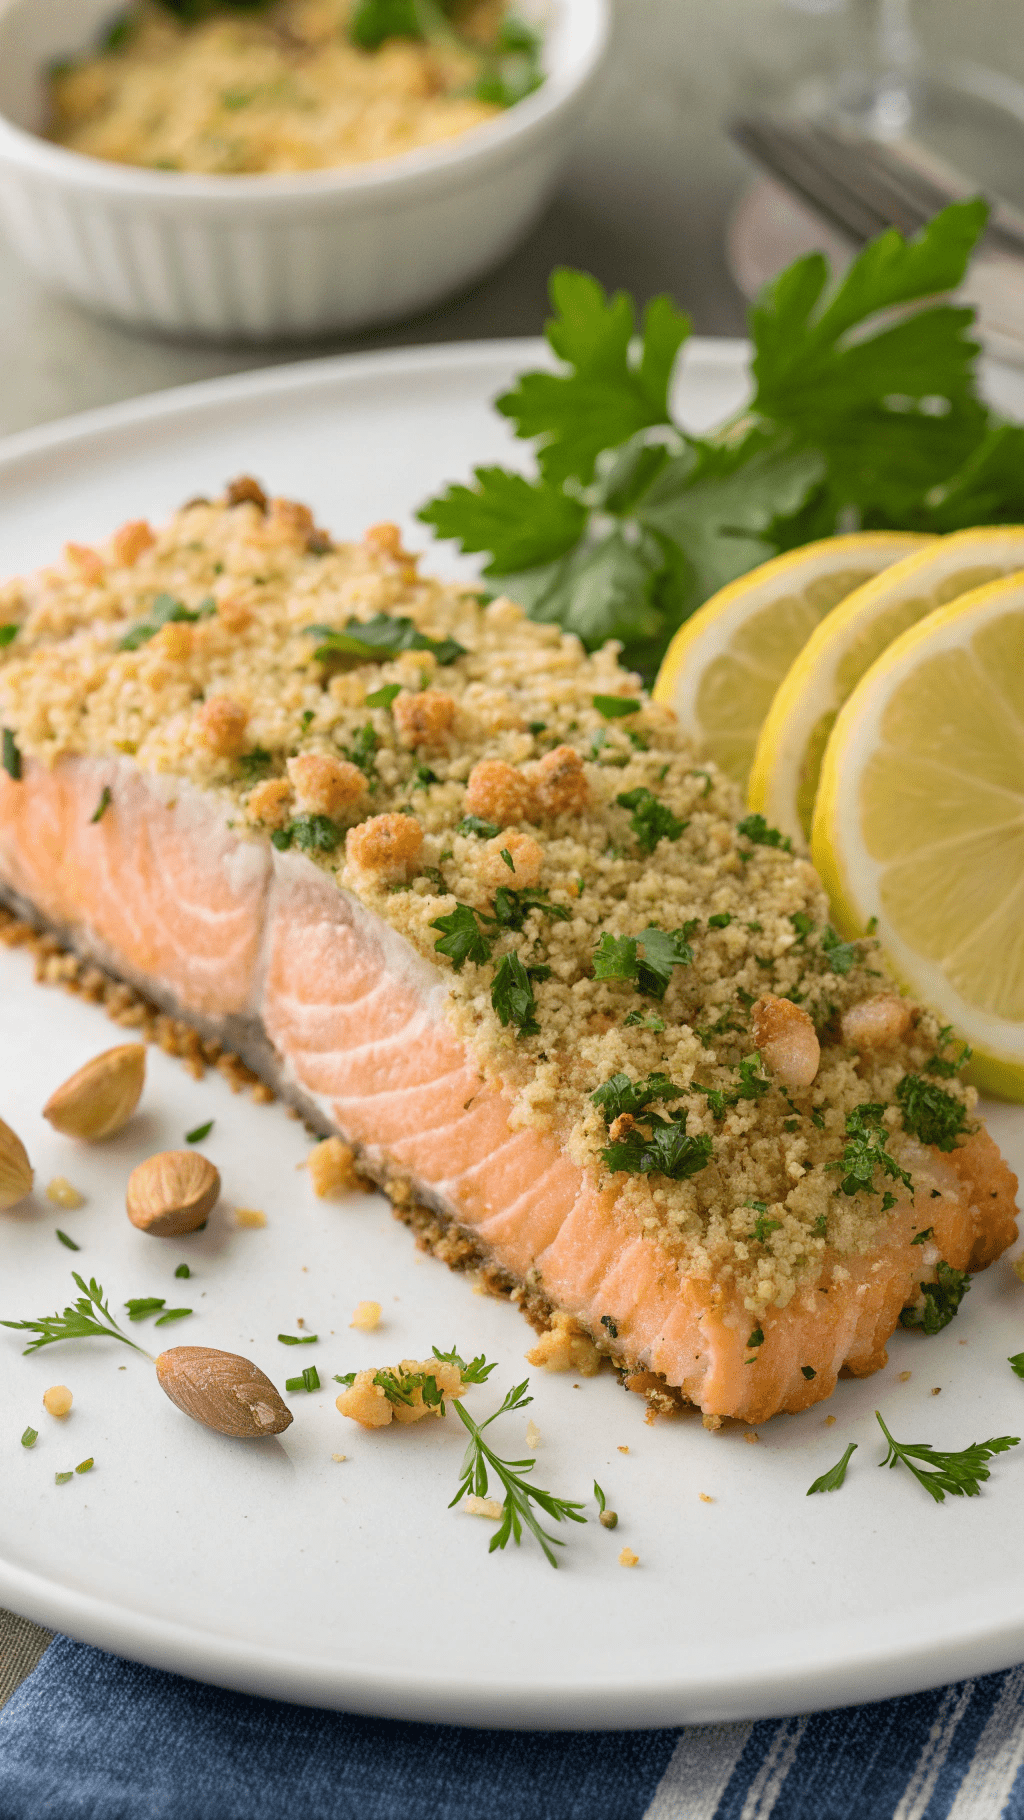
Macadamia Cilantro Crust Baked Salmon
Introduction:Salmon is a versatile and nutritious fish that is loved by seafood enthusiasts worldwide. When combined with a crunchy macadamia-cilantro crust, it takes on a whole new level of flavor and texture. In this blog post, we will guide you through the step-by-step process of preparing a mouthwatering baked salmon dish with a delightful macadamia-cilantro crust. Get ready to impress your family and friends with this delectable recipe! Ingredients:To make this delicious baked salmon with macadamia-cilantro crust, you will need the following ingredients: – 4 salmon fillets (6 ounces each)– 1 cup macadamia nuts, finely chopped– 1/2 cup fresh cilantro leaves, finely chopped– 1/4 cup panko breadcrumbs– 2 tablespoons Dijon mustard– 2 tablespoons honey– 1 tablespoon olive oil– Salt and pepper to taste Instructions: 1. Preheat the oven: Start by preheating your oven to 400°F (200°C). This will ensure that your salmon cooks evenly and develops a beautiful crust. 2. Prepare the macadamia-cilantro crust: In a mixing bowl, combine the finely chopped macadamia nuts, cilantro leaves, panko breadcrumbs, salt, and pepper. Mix well until all the ingredients are evenly distributed. 3. Season the salmon fillets: Place the salmon fillets on a baking sheet lined with parchment paper or aluminum foil. Season both sides of the fillets with salt and pepper according to your taste preferences. 4. Apply Dijon mustard and honey: In a small bowl, whisk together the Dijon mustard and honey until well combined. Brush this mixture evenly over the top of each salmon fillet. 5. Add the macadamia-cilantro crust: Take the macadamia-cilantro crust mixture and press it onto the top of each salmon fillet, ensuring an even coating. Gently pat down the crust to help it adhere to the salmon. 6. Drizzle with olive oil: Drizzle a tablespoon of olive oil over the top of each salmon fillet. This will help the crust turn golden brown and add a touch of richness to the dish. 7. Bake the salmon: Place the baking sheet with the salmon fillets in the preheated oven and bake for approximately 12-15 minutes, or until the salmon is cooked through and the crust is golden brown. 8. Serve and enjoy: Once baked, remove the salmon from the oven and let it rest for a few minutes. Serve your delicious baked salmon with macadamia-cilantro crust alongside your favorite side dishes, such as roasted vegetables or a fresh salad. Conclusion:Baked salmon with macadamia-cilantro crust is a delightful dish that combines the natural flavors of salmon with a crunchy and aromatic topping. The combination of macadamia nuts, cilantro, Dijon mustard, and honey creates a harmonious blend of textures and tastes that will leave you craving more. Whether you’re hosting a dinner party or simply looking to elevate your weeknight meal, this recipe is sure to impress. Give it a try and savor every bite!

Vegan Chocolate Protein Shake
Are you looking for a delicious and healthy way to boost your protein intake? Look no further than a vegan chocolate protein shake! Packed with plant-based protein, essential nutrients, and the rich flavor of chocolate, this shake is not only satisfying but also nourishing. In this blog post, we will guide you through a simple and scrumptious recipe that will leave you energized and ready to take on the day. Ingredients: To create a vegan chocolate protein shake, you will need the following ingredients: – 1 ripe banana – 1 cup of unsweetened almond milk (or any plant-based milk of your choice) – 2 tablespoons of cocoa powder – 1 tablespoon of almond butter (or any nut butter) – 1 scoop of vegan chocolate protein powder – 1 teaspoon of maple syrup or agave nectar (optional, for added sweetness) – A handful of ice cubes Instructions: Now that we have gathered our ingredients, let’s dive into the step-by-step process of making this delectable vegan chocolate protein shake: Step 1: Gather all the ingredients and ensure they are readily available. Step 2: Peel the ripe banana and break it into smaller chunks for easier blending. Step 3: In a blender, combine the banana chunks, unsweetened almond milk, cocoa powder, almond butter, vegan chocolate protein powder, and sweetener (if desired). Step 4: Add a handful of ice cubes to the blender. The ice will help create a refreshing and creamy texture. Step 5: Blend all the ingredients together until smooth and creamy. If needed, scrape down the sides of the blender and blend again to ensure everything is well incorporated. Step 6: Once blended to your desired consistency, pour the vegan chocolate protein shake into a glass. Step 7: Optionally, you can garnish your shake with a sprinkle of cocoa powder or a few chocolate shavings for an extra touch of indulgence. Step 8: Serve immediately and enjoy the delightful flavors of your homemade vegan chocolate protein shake! Benefits of a Vegan Chocolate Protein Shake: This vegan chocolate protein shake offers numerous benefits, making it an excellent choice for those seeking a nutritious and satisfying beverage: 1. Plant-Based Protein: Vegan protein powders derived from sources like peas, brown rice, or hemp provide all the essential amino acids required by the body. They are easily digestible and suitable for individuals following a vegan or vegetarian lifestyle. 2. Nutrient-Rich: This shake is not only high in protein but also contains essential vitamins and minerals found in ingredients like bananas, almond milk, and cocoa powder. These nutrients contribute to overall health and well-being. 3. Satisfying and Energizing: The combination of protein, healthy fats from almond butter, and natural sugars from the banana provides a balanced source of energy that can keep you feeling full and satisfied throughout the day. Conclusion: Incorporating a vegan chocolate protein shake into your daily routine is an excellent way to boost your protein intake while enjoying a delicious treat. This recipe is simple to make, customizable to suit your taste preferences, and packed with essential nutrients. So why not indulge in this guilt-free pleasure and give your body the nourishment it deserves?
Homemade Vegan Butter Recipe
Homemade Vegan Butter Recipe As the popularity of veganism continues to rise, so does the demand for plant-based alternatives to traditional dairy products. One such staple in many kitchens is butter, which adds richness and flavor to a wide range of dishes. Fortunately, creating a vegan version of this beloved ingredient is easier than you might think. In this blog post, we will guide you through a simple yet delicious recipe for vegan butter that can be made at home. Homemade vegan butter is a versatile and delicious alternative to traditional dairy butter. It is a plant-based spread that mimics the creamy texture and rich flavor of butter, making it an excellent choice for those following a vegan or dairy-free diet. This homemade version allows you to have full control over the ingredients, ensuring a healthier and more sustainable option. Can I use any kind of non-dairy milk for this recipe? To make homemade vegan butter, you will need a few simple ingredients that are easily accessible. The base of this recipe typically consists of plant-based oils such as coconut oil, olive oil, or avocado oil. These oils provide the necessary fat content to achieve the desired texture and consistency. Additionally, non-dairy milk, such as almond milk or soy milk, is often used to add creaminess. How do I enhance the taste of homemade vegan butter? One common ingredient in homemade vegan butter is nutritional yeast. Nutritional yeast not only adds a subtle cheesy flavor but also provides essential nutrients like B vitamins. Other flavorings such as salt, apple cider vinegar, and lemon juice can be added to enhance the taste and mimic the tanginess of traditional butter. One of the advantages of homemade vegan butter is that it allows customization according to personal preferences. By experimenting with different oils and flavorings, individuals can create their own unique variations of vegan butter tailored to their taste buds. What can I use homemade vegan butter on? Homemade vegan butter can be used in various ways in cooking and baking. It can be spread on toast, used for sautéing vegetables, or incorporated into recipes that call for butter. It can also be used as a substitute for dairy butter in baking, providing moisture and richness to cakes, cookies, and pastries. In addition to being a suitable option for vegans and those with dairy allergies, homemade vegan butter also offers environmental benefits. The production of traditional dairy butter requires significant amounts of water, land, and resources. By opting for homemade vegan butter, individuals can contribute to reducing their carbon footprint and promoting sustainability. Feeling Lazy? You dont have to cook if you dont feel like it. Order Vegan Butter and have it shipped straight to your door step! Pin Print Vegan Butter Recipe Recipe by ccthefitnessblogDifficulty: EasyServings 24 servingsPrep time 5 minutesCooking timeminutesCalories 40 kcal Ingredients 1 cup refined coconut oil 1/2 cup unsweetened plant-based milk (such as almond or soy milk) 1/4 cup refined liquid coconut oil 1 teaspoon apple cider vinegar 1/2 teaspoon salt 1/4 teaspoon nutritional yeast (optional, for a slightly cheesy flavor) 1/4 teaspoon turmeric powder (optional, for a yellow color reminiscent of traditional butter) Directions Melt the coconut oil In a small saucepan, melt the refined coconut oil over low heat until it becomes completely liquid. Be careful not to overheat it. Combine the ingredients In a blender or food processor, combine the melted coconut oil, plant-based milk, liquid coconut oil, apple cider vinegar, salt, nutritional yeast (if using), and turmeric powder (if using). Blend on high speed until all the ingredients are well combined and the mixture is smooth and creamy. Chill and solidify Transfer the mixture into a container or mold of your choice. You can use an empty butter dish or silicone molds for individual portions. Place the container in the refrigerator and allow it to chill for at least two hours or until it solidifies. Store and use Once the vegan butter has solidified, it is ready to use. You can store it in the refrigerator for up to two weeks or freeze it for longer shelf life. Use it as a spread on bread, in baking recipes, or for sautéing and frying. Notes For Storing, You can store it in the refrigerator for up to two weeks or freeze it for longer shelf life. Use it as a spread on bread, in baking recipes, or for sautéing and frying. For Spreading, You can scoop out desired amount, sit out of fridge for a few minutes to soften up like regular butter. It is important to note that while homemade vegan butter can be a healthier alternative to dairy butter, it should still be consumed in moderation. Like any other high-fat food, excessive consumption may lead to weight gain and other health issues. It is always recommended to consult with a healthcare professional or registered dietitian for personalized dietary advice. In conclusion, homemade vegan butter is a versatile and customizable plant-based spread that provides a delicious alternative to traditional dairy butter. With its creamy texture and rich flavor, it can be used in various cooking and baking applications. By making your own vegan butter at home, you have control over the ingredients and can contribute to a more sustainable food system. In conclusion, homemade vegan butter is a versatile and customizable plant-based spread that provides a delicious alternative to traditional dairy butter. With its creamy texture and rich flavor, it can be used in various cooking and baking applications. By making your own vegan butter at home, you have control over the ingredients and can contribute to a more sustainable food system. Share: Facebook Pinterest Email Social Media Facebook-f Youtube Pinterest Instagram Tiktok Most Popular Get The Latest Updates Subscribe To Our Weekly Newsletter No spam, notifications only about new post, updates. Categories On Key Related Posts

Achieving Clear Skin: The Power of Nutritious Foods
Having clear and radiant skin is a goal for many individuals. While skincare routines and products play a significant role in maintaining healthy skin, the importance of nutrition should not be overlooked. The foods we consume can have a profound impact on our skin’s health and appearance. In this blog post, we will explore some of the best foods that promote clear skin and discuss their beneficial properties. 1. Fatty Fish: Fatty fish such as salmon, mackerel, and sardines are excellent sources of omega-3 fatty acids. These essential fats help to nourish the skin by reducing inflammation and keeping it moisturized. Omega-3 fatty acids also support the production of collagen, a protein that maintains the skin’s elasticity and firmness. Including fatty fish in your diet can help combat dryness, redness, and acne breakouts. 2. Avocados: Avocados are not only delicious but also packed with nutrients that benefit the skin. They are rich in healthy fats, particularly monounsaturated fats, which help to keep the skin hydrated and supple. Additionally, avocados contain vitamin E, an antioxidant that protects the skin from oxidative damage caused by free radicals. This nutrient also aids in reducing inflammation and promoting overall skin health. 3. Berries: Berries such as strawberries, blueberries, and raspberries are loaded with antioxidants that contribute to clear and youthful-looking skin. Antioxidants help to neutralize free radicals, which can damage cells and accelerate aging processes. Berries are also high in vitamins A and C, which play crucial roles in collagen production and maintaining skin elasticity. Including a variety of berries in your diet can provide your skin with a natural glow while protecting it from environmental stressors. 4. Green Tea: Green tea is renowned for its numerous health benefits, including its positive effects on the skin. It contains antioxidants called catechins, which have anti-inflammatory and anti-aging properties. These compounds help to reduce redness, fight acne-causing bacteria, and improve overall skin complexion. Drinking green tea regularly can also help protect the skin from sun damage and promote a more even skin tone. 5. Nuts and Seeds: Nuts and seeds, such as almonds, walnuts, flaxseeds, and chia seeds, are excellent sources of essential fatty acids, vitamins, and minerals that support clear skin. They provide a range of nutrients like vitamin E, zinc, selenium, and omega-3 fatty acids that help maintain healthy skin cells and prevent inflammation. Including a handful of nuts or seeds in your daily diet can contribute to a smoother and more radiant complexion. 6. Leafy Greens: Leafy greens like spinach, kale, and Swiss chard are packed with vitamins A, C, and K, as well as various antioxidants that promote clear skin. These vegetables help to detoxify the body by eliminating toxins that can lead to breakouts and dullness. The high vitamin content in leafy greens aids in collagen production and protects against sun damage. Adding these nutrient-dense greens to your meals can enhance your skin’s health and appearance. Conclusion: While skincare products are undoubtedly important for maintaining clear skin, incorporating a balanced diet rich in nutritious foods can significantly enhance your skin’s health from within. Fatty fish, avocados, berries, green tea, nuts and seeds, as well as leafy greens are just a few examples of foods that promote clear skin. By nourishing your body with these beneficial ingredients, you can achieve a radiant complexion that reflects your overall well-being.

Foods Most People Didn’t Know Were Gluten Free
Foods Most People Didn’t Know Were Gluten Free Gluten-free diets have gained significant popularity in recent years, whether due to medical necessity or personal preference. While many people associate gluten with wheat-based products, there is a wide range of foods that are naturally gluten-free or can be easily modified to fit a gluten-free lifestyle. In this blog post, we will delve into some lesser-known foods that most people didn’t realize were gluten-free. 1. QUINOA Quinoa is a versatile and nutritious grain-like seed that has been consumed for thousands of years. It is naturally gluten-free and packed with essential nutrients such as protein, fiber, and various vitamins and minerals. Quinoa can be used as a substitute for rice or couscous in various dishes, including salads, stir-fries, and even desserts. 2. BUCKWHEAT Despite its name, buckwheat is not related to wheat at all. It is actually a fruit seed that is commonly used as a grain substitute due to its nutty flavor and nutritional benefits. Buckwheat is rich in fiber, protein, and antioxidants. It can be ground into flour to make pancakes, noodles, or used as a base for gluten-free bread. 3. TAMARI Tamari is a type of soy sauce that is traditionally made without wheat. Unlike regular soy sauce, which often contains wheat as an ingredient, tamari is made solely from fermented soybeans. It adds depth of flavor to various dishes and can be used as a dipping sauce or marinade. However, it’s important to check the label when purchasing tamari as some brands may add wheat as a filler. 4. MILLET Millet is a small grain that has been cultivated for thousands of years and is widely consumed in many parts of the world. It is naturally gluten-free and provides an excellent source of fiber, protein, and essential minerals. Millet can be cooked and used as a side dish, added to soups or stews, or ground into flour for baking gluten-free goods. 5. COCONUT Coconut is a versatile ingredient that can be used in various forms, including coconut milk, coconut flour, and coconut oil. All of these coconut-based products are naturally gluten-free and can be incorporated into a wide range of recipes. Coconut flour is an excellent alternative to wheat flour in baking, while coconut milk adds richness to curries and desserts. 6. LENTILS Lentils are legumes that come in various colors and sizes, including green, red, brown, and black. They are highly nutritious, packed with protein, fiber, and essential minerals. Lentils can be cooked and used as a base for soups, stews, salads, or even veggie burgers. They are a great gluten-free alternative to grains like wheat or barley. 7. CHIA SEEDS Chia seeds have gained popularity in recent years due to their nutritional benefits. These tiny seeds are rich in omega-3 fatty acids, fiber, and antioxidants. They can be used as a thickening agent in recipes or soaked in liquid to create a gel-like consistency. Chia seeds are often used in gluten-free baking as an egg substitute. While the gluten-free diet may seem restrictive at first glance, there is a wide variety of foods that are naturally gluten-free or can be easily modified to fit this dietary lifestyle. From quinoa and buckwheat to tamari and lentils, these lesser-known options provide delicious alternatives for those following a gluten-free diet. Share: Facebook Pinterest Email Social Media Facebook-f Youtube Pinterest Instagram Tiktok Most Popular Get The Latest Updates Subscribe To Our Weekly Newsletter No spam, notifications only about new post, updates. Categories On Key Related Posts

How to Heal A Leaky Gut
How to Heal A Leaky Gut Leaky gut syndrome, also known as increased intestinal permeability, is a condition that affects the lining of the intestines. It occurs when the tight junctions between the cells in the intestinal wall become compromised, allowing harmful substances such as toxins, bacteria, and undigested food particles to leak into the bloodstream. This can lead to a range of health issues, including digestive problems, food sensitivities, autoimmune disorders, and inflammation. In this blog post, we will explore various strategies and lifestyle changes that can help heal a leaky gut and restore optimal gut health. 1. Identify and Remove Trigger Foods The first step in healing a leaky gut is to identify and eliminate any trigger foods that may be contributing to the condition. Common culprits include gluten, dairy products, processed foods, refined sugars, alcohol, and caffeine. These foods can irritate the intestinal lining and exacerbate inflammation. By removing these trigger foods from your diet, you give your gut a chance to heal and reduce further damage. 2. Adopt an Anti-Inflammatory Diet Following an anti-inflammatory diet is crucial for healing a leaky gut. This involves consuming nutrient-dense whole foods that are rich in antioxidants and anti-inflammatory compounds. Focus on incorporating plenty of fruits, vegetables, lean proteins, healthy fats (such as avocados and olive oil), nuts, seeds, and fermented foods into your meals. These foods provide essential nutrients while reducing inflammation in the gut. 3. Restore Gut Microbiome Balance A healthy gut microbiome plays a vital role in maintaining gut health. To restore balance in your gut microbiome, consider incorporating probiotic-rich foods into your diet or taking high-quality probiotic supplements. Probiotics are beneficial bacteria that help promote a healthy balance of microorganisms in the gut. Additionally, consuming prebiotic-rich foods such as garlic, onions, asparagus, and bananas can provide nourishment for the beneficial bacteria in your gut. 4. Support Digestive Enzymes: Digestive enzymes are essential for breaking down food and aiding in nutrient absorption. Supplementing with digestive enzymes can help support the digestive process and reduce the strain on the gut. Look for a high-quality enzyme supplement that contains a blend of proteases, lipases, and amylases to ensure optimal digestion. 5. Manage Stress Levels Chronic stress can have a detrimental impact on gut health. When we are stressed, our bodies release stress hormones that can disrupt the delicate balance of the gut microbiome and increase intestinal permeability. Incorporating stress management techniques such as meditation, deep breathing exercises, yoga, or regular physical activity can help reduce stress levels and support gut healing. 6. Repair Intestinal Lining Certain supplements and nutrients can aid in repairing the damaged intestinal lining. L-glutamine, an amino acid, is known for its ability to support gut health by promoting cell regeneration in the intestinal lining. Other beneficial supplements include zinc, omega-3 fatty acids, collagen peptides, and quercetin. However, it is important to consult with a healthcare professional before starting any new supplements. 7. Avoid NSAIDs and Antibiotics Nonsteroidal anti-inflammatory drugs (NSAIDs) and antibiotics can disrupt the delicate balance of the gut microbiome and contribute to leaky gut syndrome. Whenever possible, try to find natural alternatives for pain relief and limit antibiotic use to only when necessary. Healing a leaky gut requires a multifaceted approach that involves identifying trigger foods, adopting an anti-inflammatory diet, restoring gut microbiome balance, supporting digestive enzymes, managing stress levels, repairing the intestinal lining, and avoiding certain medications. By implementing these strategies and making lifestyle changes, you can support your body’s natural healing processes and restore optimal gut health. Share: Facebook Pinterest Email Social Media Facebook-f Youtube Pinterest Instagram Tiktok Most Popular Get The Latest Updates Subscribe To Our Weekly Newsletter No spam, notifications only about new post, updates. Categories On Key Related Posts

Lose Weight Without Going to The Gym
Lose Weight Without Going to The Gym Losing weight can be a challenging journey, but it doesn’t have to involve extreme diets or deprivation. By adopting a clean eating approach and maintaining a calorie deficit, you can achieve sustainable weight loss while nourishing your body with wholesome foods. In this blog post, we will delve into the principles of clean eating, explain the concept of a calorie deficit, and provide practical tips to help you reach your weight loss goals. Understanding Clean Eating Clean eating is a dietary approach that focuses on consuming whole, unprocessed foods while avoiding or minimizing processed and refined products. The goal is to nourish your body with nutrient-dense foods that provide essential vitamins, minerals, and antioxidants. By eliminating or reducing highly processed foods that are often high in added sugars, unhealthy fats, and artificial ingredients, you can optimize your health and support weight loss. Creating a Calorie Deficit To lose weight, you need to create a calorie deficit, which means consuming fewer calories than your body burns. This forces your body to tap into its fat stores for energy, resulting in weight loss over time. It’s important to note that creating too large of a calorie deficit can be counterproductive and may lead to muscle loss or a slowed metabolism. Therefore, it’s crucial to strike a balance by gradually reducing your calorie intake while ensuring adequate nutrition. Practical Tips for Clean Eating and Calorie Deficit 1. Choose Whole Foods: Base your meals around whole foods such as fruits, vegetables, lean proteins, whole grains, and healthy fats. These foods are naturally low in calories and high in nutrients, making them ideal for weight loss. 2. Portion Control: Pay attention to portion sizes to avoid overeating. Use smaller plates and bowls to visually trick yourself into thinking you’re consuming more food than you actually are. Additionally, practice mindful eating by savoring each bite and listening to your body’s hunger and fullness cues. 3. Track Your Calories: Keeping track of your calorie intake can be a helpful tool in creating a calorie deficit. Numerous mobile apps and websites allow you to log your meals and track your daily calorie consumption. This awareness can help you make informed choices and adjust your portion sizes accordingly. 4. Meal Planning: Plan your meals in advance to ensure you have nutritious options readily available. This can help prevent impulsive food choices and reduce the likelihood of reaching for unhealthy snacks. Include a balance of macronutrients (carbohydrates, proteins, and fats) in each meal to promote satiety and provide sustained energy throughout the day. 5. Stay Hydrated: Drinking an adequate amount of water is essential for overall health and weight loss. Water helps regulate metabolism, aids digestion, and can help curb appetite. Aim to drink at least eight glasses of water per day, or more if you are physically active. 6. Limit Added Sugars and Processed Foods: Minimize your consumption of sugary beverages, desserts, processed snacks, and foods high in added sugars. These items are often calorie-dense but nutrient-poor, making it difficult to maintain a calorie deficit while meeting your nutritional needs. 7. Regular Physical Activity: Now–you don’t have to go to the gym but if Incorporate regular exercise it can enhance your results and even speed it up. Instead of going to the gym you can workout at home by doing strength training, which can help boost metabolism, preserve muscle mass, and improve overall fitness. Or Even outside by engaging in both cardiovascular exercises (such as brisk walking, jogging, or cycling). Losing weight through clean eating and maintaining a calorie deficit is a sustainable approach that promotes overall health while shedding excess pounds. By prioritizing whole foods, portion control, tracking calories, meal planning, staying hydrated, limiting processed foods, and engaging in regular physical activity, you can achieve your weight loss goals effectively Share: Facebook Pinterest Email Social Media Facebook-f Youtube Pinterest Instagram Tiktok Most Popular Get The Latest Updates Subscribe To Our Weekly Newsletter No spam, notifications only about new post, updates. Categories On Key Related Posts
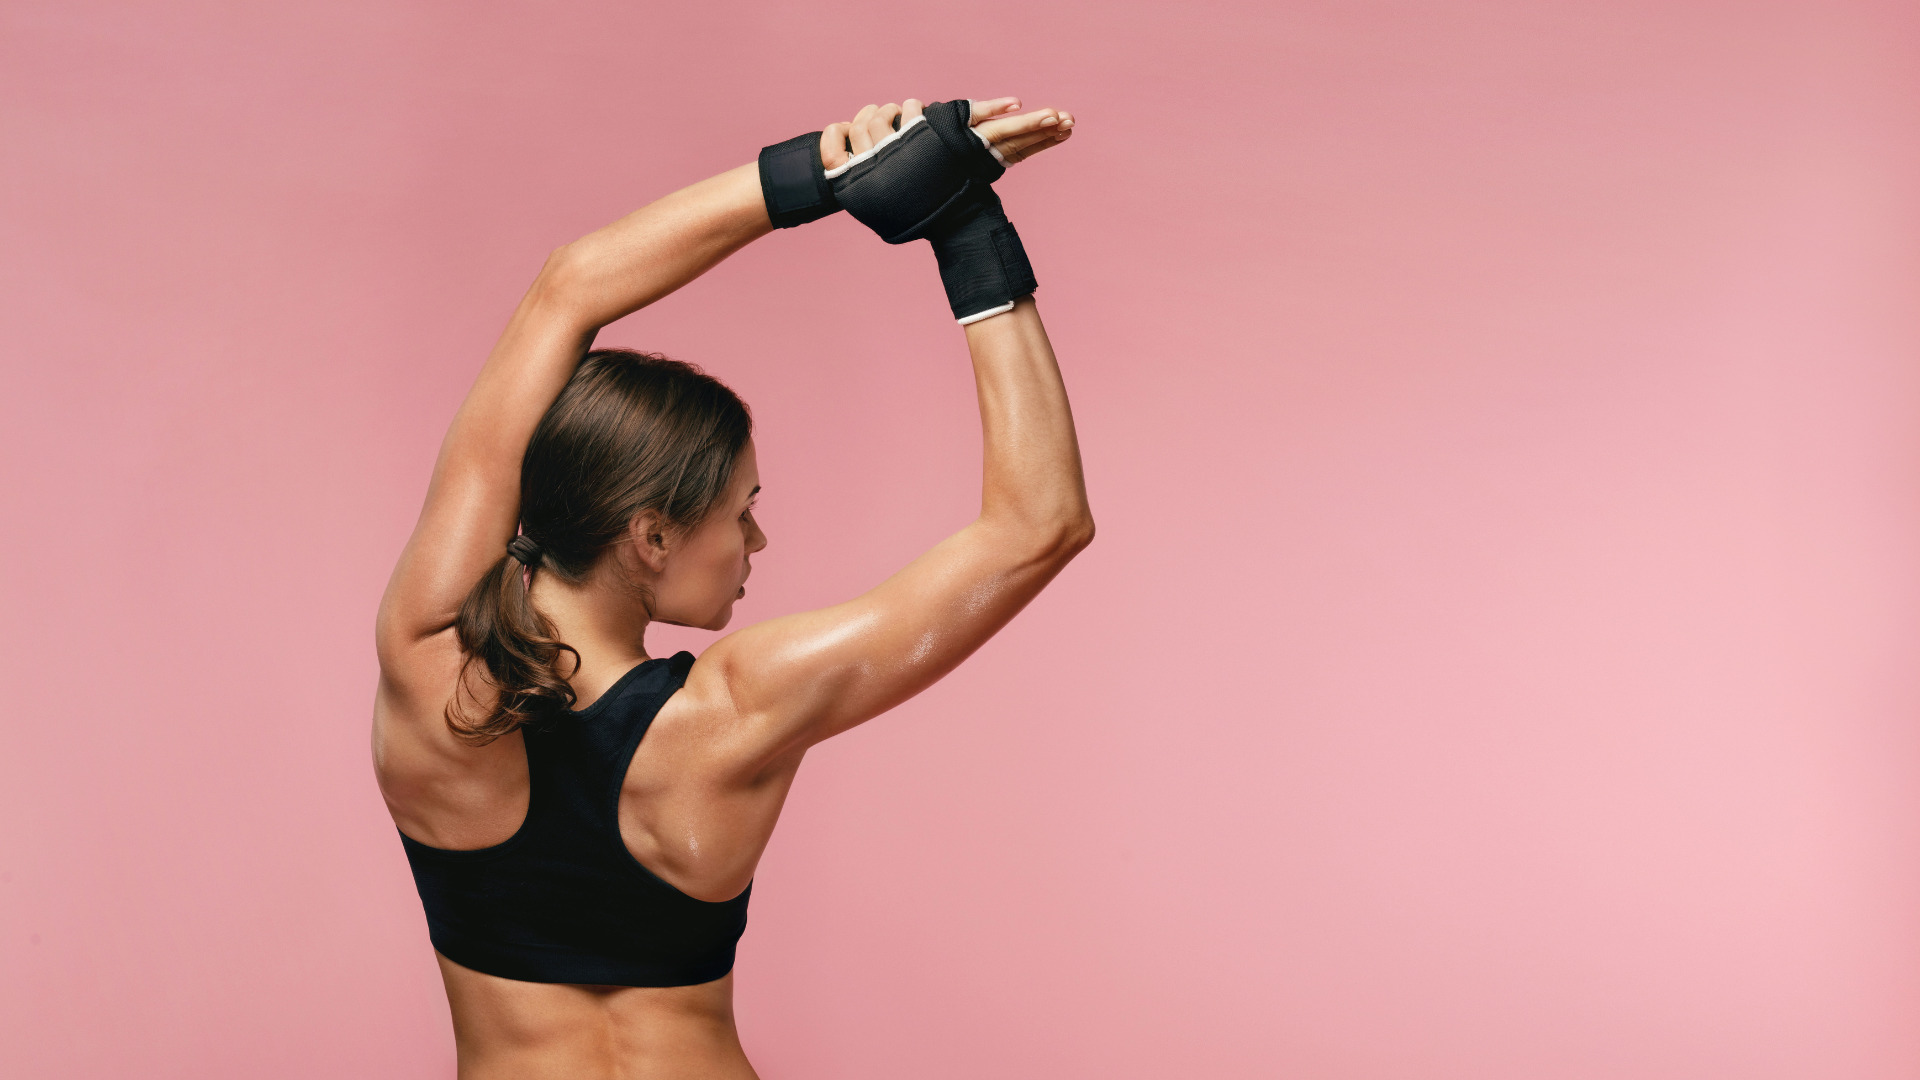
The Best Way to Workout: Guide to Full Body Workouts
Introduction:In today’s fast-paced world, finding time for exercise can be a challenge. However, incorporating a full body workout into your fitness routine can provide numerous benefits. A full body workout targets all major muscle groups, helping you build strength, improve cardiovascular health, and enhance overall fitness. In this blog post, we will delve into the concept of full body workouts, their benefits, and provide a comprehensive guide to help you design an effective routine. What is a Full Body Workout?A full body workout is a training method that engages multiple muscle groups in a single session. Unlike split routines that focus on specific muscle groups on different days, full body workouts aim to work the entire body in one session. This approach allows for efficient use of time and ensures balanced development of all muscle groups. Benefits of Full Body Workouts:1. Time Efficiency: One of the primary advantages of full body workouts is their time efficiency. By targeting multiple muscle groups simultaneously, you can complete a comprehensive workout in less time compared to split routines. 2. Increased Caloric Burn: Full body workouts engage large muscle groups, leading to higher energy expenditure during and after the workout. This increased caloric burn can aid in weight loss or maintenance goals. 3. Improved Muscle Balance: By working all major muscle groups evenly, full body workouts promote balanced muscular development. This helps prevent muscular imbalances that can lead to injuries or postural issues. 4. Enhanced Cardiovascular Fitness: Many full body exercises involve compound movements that elevate heart rate and improve cardiovascular endurance. This dual benefit of strength and cardio training makes full body workouts an excellent choice for overall fitness improvement. Designing an Effective Full Body Workout Routine:When designing a full body workout routine, it is essential to consider various factors such as your fitness level, goals, available equipment, and time constraints. Here are some key components to include: 1. Warm-up: Begin each session with a dynamic warm-up to prepare your muscles and joints for the upcoming workout. Incorporate movements that mimic the exercises you will perform, gradually increasing intensity. 2. Compound Exercises: Focus on compound exercises that engage multiple muscle groups simultaneously. Examples include squats, deadlifts, lunges, push-ups, pull-ups, and overhead presses. These exercises provide maximum efficiency and stimulate overall muscle growth. 3. Resistance Training: Incorporate both bodyweight exercises and resistance training using free weights or machines. Gradually increase the resistance as your strength improves to continue challenging your muscles. 4. Cardiovascular Exercise: Include cardiovascular activities such as running, cycling, or rowing to elevate heart rate and improve endurance. Integrate these exercises between strength sets or dedicate a separate day for cardio training. 5. Core Strengthening: Don’t forget to include exercises that target your core muscles, such as planks, Russian twists, or bicycle crunches. A strong core is essential for stability and overall functional fitness. 6. Flexibility and Mobility: Allocate time for stretching exercises or yoga poses to improve flexibility and maintain joint mobility. This can help prevent injuries and enhance overall performance. 7. Rest and Recovery: Allow adequate rest between workouts to promote muscle recovery and prevent overtraining. Aim for at least one or two days of rest per week. Conclusion:Incorporating a full body workout routine into your fitness regimen can provide numerous benefits, including time efficiency, increased caloric burn, improved muscle balance, and enhanced cardiovascular fitness. By following the guidelines mentioned above and customizing them to suit your individual needs, you can design an effective full body workout routine that helps you achieve total fitness.

Building Strong and Sculpted Thighs: Effective Exercises for Bigger Thighs
Building Strong and Sculpted Thighs: Effective Exercises for Bigger Thighs Having well-developed thighs not only enhances your overall physique but also plays a crucial role in improving lower body strength and stability. Whether you’re aiming to increase muscle mass or simply tone your thighs, incorporating targeted exercises into your fitness routine can help you achieve your goals. In this blog post, we will explore a variety of exercises that specifically target the thigh muscles, providing you with a comprehensive guide to building bigger thighs. 1. SQUATS Squats are one of the most effective exercises for developing bigger thighs as they engage multiple muscle groups simultaneously. This compound movement primarily targets the quadriceps, hamstrings, and glutes, making it an excellent choice for overall lower body development. To perform a squat:1. Stand with your feet shoulder-width apart.2. Lower your body by bending at the knees and hips, as if sitting back into an imaginary chair.3. Keep your chest lifted and your weight on your heels.4. Go as low as you comfortably can while maintaining proper form.5. Push through your heels to return to the starting position. Note: Squats can be modified by using dumbbells or a barbell to add resistance and increase the intensity of the exercise. 2. LUNGES 2. Lunges:Lunges are another effective exercise for targeting the thigh muscles, particularly the quadriceps and glutes. They also engage the hamstrings and calves to a lesser extent, providing a well-rounded lower body workout. To perform a lunge:1. Stand with your feet hip-width apart.2. Take a step forward with one foot, keeping your torso upright.3. Lower your body by bending both knees until they form 90-degree angles.4. Push through the heel of your front foot to return to the starting position.5. Repeat on the other side, alternating legs. Note: Lunges can be performed in various directions (forward, backward, or sideways) to target different areas of the thighs. Adding dumbbells or a barbell can increase the challenge. 3. LEG PRESS The leg press is a machine-based exercise that specifically targets the thigh muscles, including the quadriceps, hamstrings, and glutes. It allows you to lift heavier weights compared to squats or lunges, making it an excellent choice for building bigger thighs. To perform a leg press:1. Adjust the seat and footplate of the leg press machine according to your comfort.2. Place your feet shoulder-width apart on the footplate.3. Push against the footplate to extend your legs fully.4. Slowly lower the weight by bending your knees until they form a 90-degree angle.5. Push through your heels to return to the starting position. Note: It’s important to maintain proper form and avoid locking out your knees during this exercise. 4. STEP-UPS This exercise involves stepping onto an elevated platform using one leg at a time, targeting the quadriceps and glutes. 5. BULGARIAN SPLIT SQUATS Similar to lunges, this exercise places more emphasis on each leg individually, helping to correct muscle imbalances. 6. LEG EXTENSIONS This isolation exercise primarily targets the quadriceps and can be performed using a machine or resistance bands. 7. HAMSTRINGS CURLS This exercise targets the hamstrings and can be performed using a machine or stability ball. Building bigger thighs requires consistent effort and dedication. By incorporating exercises such as squats, lunges, leg presses, and additional targeted movements into your fitness routine, you can effectively develop stronger and more sculpted thigh muscles. Remember to start with lighter weights and gradually increase the intensity as your strength improves. Always prioritize proper form and listen to your body to avoid injury. Share: Facebook Pinterest Email Social Media Facebook-f Youtube Pinterest Instagram Tiktok Most Popular Get The Latest Updates Subscribe To Our Weekly Newsletter No spam, notifications only about new post, updates. Categories On Key Related Posts

Fill Your Hips: Exercises for Bigger Hips
Fill Your Hips: Exercises for Bigger Hips Having well-defined and curvaceous hips is a desire for many individuals. While genetics play a significant role in determining hip size, there are exercises that can help strengthen and tone the muscles around the hips, giving them a fuller appearance. In this blog post, we will explore a range of exercises specifically designed to target the hip area and promote muscle growth. Please note that it is important to consult with a healthcare professional or certified trainer before starting any new exercise routine. 1. SQUATS Squats are one of the most effective exercises for building bigger hips as they engage multiple muscle groups, including the glutes, quadriceps, hamstrings, and hip adductors. To perform squats correctly: – Stand with your feet shoulder-width apart.– Lower your body by bending your knees and pushing your hips back as if you are sitting on an imaginary chair.– Keep your chest lifted and your back straight.– Push through your heels to return to the starting position. To intensify the exercise, you can use dumbbells or a barbell across your shoulders. Aim for three sets of 10-12 repetitions. 2. HIP THRUST Hip thrusts primarily target the gluteus maximus, which is the largest muscle in the buttocks. This exercise helps build strength and size in the hip area. Here’s how to perform hip thrusts: – Sit on the ground with your upper back against a bench or elevated surface.– Place a barbell or weight plate across your hips.– Plant your feet firmly on the ground, shoulder-width apart.– Drive through your heels and lift your hips off the ground until your body forms a straight line from knees to shoulders.– Squeeze your glutes at the top of the movement and then slowly lower back down. Start with three sets of 8-10 repetitions, gradually increasing the weight as you progress. 3.SIDE-LYING LEG LIFTS Side-lying leg lifts target the hip abductor muscles, which are responsible for moving the legs away from the midline of the body. This exercise helps tone and strengthen the hips. Follow these steps to perform side-lying leg lifts: – Lie on your side with your legs extended and stacked on top of each other.– Rest your head on your lower arm and place your upper hand on the floor in front of you for stability.– Engage your core and lift your top leg as high as possible without rotating your hips or leaning backward.– Slowly lower your leg back down to the starting position. Complete three sets of 12-15 repetitions on each side. 4. FIRE HYDRANTS Fire hydrants are a great exercise for targeting the gluteus medius, a muscle located on the outer side of the hip. This exercise helps create roundness and shape in the hips. Here’s how to perform fire hydrants: – Start on all fours with your hands directly under your shoulders and knees under your hips.– Keeping your knee bent, lift one leg out to the side until it reaches hip height.– Pause briefly at the top of the movement, then lower your leg back down.– Repeat on the other side. Aim for three sets of 10-12 repetitions per leg. 5. LUNGES Lunges are a versatile exercise that targets multiple muscle groups, including the glutes, quadriceps, hamstrings, and hip adductors. They can help increase hip size while also improving overall lower body strength. To perform lunges correctly: – Stand with your feet hip-width apart.– Take a step forward with one foot and lower your body until both knees are bent at a 90-degree angle.– Keep your front knee aligned with your ankle and your back knee hovering just above the ground.– Push through your front heel to return to the starting position.– Repeat on the other side. Start with three sets of 10-12 repetitions per leg. Incorporating these exercises into your fitness routine can help strengthen and tone the muscles around the hips, contributing to a fuller and more defined appearance. Remember to start with lighter weights or bodyweight exercises if you are a beginner and gradually increase the intensity as you progress. Consistency, proper form, and a balanced diet are key factors in achieving your desired hip size. Always consult with a healthcare professional or certified trainer before starting any new exercise program. Share: Facebook Pinterest Email Social Media Facebook-f Youtube Pinterest Instagram Tiktok Most Popular Get The Latest Updates Subscribe To Our Weekly Newsletter No spam, notifications only about new post, updates. Categories On Key Related Posts

Strengthen Your Core with Ease: Standing Ab Workouts
Strengthen Your Core with Ease: Standing Ab Workouts When it comes to fitness, a strong core is essential for overall strength, stability, and balance. While traditional ab exercises like crunches and planks are effective, standing ab workouts offer a unique and dynamic way to engage your core muscles. In this blog post, we will explore the benefits of standing ab workouts, discuss various exercises you can incorporate into your routine, and provide tips for maximizing your results. Benefits of Standing Ab Workouts: Standing ab workouts offer several advantages over traditional floor exercises. Firstly, they engage multiple muscle groups simultaneously, including the rectus abdominis (six-pack muscles), obliques, transverse abdominis, and lower back muscles. This comprehensive engagement helps improve overall core strength and stability. Additionally, standing ab exercises often involve movements that mimic real-life activities such as twisting, bending, and reaching. By training your core in a functional manner, you enhance your ability to perform daily tasks with ease while reducing the risk of injury. Standing ab workouts also provide an opportunity to improve posture. Strengthening the core muscles helps support the spine and maintain proper alignment, leading to better posture and reduced back pain. Standing ab workouts are a great way to engage your core muscles while also incorporating other muscle groups and improving overall stability. These exercises can be performed without the need for any equipment, making them convenient and accessible for people of all fitness levels. In this comprehensive response, we will explore various standing ab workouts that target different areas of the core. 1. Standing Oblique Crunches: To perform standing oblique crunches, stand with your feet shoulder-width apart and place your hands behind your head or cross them over your chest. Engage your core muscles and lift one knee towards the opposite elbow, simultaneously crunching your torso to the side. Return to the starting position and repeat on the other side. This exercise targets the oblique muscles on the sides of your abdomen. 2. Standing Russian Twists: Stand with your feet hip-width apart and slightly bend your knees. Extend your arms straight in front of you, clasping your hands together. Engage your core muscles and rotate your torso to one side, keeping your hips facing forward. Return to the center and then rotate to the other side. To increase the intensity, you can hold a weight or medicine ball in your hands while performing this exercise. Standing Russian twists primarily target the obliques but also engage the entire core. 3. Standing Knee Raises: Stand tall with your feet hip-width apart and place your hands on your hips or extend them out in front of you for balance. Lift one knee towards your chest while maintaining a straight back and engaging your core muscles. Lower the leg back down and repeat on the other side. This exercise primarily targets the lower abs but also engages the hip flexors. 4. Standing Mountain Climbers: Begin by standing with your feet hip-width apart and place your hands on your hips or extend them out in front of you for balance. Lift one knee towards your chest while simultaneously bringing the opposite elbow down to meet it, as if you were climbing a mountain. Return to the starting position and repeat on the other side. This exercise targets the entire core, including the abs, obliques, and hip flexors. 5. Standing Side Bends: Stand with your feet shoulder-width apart and place your hands on your hips or extend them out to the sides. Engage your core muscles and slowly bend to one side, keeping your upper body straight and avoiding any twisting or leaning forward. Return to the center and repeat on the other side. Standing side bends primarily target the oblique muscles. 6. Standing Leg Raises: Stand tall with your feet hip-width apart and place your hands on your hips or extend them out in front of you for balance. Lift one leg straight out to the side as high as you can while maintaining a straight back and engaging your core muscles. Lower the leg back down and repeat on the other side. This exercise primarily targets the obliques but also engages the hip abductors. 7. Standing Woodchoppers: Stand with your feet shoulder-width apart and hold a weight or medicine ball with both hands. Start with the weight at one hip, then engage your core muscles as you swing the weight diagonally across your body, ending above the opposite shoulder. Control the movement as you return to the starting position and repeat on the other side. Standing woodchoppers target the obliques, shoulders, and back muscles. 8. Standing Plank: Stand tall with your feet hip-width apart and place your hands on your hips or extend them out in front of you for balance. Engage your core muscles and lift one foot off the ground, extending it straight behind you while keeping your hips level. Hold this position for a few seconds, then lower the foot back down and repeat on the other side. The standing plank is an effective exercise for strengthening the entire core, including the abs, obliques, and lower back. It is important to note that while standing ab workouts can be effective in strengthening the core, they should be combined with a well-rounded fitness routine that includes cardiovascular exercise, strength training, and flexibility exercises. Additionally, it is always recommended to consult with a healthcare professional or certified fitness trainer before starting any new exercise program, especially if you have any pre-existing medical conditions or injuries. In conclusion, standing ab workouts offer a dynamic and effective way to strengthen your core muscles while improving stability, posture, and functional movement patterns. Stop choosing between glutes or hips—train both and unlock your full lower body potential. Share: Facebook Pinterest Email Social Media Facebook-f Youtube Pinterest Instagram Tiktok Most Popular Get The Latest Updates Subscribe To Our Weekly Newsletter No spam, notifications only about new post, updates. Categories Related Posts
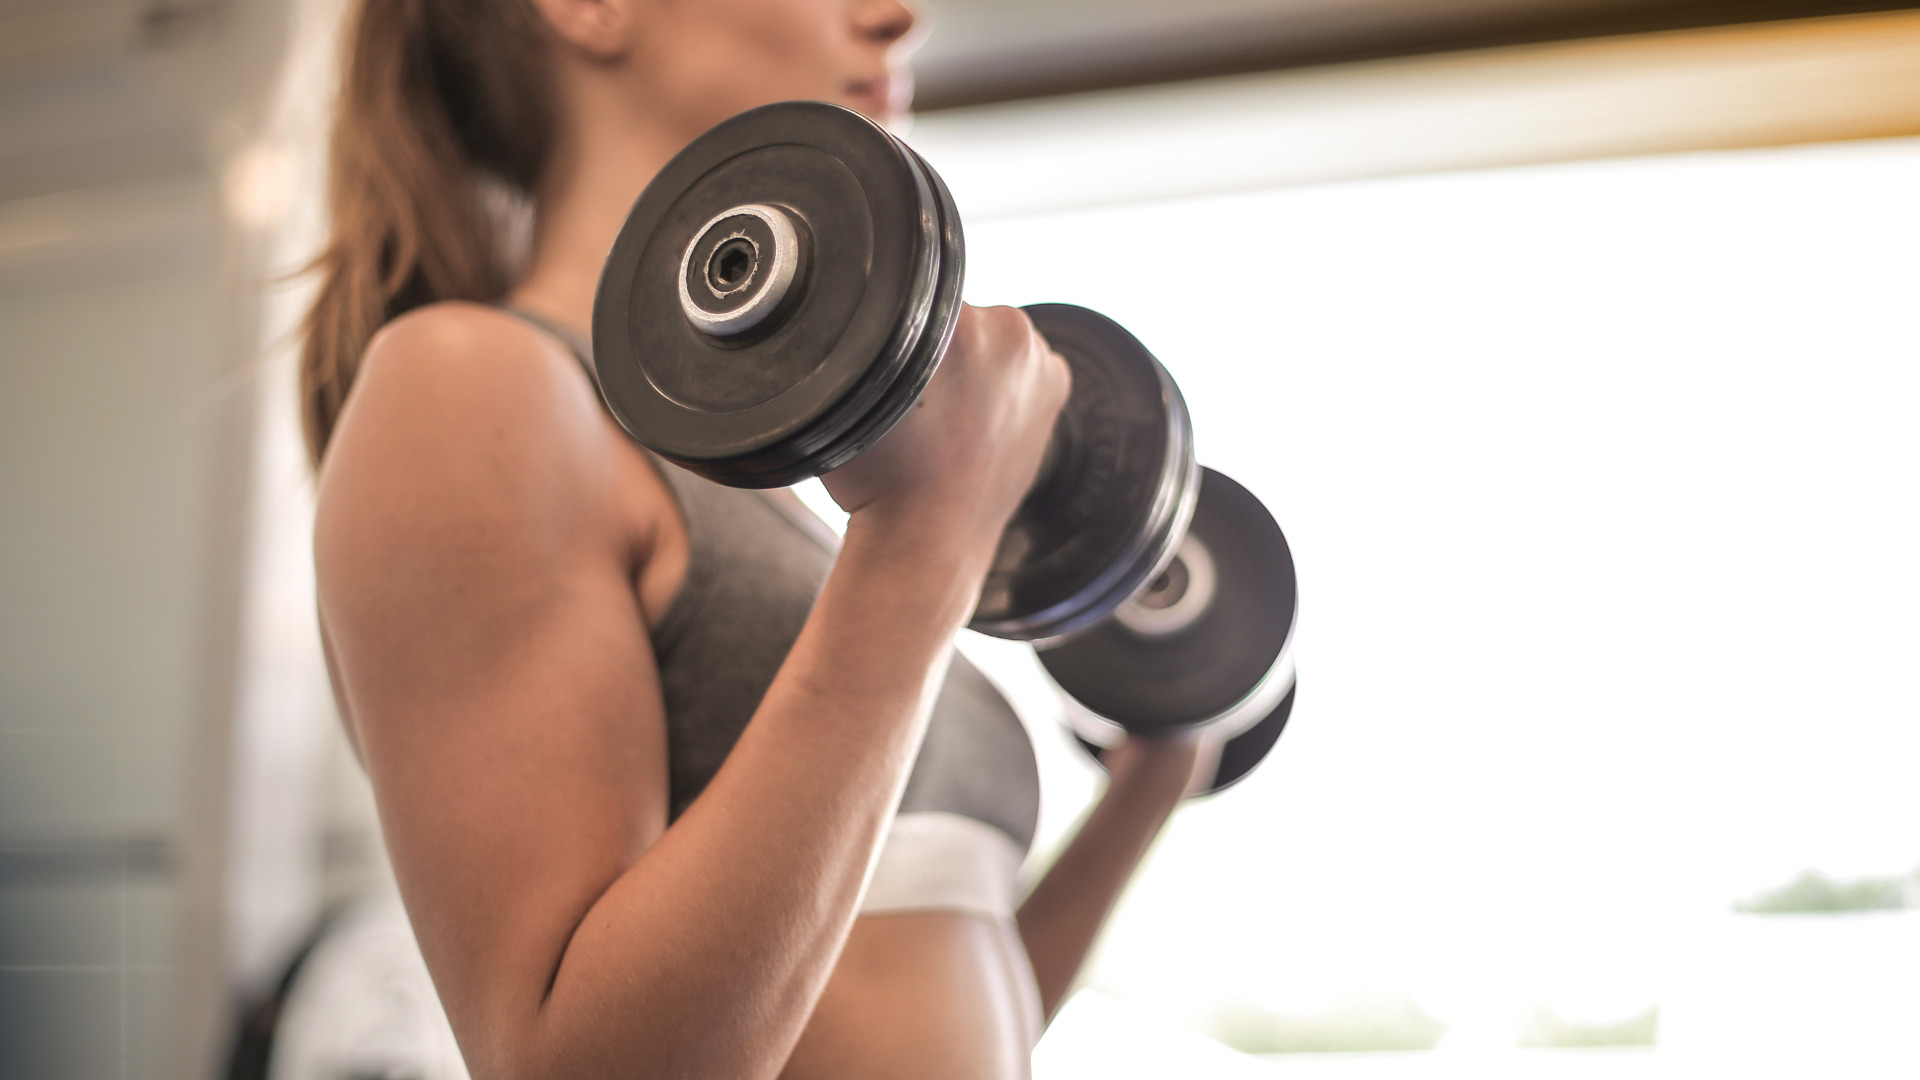
Sculpt Your Body Versatile Training: The Ultimate Guide to Dumbbell Workouts
Sculpt Your Body Versatile Training: The Ultimate Guide to Dumbbell Workouts When it comes to strength training, dumbbells are a versatile and effective tool that can help you achieve your fitness goals. Whether you’re a beginner or an experienced lifter, incorporating dumbbell workouts into your routine can provide numerous benefits. In this comprehensive guide, we will explore the various exercises and workout routines that can be performed using only dumbbells. Benefits of Dumbbell Workouts: Versatility: Dumbbells offer a wide range of exercises that target different muscle groups. From upper body to lower body and core, you can perform a variety of movements to engage multiple muscles simultaneously. Convenience: Unlike bulky gym equipment, dumbbells are compact and portable, making them ideal for home workouts or when traveling. They require minimal space and can be easily stored. Stability and Balance: Dumbbell exercises require greater stability and balance compared to machines or barbells. This helps improve coordination and strengthens the stabilizer muscles. Upper Body Dumbbell Exercises: Dumbbell Bench Press: Lie on a bench with dumbbells in hand, palms facing forward. Lower the weights towards your chest, then push them back up while maintaining control. Dumbbell Shoulder Press: Stand with feet shoulder-width apart, holding dumbbells at shoulder level. Press the weights overhead until your arms are fully extended, then lower them back down. Dumbbell Rows: Place one knee on a bench while supporting your upper body with one hand. Hold a dumbbell in the opposite hand and pull it up towards your chest, squeezing your back muscles. Lower Body Dumbbell Exercises: Goblet Squats: Hold a dumbbell vertically against your chest with both hands. Lower into a squat position by bending your knees and pushing your hips back, then return to the starting position. Dumbbell Lunges: Stand with feet hip-width apart, holding dumbbells at your sides. Step forward with one leg and lower your body until both knees are bent at a 90-degree angle. Push through the front heel to return to the starting position. Dumbbell Deadlifts: Stand with feet hip-width apart, holding dumbbells in front of your thighs. Hinge at the hips, keeping your back straight, and lower the weights towards the ground. Engage your glutes and hamstrings to return to a standing position. Core Dumbbell Exercises: Russian Twists: Sit on the floor with knees bent and feet lifted off the ground. Hold a dumbbell with both hands and twist your torso from side to side, touching the weight to the ground on each side. Dumbbell Plank Rows: Start in a high plank position with each hand gripping a dumbbell. Row one arm up towards your chest while maintaining a stable core and neutral spine. Alternate sides. Dumbbell Woodchoppers: Stand with feet shoulder-width apart, holding a dumbbell with both hands above one shoulder. Swing the weight diagonally across your body, engaging your core muscles. Workout Routine 1. Full-Body Dumbbell Workout: Dumbbell Squats: 3 sets of 12 reps Dumbbell Bench Press: 3 sets of 10 reps Dumbbell Rows: 3 sets of 10 reps Russian Twists: 3 sets of 15 reps Rest for 60 seconds between sets 2. Upper Body Dumbbell Workout: Dumbbell Shoulder Press: 3 sets of 8 reps Dumbbell Bicep Curls: 3 sets of 12 reps Dumbbell Tricep Kickbacks: 3 sets of 10 reps Dumbbell Chest Flyes: 3 sets of 10 reps Rest for 60 seconds between sets 3. Lower Body Dumbbell Workout: Goblet Squats: 3 sets of 12 reps Dumbbell Lunges: 3 sets of 10 reps per leg Dumbbell Romanian Deadlifts: 3 sets of 8 reps Dumbbell Calf Raises: 3 sets of 15 reps Rest for 60 seconds between sets Dumbbells are a fantastic tool for strength training, offering versatility, convenience, and the ability to target various muscle groups. Incorporating dumbbell exercises into your workout routine can help you build strength, improve stability, and achieve your fitness goals. Remember to start with lighter weights and gradually increase the load as you progress. Stay consistent, challenge yourself, and enjoy the benefits of a well-rounded dumbbell workout routine. Share: Facebook Pinterest Email Social Media Facebook-f Youtube Pinterest Instagram Tiktok Most Popular Get The Latest Updates Subscribe To Our Weekly Newsletter No spam, notifications only about new post, updates. Categories Related Posts

Unlocking Healthy Weight Gain: The Best Supplements to Support Your Journey
Unlocking Healthy Weight Gain: The Best Supplements to Support Your Journey While most people focus on weight loss, there are individuals who struggle with gaining weight due to various reasons such as a fast metabolism, medical conditions, or simply a desire to achieve a healthier physique. If you’re looking to gain weight in a safe and controlled manner, incorporating certain supplements into your routine can support your efforts. In this article, we will explore some of the best supplements for weight gain, helping you on your journey towards a stronger, more nourished body. 1. Whey Protein Whey protein is a popular supplement known for its ability to promote muscle growth and weight gain. It is rich in essential amino acids, which are the building blocks of muscle tissue. By adding whey protein to your diet, either through shakes or as an ingredient in meals, you can increase your protein intake and support muscle development. 2. Creatine Creatine is a compound naturally found in the body and is widely used as a supplement for enhancing athletic performance. It helps increase muscle mass by improving the body’s ability to produce energy during intense workouts. By supplementing with creatine, you may experience weight gain in the form of lean muscle mass. 3. Weight Gainers Weight gainer supplements are specifically designed to provide a high-calorie intake and support weight gain. They typically contain a blend of carbohydrates, proteins, and fats, making them an efficient way to increase your calorie consumption. However, it’s important to choose a weight gainer that uses quality ingredients and fits your nutritional needs. 4. Omega-3 Fatty Acids Omega-3 fatty acids are essential fats that offer numerous health benefits. They can support weight gain by reducing inflammation, improving appetite, and enhancing nutrient absorption. You can find omega-3 fatty acids in fish oil supplements or sources like salmon, chia seeds, and walnuts. 5. Healthy Fats Incorporating healthy fats into your diet is crucial for healthy weight gain. Supplements such as flaxseed oil, coconut oil, and olive oil can provide an extra calorie boost. Additionally, they offer essential nutrients and support overall well-being. 6. Multi-vitamins & Minerals To ensure your body has all the necessary nutrients for healthy weight gain, consider taking a high-quality multivitamin and mineral supplement. This will help fill any nutritional gaps that may occur during your weight gain journey. 7. Branched-chain Amino Acids (BCAAs) BCAAs are essential amino acids that play a vital role in muscle recovery and growth. They can be particularly beneficial if you engage in intense workouts as part of your weight gain regimen. BCAA supplements can help reduce muscle breakdown, enhance protein synthesis, and support muscle gain. 8. Probiotics A healthy digestive system is essential for effective weight gain. Probiotic supplements help maintain a balanced gut flora, improve digestion, and enhance nutrient absorption. Look for a high-quality probiotic supplement containing various strains of beneficial bacteria. Remember, supplements should be used as a complement to a well-rounded diet and lifestyle. It’s essential to consult with a healthcare professional or a registered dietitian before incorporating any new supplements into your routine. They can guide you based on your specific needs, health status, and goals. Gaining weight in a healthy and controlled manner requires a combination of proper nutrition, exercise, and lifestyle choices. When used wisely and under professional guidance. Share: Facebook Pinterest Email Social Media Facebook-f Youtube Pinterest Instagram Tiktok Most Popular Get The Latest Updates Subscribe To Our Weekly Newsletter No spam, notifications only about new post, updates. Categories Related Posts

The Ultimate Guide to Balancing Your Hormones Naturally
The Ultimate Guide to Balancing Your Hormones Naturally Hormones play a crucial role in regulating various bodily functions, including metabolism, mood, reproduction, and growth. When our hormones are out of balance, it can lead to a wide range of health issues and imbalances. Fortunately, there are several natural ways to support hormonal balance and optimize overall well-being. In this blog post, we will explore effective strategies to help you balance your hormones naturally. 1. Maintain a Healthy Diet A balanced diet is essential for maintaining hormonal balance. Include a variety of whole foods in your diet, such as fruits, vegetables, lean proteins, healthy fats, and complex carbohydrates. Avoid processed foods, refined sugars, and excessive caffeine intake as they can disrupt hormone levels. Certain foods can specifically support hormonal balance: a) Cruciferous Vegetables: Broccoli, cauliflower, kale, and Brussels sprouts contain compounds that aid in estrogen metabolism and promote hormonal balance. b) Omega-3 Fatty Acids: Found in fatty fish like salmon and sardines, as well as flaxseeds and chia seeds, omega-3 fatty acids help reduce inflammation and support hormone production. c) Adaptogenic Herbs: Adaptogens like ashwagandha and rhodiola can help regulate cortisol levels (the stress hormone) and promote overall hormonal balance. 2. Mange Stress Levels Chronic stress can disrupt hormone production, leading to imbalances. Incorporating stress management techniques into your daily routine is crucial for hormonal health: a) Regular Exercise: Engaging in physical activity helps reduce stress levels by releasing endorphins and improving overall well-being. b) Mindfulness Practices: Techniques like meditation, deep breathing exercises, and yoga can help lower cortisol levels and promote relaxation. c) Adequate Sleep: Prioritize getting 7-9 hours of quality sleep each night to support hormone regulation and overall well-being. 3. Maintain a Healthy Weight Maintaining a healthy weight is essential for hormonal balance. Excess body fat, especially around the abdomen, can lead to increased estrogen production and disrupt hormone levels. Incorporate regular exercise and a balanced diet to achieve and maintain a healthy weight. 4. Limit Exposure to Environment Toxins Environmental toxins can disrupt hormonal balance. Minimize exposure to chemicals found in household cleaning products, personal care items, and plastics. Opt for natural alternatives whenever possible and choose organic produce to reduce exposure to pesticides. 5. Stay Hydrated Proper hydration is crucial for hormone regulation. Drink an adequate amount of water throughout the day to support optimal bodily functions, including hormone production and metabolism. 6. Consider Herbal Supplements Certain herbal supplements can support hormonal balance: a) Maca Root: Known for its adaptogenic properties, maca root can help regulate hormones and improve overall well-being. b) Vitex (Chasteberry): This herb has been traditionally used to support hormonal balance in women, particularly during the menstrual cycle. c) Dong Quai: Often used in traditional Chinese medicine, dong quai may help regulate estrogen levels and alleviate symptoms associated with hormonal imbalances. Balancing hormones naturally requires a holistic approach that includes maintaining a healthy diet, managing stress levels, maintaining a healthy weight, limiting exposure to environmental toxins, staying hydrated, and considering herbal supplements. By incorporating these strategies into your lifestyle, you can support optimal hormonal balance and improve your overall well-being. Share: Facebook Pinterest Email Social Media Facebook-f Youtube Pinterest Instagram Tiktok Most Popular Get The Latest Updates Subscribe To Our Weekly Newsletter No spam, notifications only about new post, updates. Categories Related Posts

Foods That Cause Bloating: Understanding the Culprits
Foods That Cause Bloating: Understanding the Culprits Bloating is a common digestive issue that many people experience at some point in their lives. It is characterized by a feeling of fullness, tightness, or swelling in the abdomen. While occasional bloating is normal, chronic or excessive bloating can be uncomfortable and disruptive to daily life. One factor that can contribute to bloating is the consumption of certain foods. In this blog post, we will explore some common culprits behind bloating and provide insights into how they affect our digestive system. 1. Legumes and Beans Legumes and beans are highly nutritious and an excellent source of plant-based protein. However, they contain a type of carbohydrate called oligosaccharides, which can be difficult for some individuals to digest properly. These carbohydrates pass through the small intestine undigested and reach the large intestine, where they are fermented by gut bacteria. This fermentation process produces gas as a byproduct, leading to bloating and discomfort. Additionally, legumes and beans also contain high amounts of fiber, which can cause bloating in some people. Fiber is essential for maintaining a healthy digestive system, but consuming excessive amounts without gradually increasing intake can overwhelm the digestive system and result in bloating. 2. Cruciferous Vegetables Cruciferous vegetables like broccoli, cauliflower, cabbage, Brussels sprouts, and kale are packed with essential nutrients and are known for their numerous health benefits. However, they also contain a group of carbohydrates called raffinose sugars that are not easily digested by the human body. Similar to legumes and beans, these carbohydrates reach the large intestine undigested and undergo fermentation by gut bacteria. This process leads to the production of gas, causing bloating and discomfort. Cooking cruciferous vegetables can help break down some of these complex carbohydrates and make them easier to digest. 3. Carbonated Drinks Carbonated drinks, including soda, sparkling water, and fizzy beverages, are notorious for causing bloating. The carbonation process involves the infusion of carbon dioxide gas into the liquid, creating bubbles. When consumed, these bubbles can accumulate in the digestive system and contribute to bloating. Furthermore, many carbonated drinks contain high amounts of added sugars or artificial sweeteners. These substances can be difficult for the body to digest and may lead to bloating and gas production. Opting for non-carbonated alternatives or reducing overall consumption of carbonated drinks can help alleviate bloating symptoms. 4. Other Foods That May Cause Bloating While legumes, cruciferous vegetables, and carbonated drinks are common culprits behind bloating, it is important to note that individual reactions to foods can vary. Some other foods that may cause bloating in certain individuals include: Dairy products: Lactose intolerance can lead to bloating and digestive discomfort when consuming dairy products. Fatty foods: High-fat meals can slow down digestion, leading to a feeling of fullness and bloating. Wheat and gluten-containing foods: Individuals with gluten sensitivity or celiac disease may experience bloating after consuming wheat-based products. Artificial sweeteners: Certain artificial sweeteners like sorbitol and xylitol can have a laxative effect and cause bloating. Understanding which foods can cause bloating is essential for managing digestive discomfort. While legumes, cruciferous vegetables, and carbonated drinks are commonly associated with bloating, it is important to remember that individual reactions may vary. Keeping a food diary and paying attention to personal triggers can help identify specific foods that contribute to bloating. Additionally, seeking guidance from a healthcare professional or registered dietitian can provide personalized advice on managing bloating symptoms. Share: Facebook Pinterest Email Social Media Facebook-f Youtube Pinterest Instagram Tiktok Most Popular Get The Latest Updates Subscribe To Our Weekly Newsletter No spam, notifications only about new post, updates. Categories Related Posts

5 Reasons You Can’t Gain Weight
5 Reasons You Can’t Gain Weight Apetamin? No! Carbs? No! McDonald’s? Absolutely not! You wonder why you are struggling to gain weight and struggling to keep any weight gained on? Sometimes things we cannot control can hinder our goals–but those things shouldn’t stop us. We have listed five reasons why you aren’t gaining weight and getting curves. You’re Too Tall Being tall is a great thing for being thin and staying thin. It is, in fact, easier to keep weight off when you are tall, BUT the con is when trying to gain weight you may find it a bit harder to do so. Being tall and having curves aren’t as common as being thin and tall. This is not impossible but just requires more work. You can push harder on your goals to make this possible by consuming more calories. Too Much Cardio Cardio is a great thing–believe us, but too much of it, while trying to gain weight and build muscle, may make this harder. When you do cardio try HIT workouts that incorporate using bodyweight to burn fat at the same time. Also, try not to do it every day. If you workout 5 days a week–light cardio every other day is fine. But of course if you can’t help yourself you need to consume more calories to make up for calories lost from your workouts. Aim for 15 -20 minutes of INTENSE cardio instead. You Have A Thyroid Most people are unaware they have a thyroid–which is why it may be best to go to the doctor and find out. But once you do find out you can help treat it by consuming prescribed medication by your doctor or treating it naturally with foods and supplements. Stress Learn to relax more–stress is dangerous and can kill you! Not to mention, stress can cause you to gain weight when you are trying to lose or even make you lose weight when you are trying to gain–depending on your stress habits and body type. Try to not put too much press on yourself all the time. It is ok to take a “ME” day every now and then, sit in bed with a cozy blanket and binge watch a good show. Life isn’t always about work and it shouldn’t be. Make sure you live life! You Are Not Consistent You cannot expect to see any goals reached if you are not consistent. If you don’t eat the right things along with eating them consistently–YOU WILL NOT SEE RESULTS. If you don’t work out it doesn’t make a difference! Being lazy doesn’t get you results. Do yourself a favor and track your progress in a journal, whether it is for your daily food consumption or daily exercises. Regardless of the steps that need to be done—DO THEM! Do you know about any other reason you might be struggling to gain weight? let us know in the comment section and don’t forget to like, comment and subscribe. Share: Facebook Pinterest Email Social Media Facebook-f Youtube Pinterest Instagram Tiktok Most Popular Get The Latest Updates Subscribe To Our Weekly Newsletter No spam, notifications only about new post, updates. Categories Related Posts